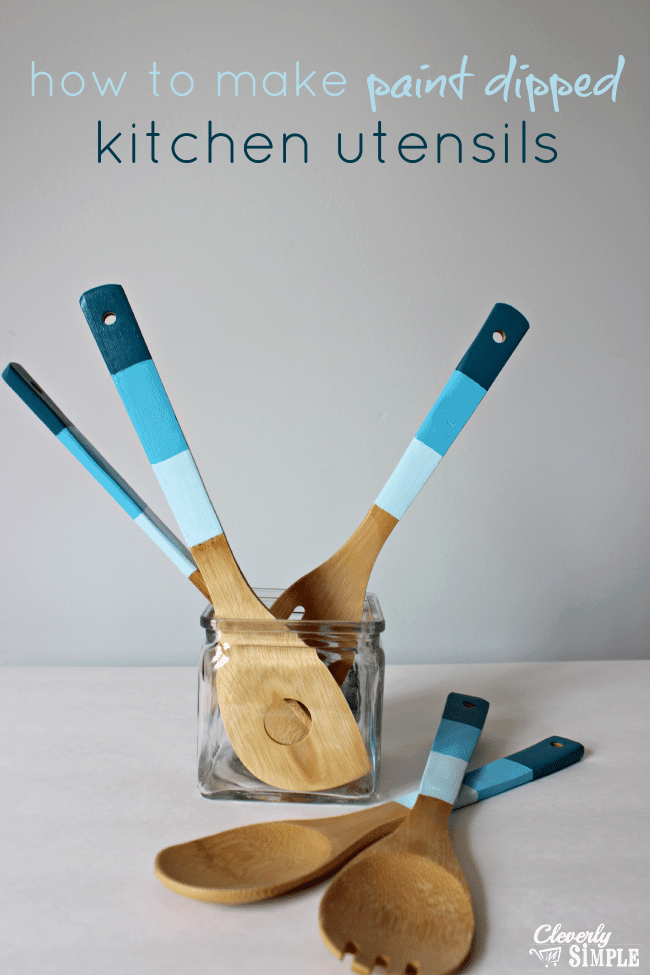
Paint Dipped Kitchen Utensils
I’m back with another DIY gift idea today for Mother’s Day! It’s the week that keeps on giving! I don’t know about you but my kitchen utensils are all mis-matched and they definitely don’t look cute on my counter. I was inspired to dress up a new pair of bamboo kitchen utensils so I got out some paint and look at how they turned out! They’re now not only functional but they look great. Plus, the total cost for this project was only $9!
If you’re looking for another way to dress up mom’s kitchen, put a personal touch on kitchen utensils with paint. These Paint Dipped Kitchen Utensils look custom and they didn’t break the budget.
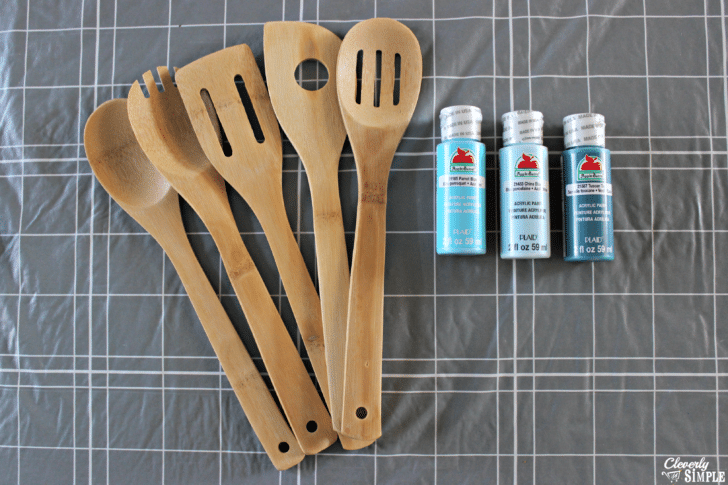
To make these you’ll need wooden or bamboo wooden utensils. I bought mine at Walmart for $4.97 total. You’ll also need paint. I bought acrylic paint for $0.50 each. To finish it off you’ll need a clear gloss. (Not pictured.) I used Rustoleum’s Painters Touch 2x clear gloss. It was around $3. The paint and gloss I can use again for another project.
The color of paint you use is really up to you. You could also use one color per utensil. You could use two colors or five colors or 10 colors. It’s really up to you how you want these to turn out! I had thought about letting my kids paint them as well. It would be cute to have little drawings on a spoon to give to grandma.
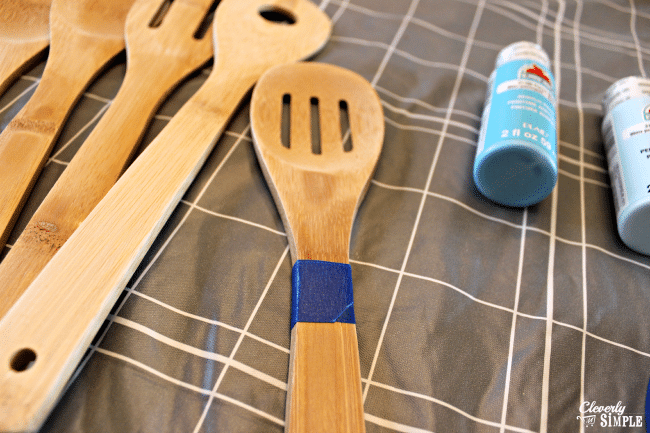
The first thing you want to do is to put painter’s tape on the utensils to mark a line. You could “eye ball” this step as well. You don’t want the paint or the gloss to go where food will touch the kitchen utensils. I won’t be using these for a deep pot of soup. 🙂 I decided to put the painter’s tape about 2 inches above the spoon section.
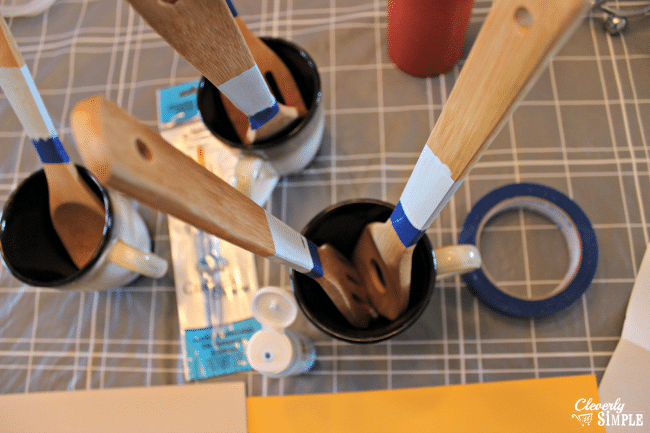
Start painting! I decided to go with three colors so I started with the lightest one at the base of the utensil. Each one took about two coats of paint. To let them dry I used coffee mugs so that they didn’t touch anything.
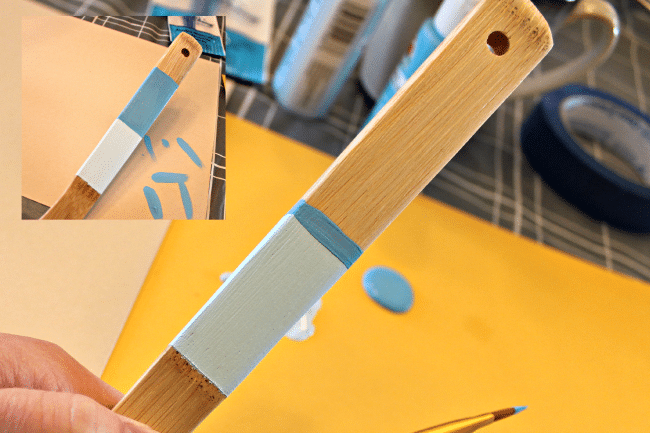
To start the next color, I painting a line around the first color and then painted the dark color where I wanted it. You could let the lighter color dry and then use painter’s tape again. I wasn’t into waiting forever for it to dry. 🙂 As you can see here, I also took the painter’s tape off while the paint was a bit wet. I wanted to make sure it was going to look right.
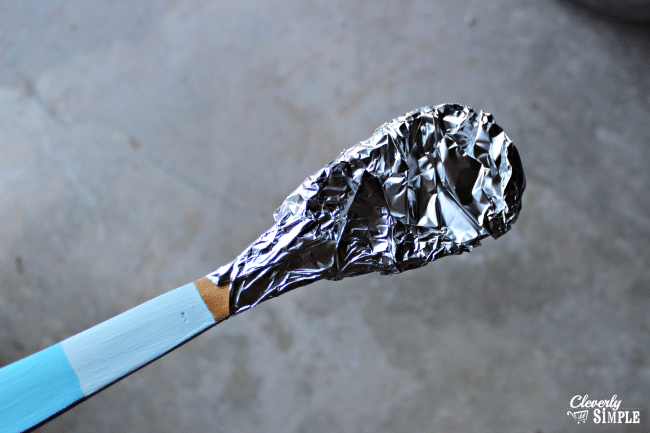
Let the paint dry overnight. Once the paint is dry, you’ll need to add the gloss. To avoid getting the gloss on the part of the utensil that will touch food, I put foil around the base of the utensil. I’m creative like that. 🙂 I bought a spray gloss so it was easy to take these out to the garage to spray them down.
Just stand upwind. Learn from me. 🙂
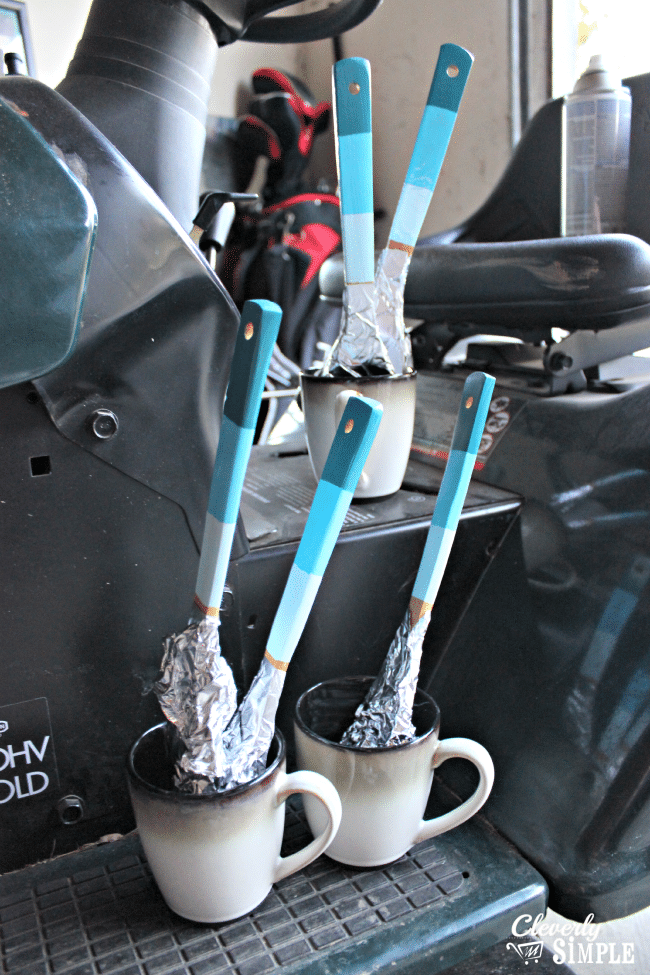
Here they are drying. This is the real life picture of drying utensils. You use what you have and what I had was a lawnmower and coffee cups!
I LOVE the finished product! These Paint Dipped Kitchen Utensils were an easy project and one that will dress up any kitchen!
Want to save this recipe?
Enter your email & I'll send it to your inbox. Plus, get great new recipes from me every week!


Comments & Reviews
Could you use the bottled liquid varnish instead of the spray varnish?
Yes, you could use spray varnish. You want to be very careful not to get the varnish on the part of the spoon that will touch food. Make sure to cover it well. Varnish at your own risk.
I am a very crafty person, but I don’t have the imagination that goes with crafts. I can make wreaths and stuff but, I just can’t come up with even the simplest ideas like you just did. I love your project and will definitely do this for gifts. Thank you for the idea.
This post will help the internet users for creating new web site or even a weblog from start to end.
Can these be washed in the dishwasher?
Oops! sorry didn’t see the comments.
Are they dish washable?
Hi Bob, I would not put them in the dishwasher as the dishwasher will dry out the wooden spoons. I clean mine by hand.
I would love to know the name of these colors you used. This is perfect for my sisters wedding shower centerpieces. Thanks so much. We are revolving it around the Kitchen etc.
Hi Jessica, I don’t know the colors as I’ve already used them. However, I did get the paint at walmart so you should be able to find similar colors there. GOod luck!
Can you use modge podge for the sealer?
Hi Shelby, I don’t see why not. I’m not sure how well modge podge holds up to water. Let me know how it turns out. 🙂
These are totally cute and I have so many wooden utensils that this will tie all together. Plus, as a side note, I love your running commentary. It makes it so much more enjoyable to read when the instructions include little amusing bits of advice or notes about the things in the background like the lawnmower. I really enjoyed that part as much as the tutorial. Keep them coming! And remember, stand upwind & dry paint? Why would one wait for that?? Hege
These look great! I’ve been wanting to do a craft like this for awhile now and I think you just inspired me to get started on some! Love your site, I made sure to stop by and like you on Facebook. Looking forward to following yourand seeing all your great ideas.
Thanks Courtney!
I just wanted to let you know; I plan to do this! I haven’t yet, but I will be probably for Christmas gifts! My cousin is soooo into cooking (she cooked her prom dinner for 6 just last night!) 😉 I’m so excited about it! I just created my new blog and my first real post was 24-Mothers Day Gifts that don’t Break the Bank! I shared this, and wanted to let you know in case you need any additional kind of credit/linking.
http://freshlymessylife.wordpress.com/2014/05/04/24-mothers-day-crafts/#more-25
But your blog is amazing, and I thank you for sharing this!