Trick or Trick is a special time here in our neighborhood. We live in an old fashioned little village where people sit on their front steps and hand out candy bars and lollipops to princesses, pirates and turtles. We’ve had upwards of 400 kids visit us each year. It’s always fun to see the creative costumes and different personalities! I especially get a kick out of parents who walk their dressed up newborns to our steps and say “Trick or Treat!” So…who really is going to eat that candy? 🙂
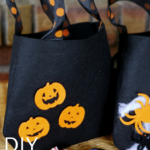
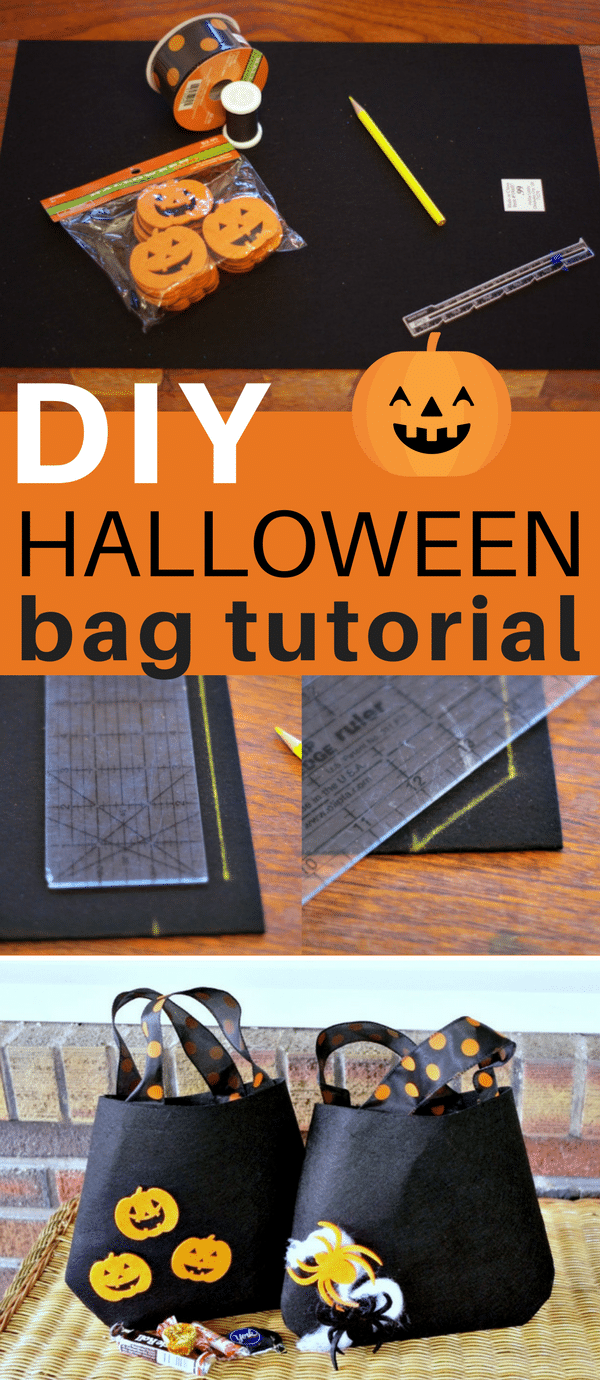
Getting free treats on Trick or Treat is the highlight of the holiday. Of course, you can buy the generic orange bucket or even use an old store bag to collect your goodies, but today, I’m going to show you how to make a simple DIY halloween bag that will last for years to come! All we need is a piece of strong felt, a couple quick stitches on the machine , some ribbon for handles and spooky fun embellishment. This is a GREAT project for kids and the kid at heart. And once you try this trick or treat bag, the options are endless – gift bags, Easter egg hunt bags and more. The best part? Each bag costs less than a few bucks.
Are you ready to make a DIY Halloween bag with me?
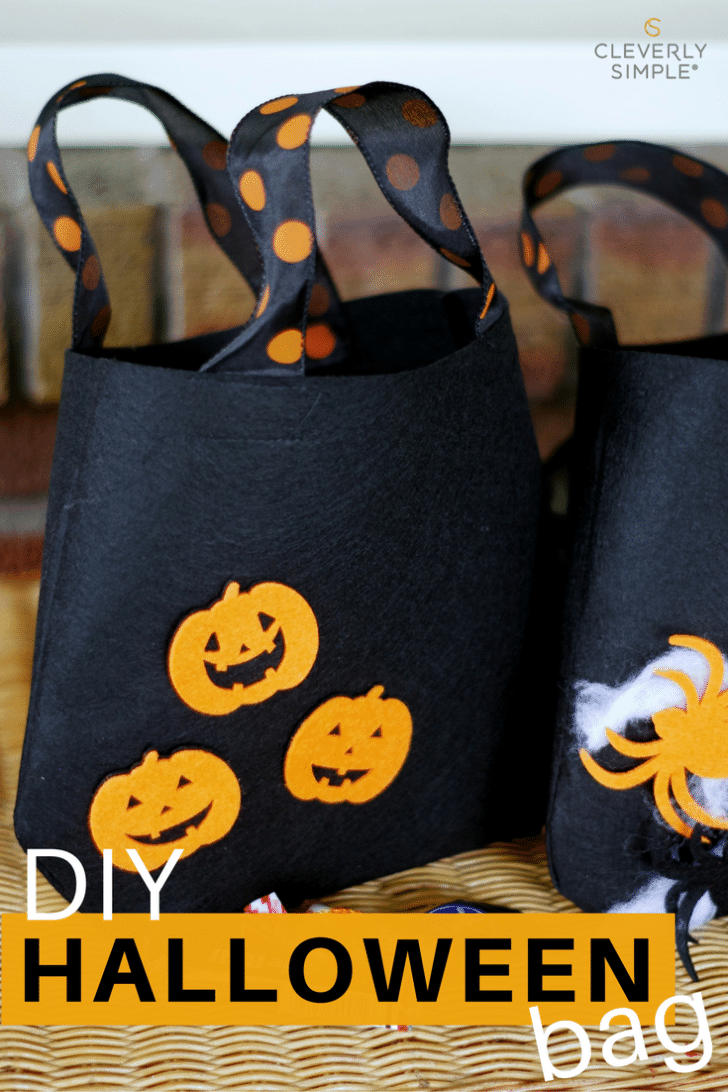
The secret to this bag is strong felt. It’s stiff like poster board, but very sew-able. I think it sews up better than fabric! In the picture above, you will see your typical 8×11 inch felt pieces that are soft. We want the larger 12×18 pieces of stiff felt on the left . Each piece is only 99 cents at Hobby Lobby and one is all we need to create the shape of our bag.
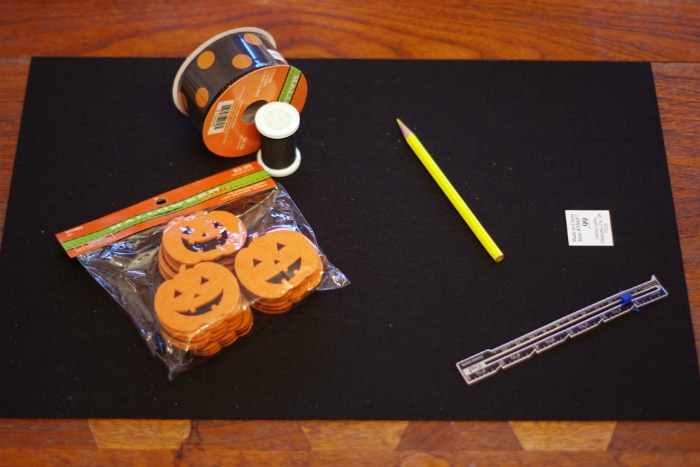
Other supplies include a spool of thread to match your felt color, a marking pencil and ruler, ribbon for handles and whatever you have on hand to decorate your bag. Or grab some fun themed embellishments at your local craft store…
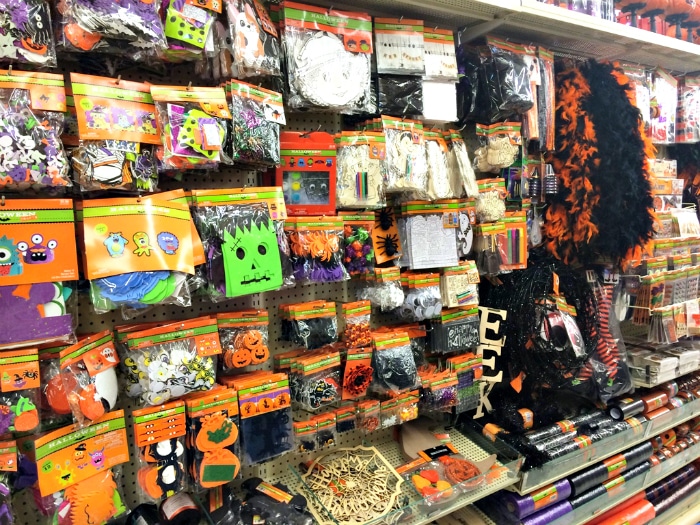
This is just a peek at the options available to you and this is what I call Halloween EXPLOSION! Now is the perfect time to stock up on embellishments. I chose some pumpkins and spiders made out of the same kind of felt material as my bag, but use what you like! Pom-poms, glitter paint, stencils, feathers, false teeth…Whatever friend!
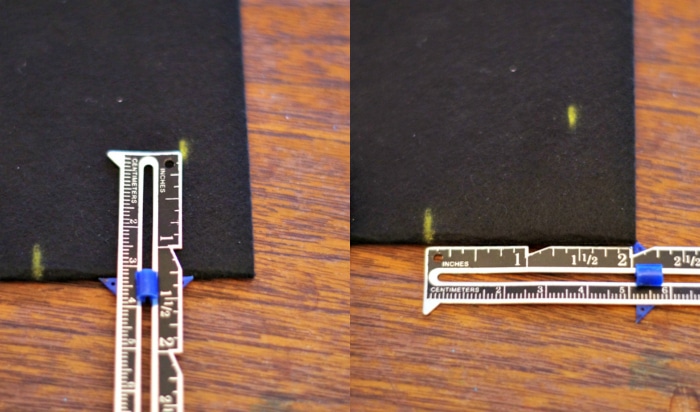
To begin creating your bag, fold your piece of felt “hamburger style” until the edges match. Make your first mark 5/8 inch from the side edge and 1 1/4 inch from the bottom fold. The second mark will be at the bottom fold, 2 inches from the side edge.
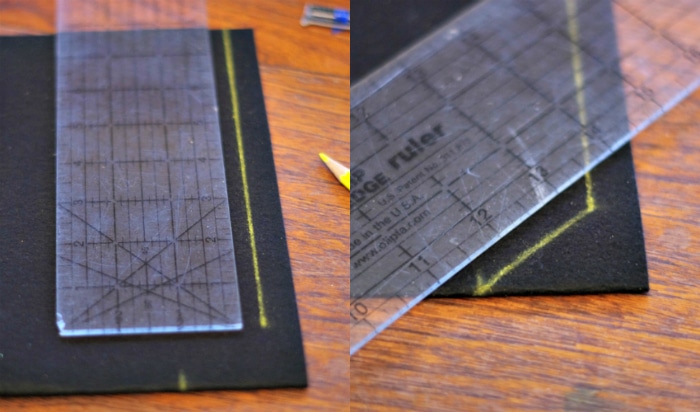
Next, draw a line from the side mark all the way to the top of the bag, making sure to keep your seam 5/8 inch from the edge. Then draw a line connecting the first mark to the second mark at the bottom fold. This will create a nice shape to our bag so that it’s not so boxy.

Repeat the same markings and lines with the other side. When finished, this is what you will see!
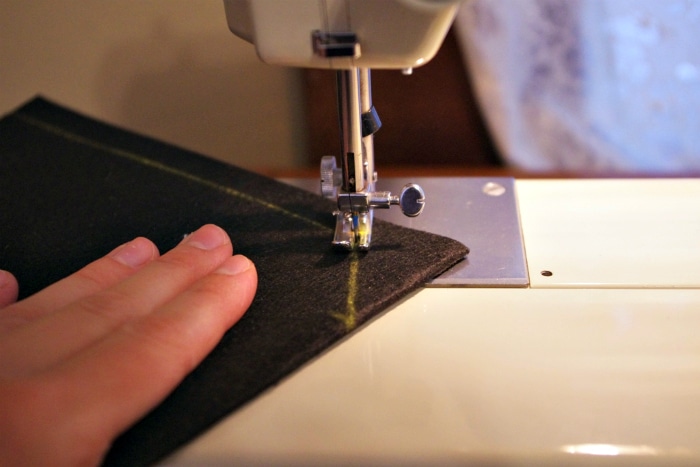
Get out your handy dandy sewing machine here and sew right on your lines. Pivot your felt piece when you get to the bottom angle. No need to be a professional here! We are only a sewing straight lines and let me tell you, felt is so easy to work with. Makes me want to whip up some jumpers made out of felt! Would that be weird?
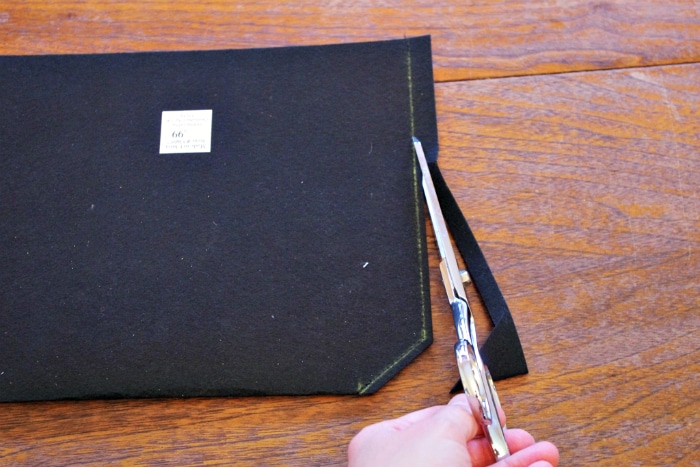
Trim the excess edging with some scissors. Felt will never ravel so there is no need for fancy pinking shears or glue to seal the edge.
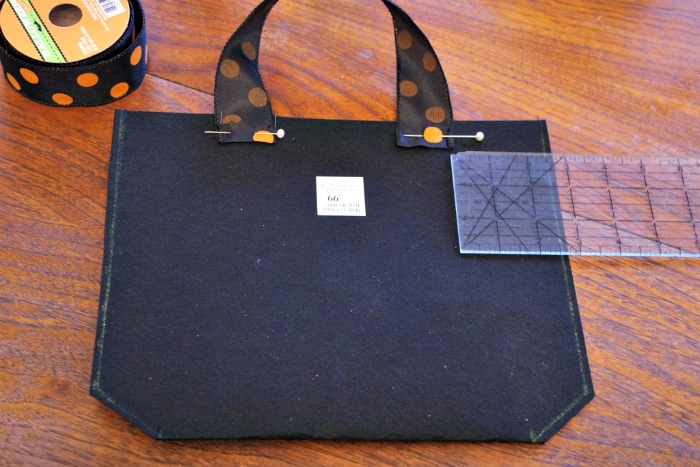
Withhold the urge to turn the bag inside out! We have to quickly sew on the handles first. Here, I cut a 13 inch piece of wired ribbon and folded up 1/2 inch at each end. Then I placed the ribbon about 2 1/2 inches away from the side seam and about 1 inch down from the top. I used a couple pins to hold them in place.
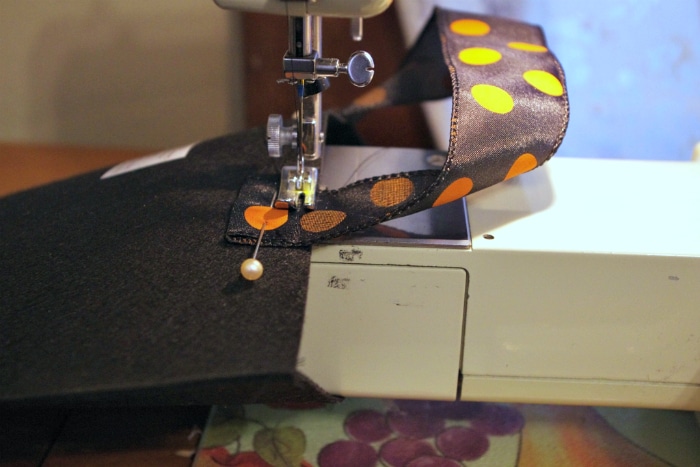
At your machine, sew a straight line at the top (above your pin) and sew a second straight line at the bottom (below your pin). Technically, you could sew on the handles before you sew up the sides of your bag. Whichever way you find easier!
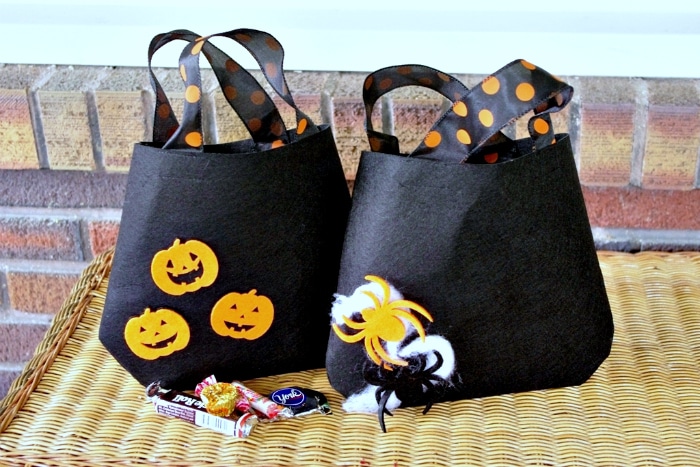
The moment of truth has come! Turn the bag right side out attach your embellishments. Because of its shape, the bag will actually stand up by itself when filled with treats.
Now go fill it!
Happy Halloween 🙂


Leave A Reply!