You all, this is one of my favorite DIY projects of all time. I have had my grandma’s handkerchief’s in a drawer for a few years. I absolutely love them but keeping them in a drawer just didn’t feel right. I lost my grandmother a few years ago. I miss her all the time. One of the things she always had with her was a pretty handkerchief. I don’t remember a time my grandmother didn’t have one with her. It was just her.
So when she passed away, my mom, sister, and I sat in the dining room and waded through the massive amount of handkerchiefs she had owned. I picked out 10 to keep to remind me of her. And since that time I’ve wanted to do something special with them. Keeping them in a drawer just didn’t feel right. They are beautiful and I wanted to have a way to show them off and have them front and center so that everyone could enjoy them.
So, I decided to frame them. The entire process took months. Not because of the actual DIY but because of the fact that it is next to impossible to find good square frames that don’t cost over $20. Since I was buying nine, I didn’t want to spend more than $100 in total. Sure, there are cheaper frames, but they look like…. cheaper frames. I first found some really good frames at Hobby Lobby for $5. However, they were black. I bought them and took them home to spray paint them. And then a few weeks ago just before I ventured to the garage to break open the spray paint, I decided to look online one more time. I found frames at JoAnn’s. They were on sale and I paid around $80 for all nine. That included shipping!
Here’s how I made the handkerchief wall art.
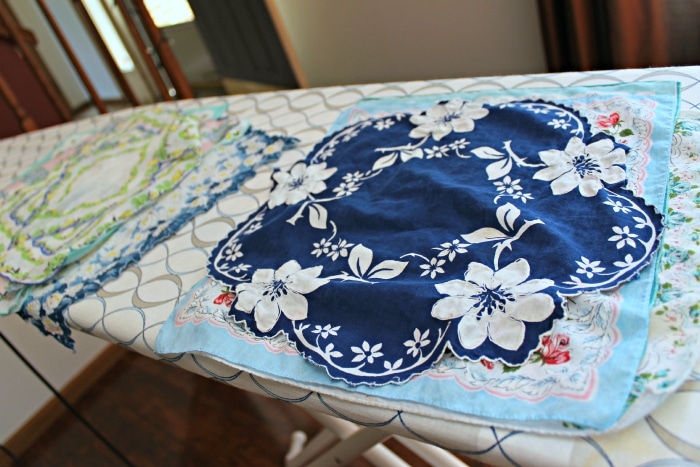
The first thing I did was wash and iron all the handkerchiefs. It pained me to wash them because they still smelled like my grandma. It immediately took me back to her home and all the games we played there. But I knew I wanted the next generation to enjoy these, so I wanted to get any chemicals out of the fabric to help them last longer.
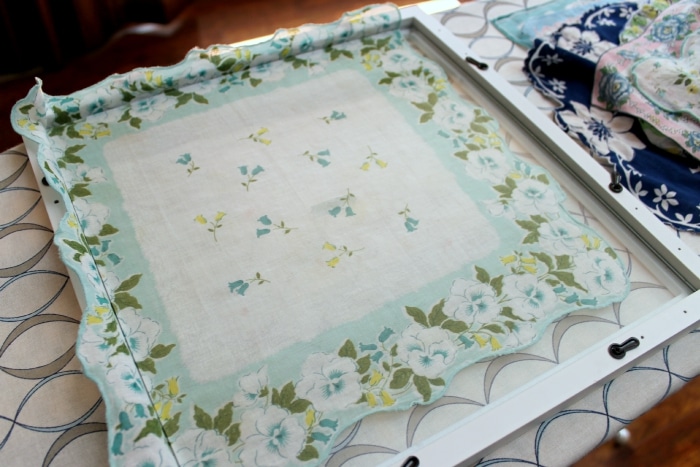
The frames I bought are called float frames. I didn’t intentionally buy them that way. I accidentally bought that kind, however, I LOVE them for this project. A few of the handkerchiefs had the most beautiful edging. By placing them a bit off-center I could preserve the look of the edge. And because they’re squished between two pieces of glass, it’s even more perfect.
The extra fabric is folded in the back. I couldn’t bring myself to cut them. I should probably mention that these frames are 12×12. The handkerchiefs are around that size, but they’re not square, so it was a bit of a squeeze for most of them.
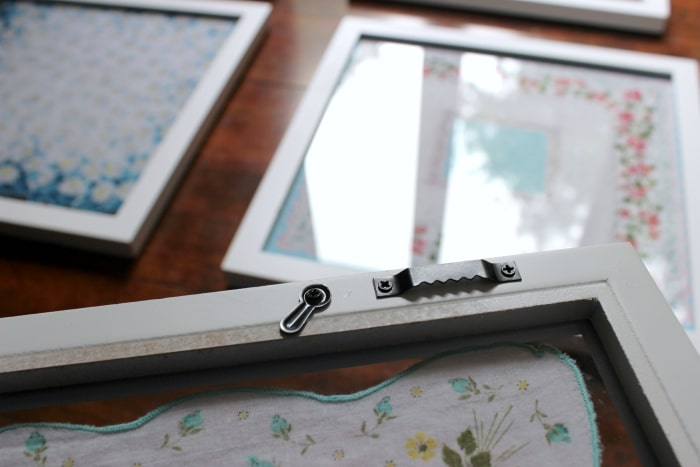
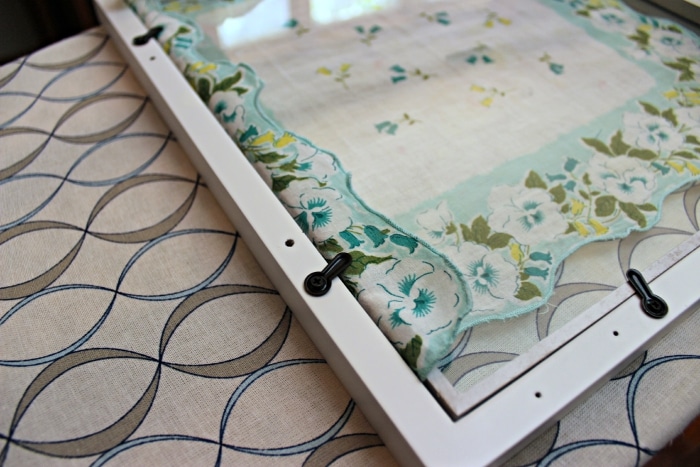
Each frame had two hangy thingy’s. (For lack of better words, of course.) They were a pain to put on the white frames. But I was glad to have them once I was putting nails into the walls.
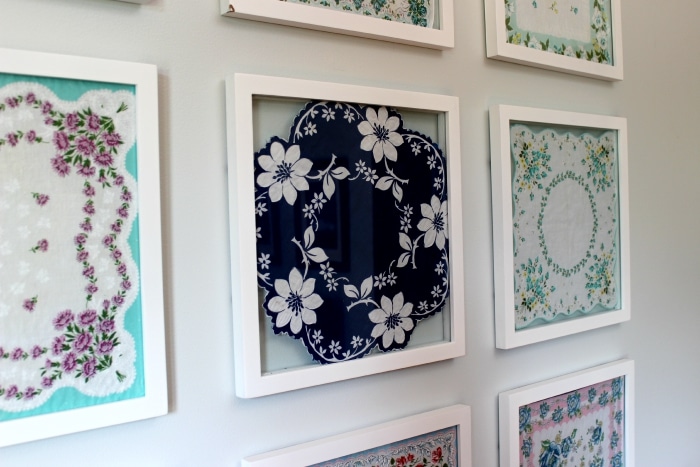
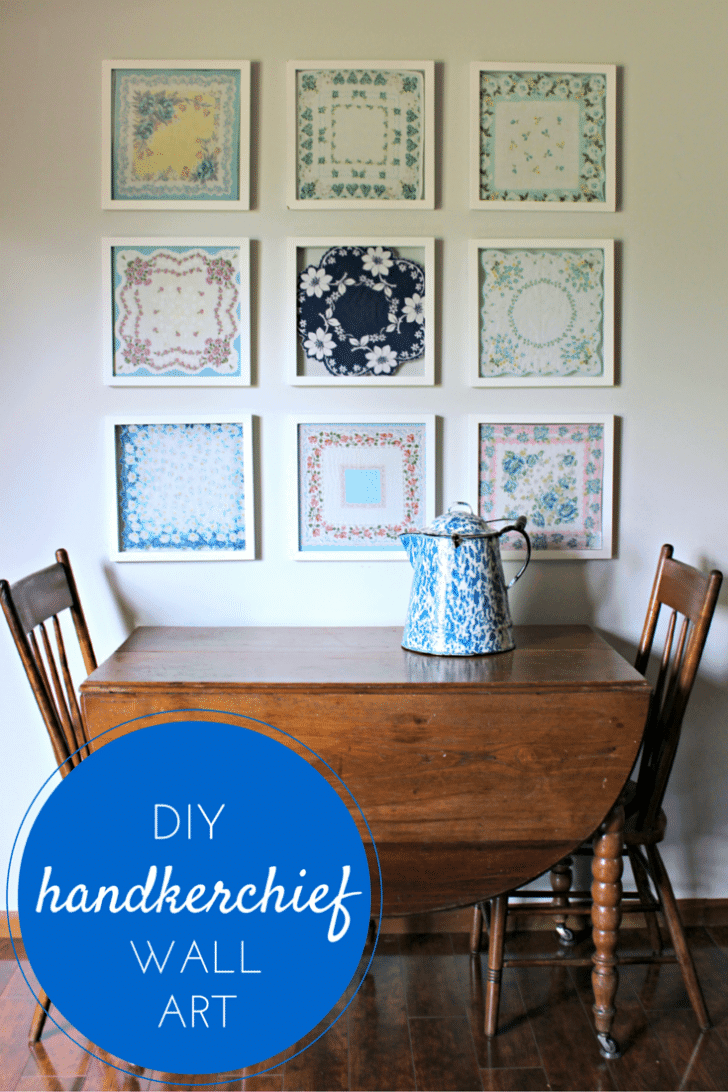
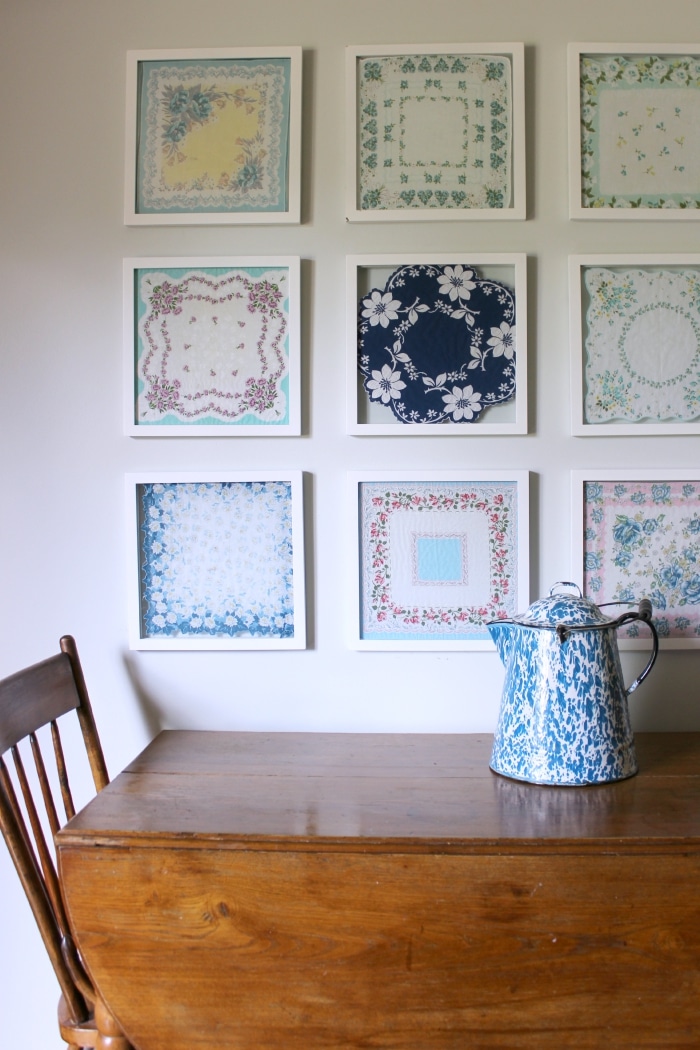
And here’s the finished product. They look so beautiful! I can’t tell you how much I love having them in my home, displayed like this.
The hanging process was a bit tedious. With a ruler and a level – as well as some math skills, it only took me about 30 minutes. If you want me to share with you those details, let me know in the comments. I can do a step-by-step if that’s something you’d like to see.
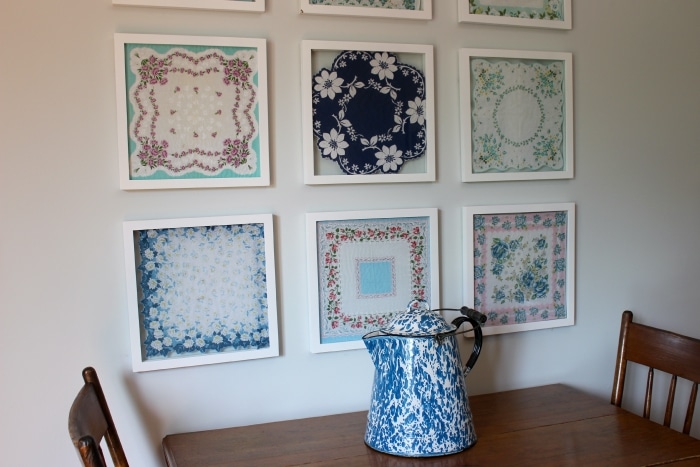
I try to only put pieces with meaning on my walls. Of course, that means I don’t have much on my walls because of the high standard I’ve set for myself. But slowly, but surely I’m getting to put meaningful pieces in our home. (The table pictured is the table I ate on as a child. The coffee tin was my great-grandma’s.) What can I say? I’m sentimental.
I hope you enjoy this! If you don’t inherit handkerchiefs like me you can always find beautiful vintage ones here on Amazon.


Leave A Reply!