The much anticipated before and after pictures from our farmhouse kitchen renovation are here! Thanks for your patience. We moved into the house a few weeks before Christmas and it’s taken us weeks to feel settled. We’re not decorated completely, but everything is, for the most part, unpacked. I took a break from sharing since pictures of cardboard boxes aren’t the most exciting thing ever.
If you missed our farmhouse renovation (all 21 weeks of it!) you can see it all here.
So, sit back and settle in as this will be a long post with lots of photos. I’m also going to be sharing exactly the colors and products we bought so if you’re like me and browsed the internet during your kitchen research and stumble on this page – you’ll get the inside information and not just the pretty pictures.
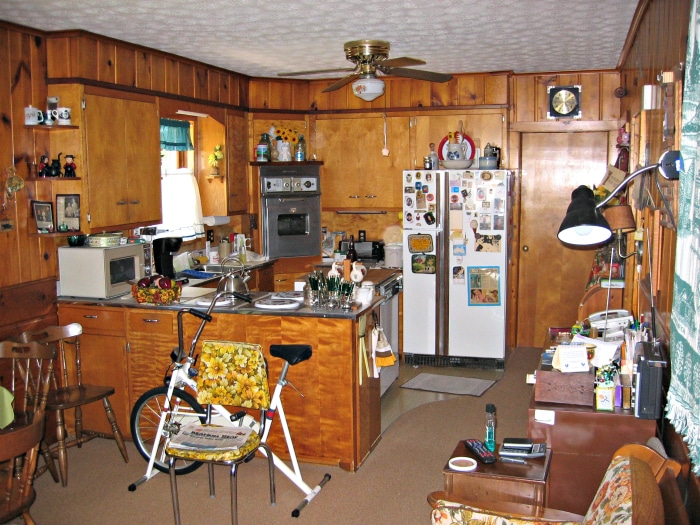
Here’s the kitchen in the home when my grandma lived there. She had a lot of stuff. 🙂 She used this area as the kitchen as well as a small family room. It’s where you would find her reading a book and watching 60 Minutes on Sunday nights.
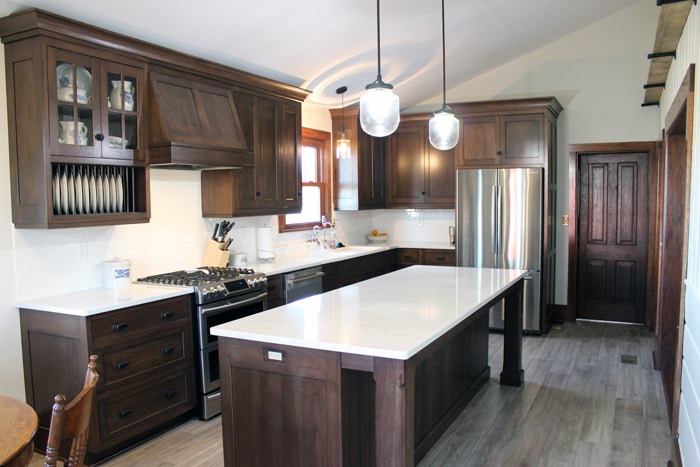
Here’s the same view today. It’s amazing how different it looks. I feel nostalgic about the before, but the current is becoming home to me now.

Here’s the view standing in what was the kitchen towards the other side of the room.
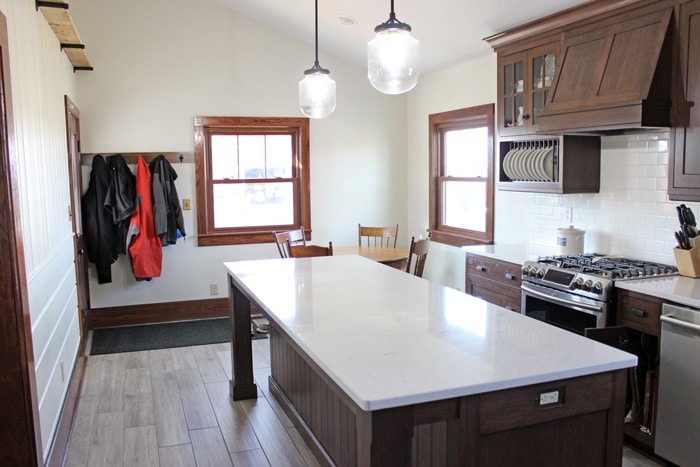
And here’s the same view today. Does it look like a completely different room?! As I had mentioned in the past, this room was a porch and then converted to the kitchen at some point. We know the last remodel was most likely in the 1940s.
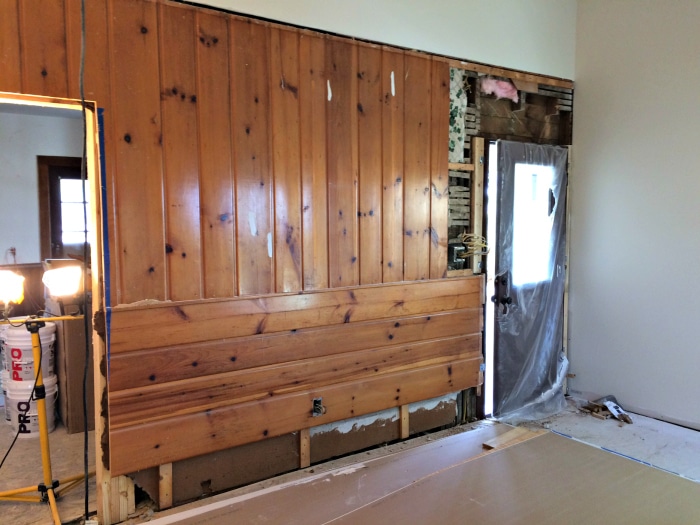
One of my goals for our home was to preserve as much of the “before” as we could. Obviously, in the 1800’s they would not have had much of a kitchen and we didn’t want to go back to that. We also knew there was history on the walls that had been made since the construction of the house. The pine paneling was something I wanted to keep. I’m pretty sure many people thought I was a bit crazy. And even after it became apparent that only one wall could be preserved, I stood my ground. The paneling was thick – we could have gained three inches on the kitchen if we had removed it.
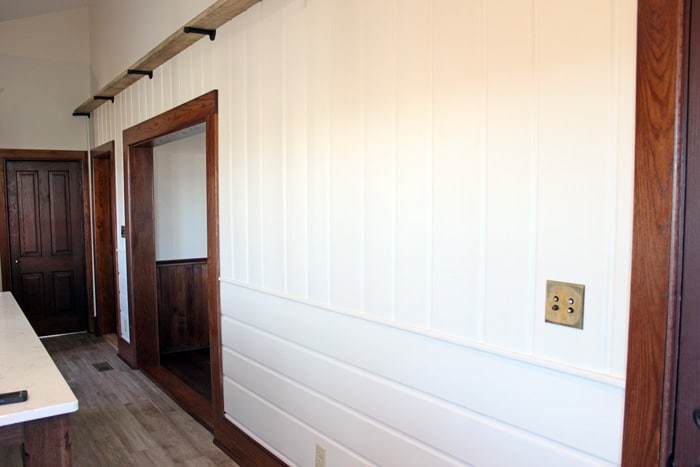
But instead, I painted it. It reminds me of my grandma who most likely was the one who had picked it out. She shined the pine with lemon oil every year. And while I did paint it – I think it fits the space and every time I look at it I think of her and the kitchen she designed so many years ago.
You can read more about the texture of the kitchen walls here.
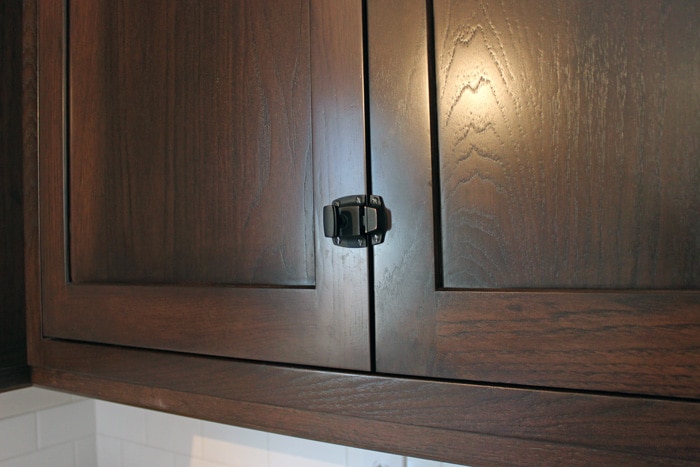
The entire kitchen design revolved around these latches. We have a few large pieces in the house that are original and they have latches like this one. In order to get the latches we had to go with inset cabinets which in turn became custom cabinets. The cabinets are Hickory and are stained in the color Wynwood.
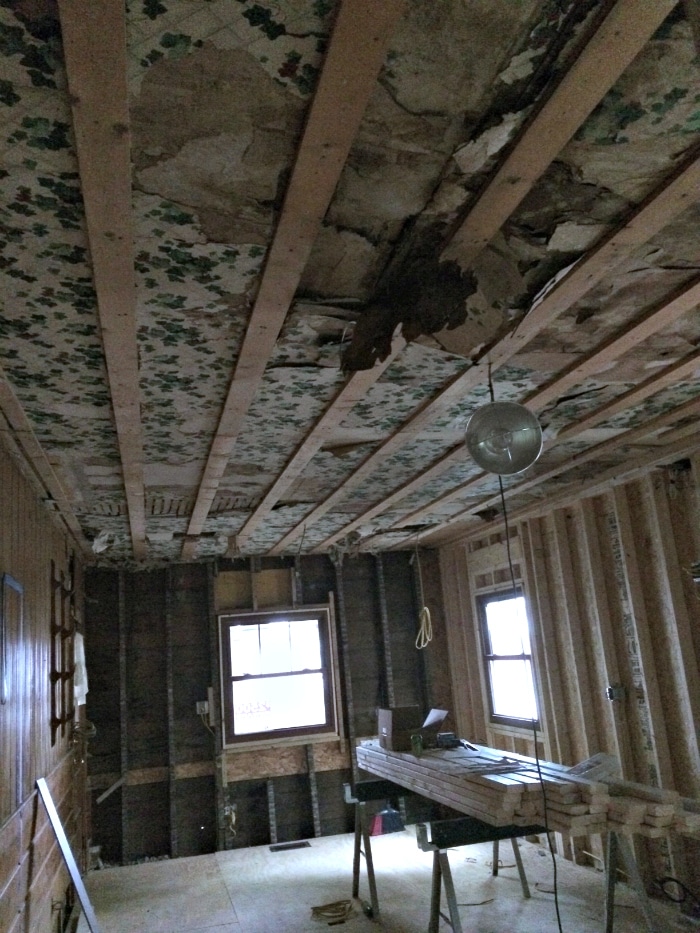
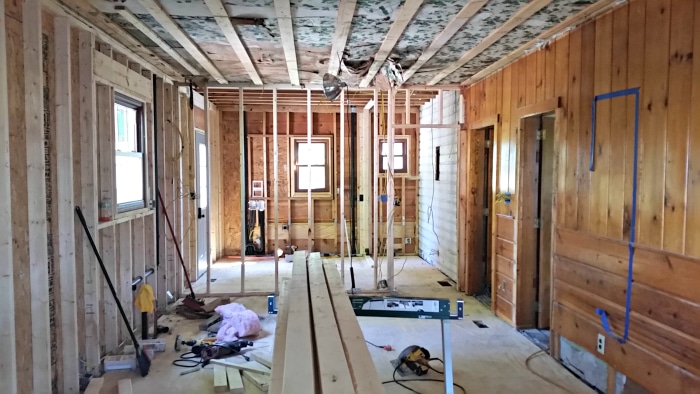
Another big project was vaulting the ceilings. It wasn’t in the original plans although it was something I had wanted to do – but didn’t want to pay for in added costs. After finding out the ceiling had to go anyways, we vaulted.
You can read more about how we vaulted our ceiling here.
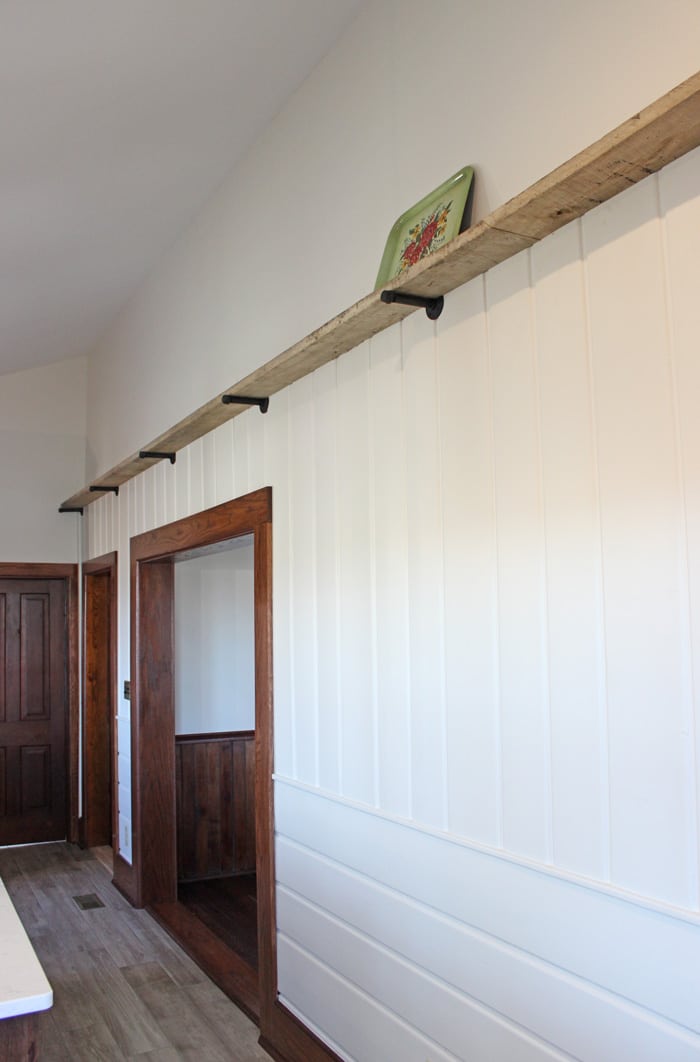
And I’m so glad we did. It gives the room height. The barn wood shelf was added to bridge the gap between the paneling and the drywall in the vaulted area. Above the kitchen was a small attic before, so it was the perfect plan to vault the ceiling. Our home has tall ceilings so walking into the kitchen it felt natural to have the height the vaulted ceiling provided.
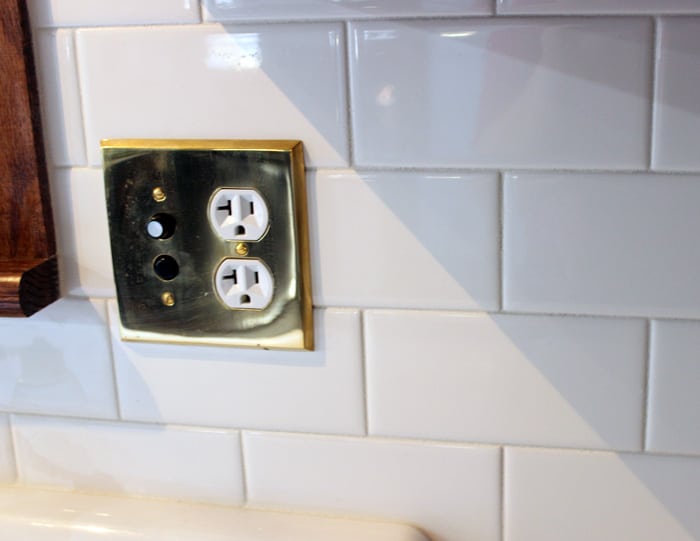
We decided to go with un-laquered brass covers. When we bought the house it had these with the original knob and tube electric upstairs. When we replaced the electricity we decided to put the push button light switches throughout the home and add the un-lacquered brass. Right now they’re shiny but they will tarnish quite nicely over the next few years.
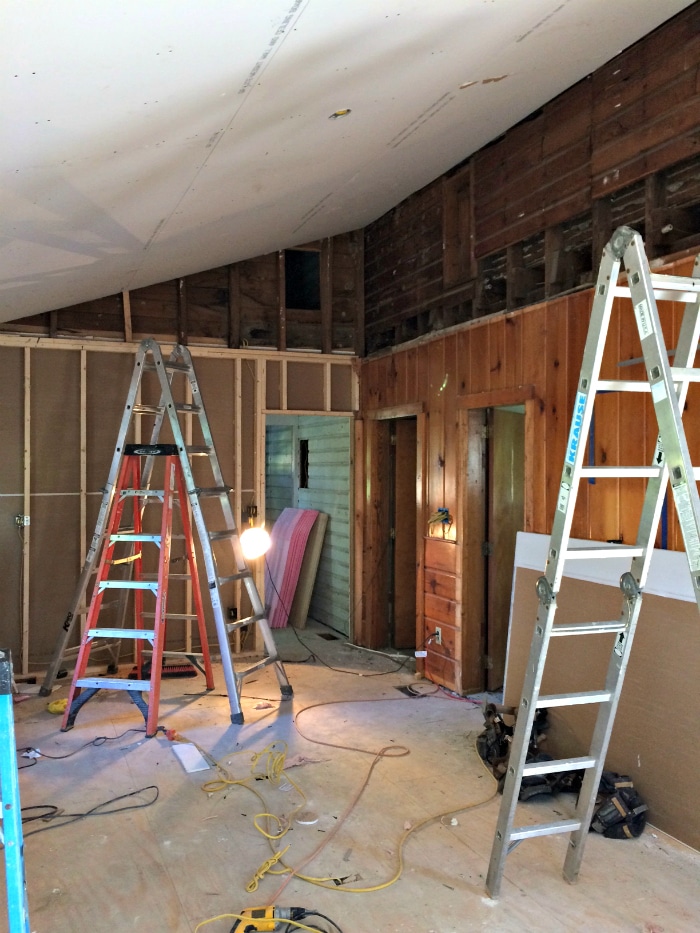
It’s amazing how “open” the space was during our renovation of the space. You can see the original smaller door to the right and the pine paneling as well. I was worried about how all of it was going to fit together.
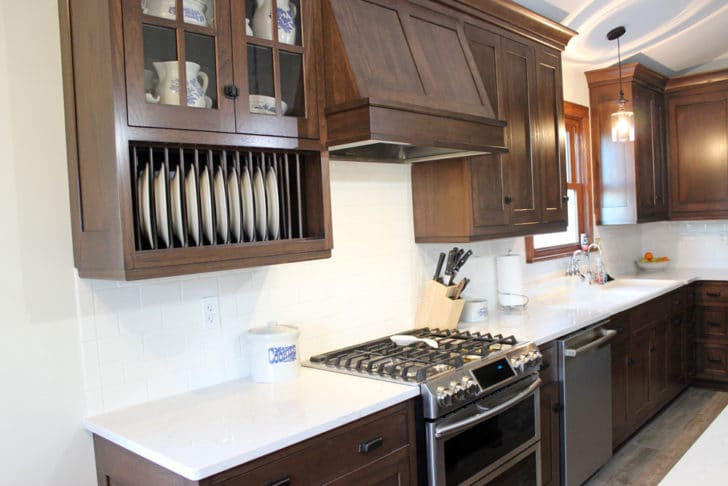
But it all did. In keeping with older homes, we added a plate rack in our plans. I use my grandma’s pfaltzgraff dishes and I wanted to display them. We also went with white subway tile to keep everything classic and untrendy. We’re never planning to remodel the kitchen again so when I’m 80 I want it to still look good! The only way to do that is to go with items that fit an old home so that they’ll fit the old home in the future.
And then there’s the appliances. After a lot of research, the way to make an oven look high-end is to purchase one without a back that has a bit of an overlap on the sides. Our oven (you can see it close up here), overlays the countertop which is great for cleanup but also makes it look built-in. The oven wasn’t cheap, but it wasn’t as expensive as the really nice high-end, high-end ones.
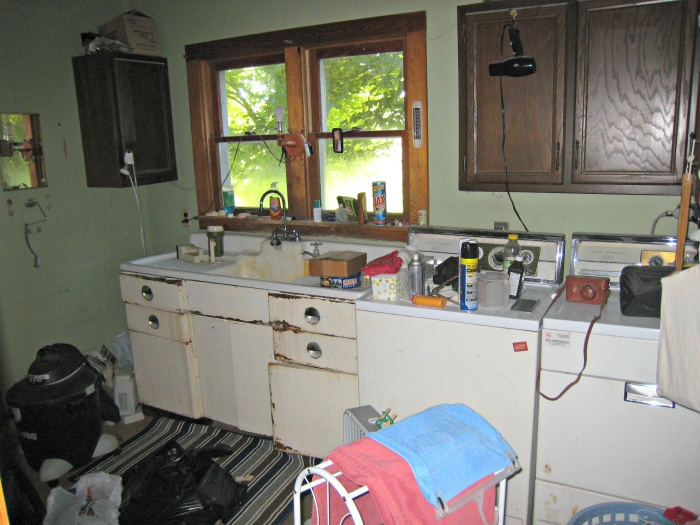
We plucked the laundry room sink out of the laundry room…
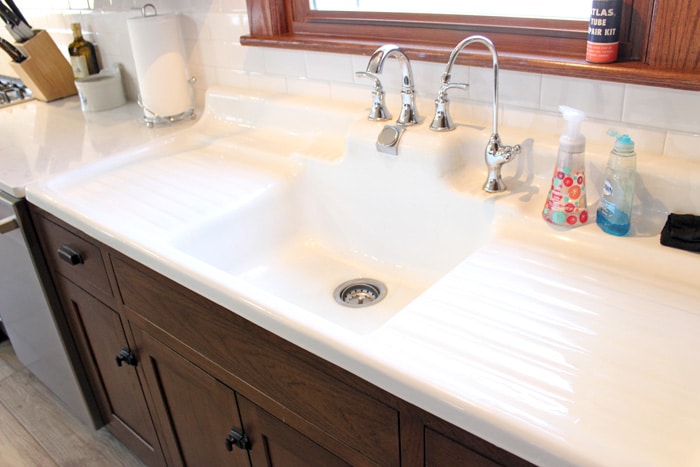
…and gave it a place in our new kitchen. I just LOVE this sink. It’s so practical. The drainboard sides are perfect for drying dishes. After cleaning it up, we realized how great its shape of it was. Underneath the sink, it says “1942” on the cast iron. That’s one old sink! Although with how old the house is, it’s one of our “newer” items. It’s also very heavy! Another reason we went with custom cabinets is that they could design the cabinets around our sink to make it all work together in the space.
I ordered an older-looking faucet for the kitchen sink but it was back-ordered. So a “cheap as possible” faucet was installed for now. I can’t wait to get the new one in!
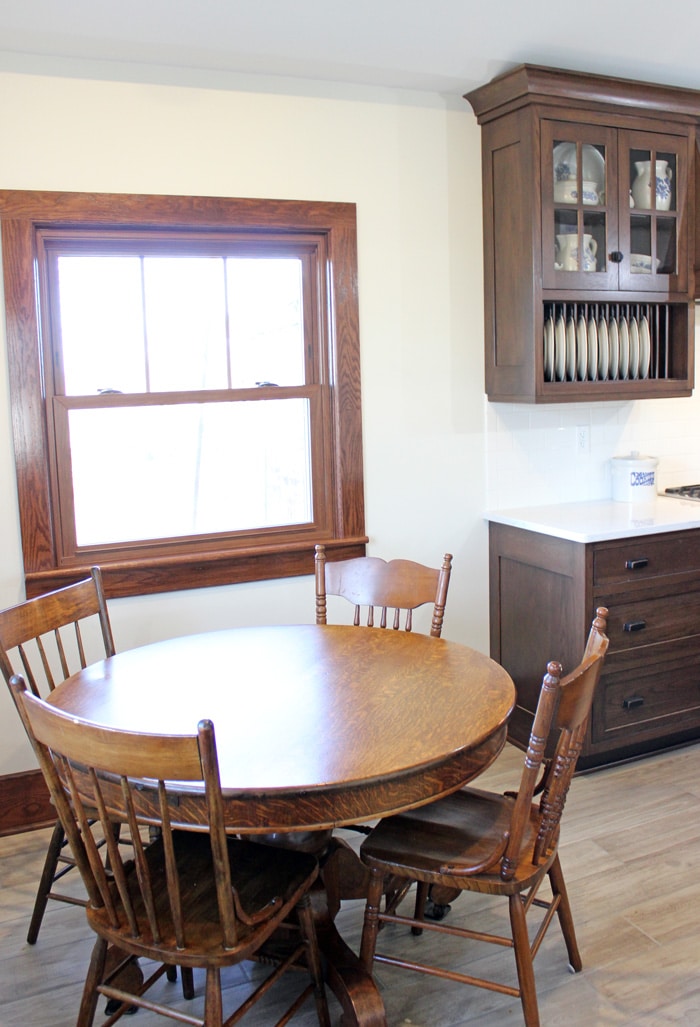
We wanted an eat-in kitchen. This small round table was from my great-grandma and grandpa’s restaurant on my dad’s side. There are probably hundreds of people who have eaten at this table and they all probably enjoyed my great-grandma’s pies! The table was used by my grandma after the restaurant closed decades ago and she gifted it to my dad when she went into assisted living. Since our home is from my mom’s side of the family, it’s nice to have some things in our home from my dad’s side of the family. My grandma visited during Christmas and I wish I had a video of her pure joy when she realized this table was being used and was treasured. With only four people in our family, it’s the perfect place to have dinner each night.
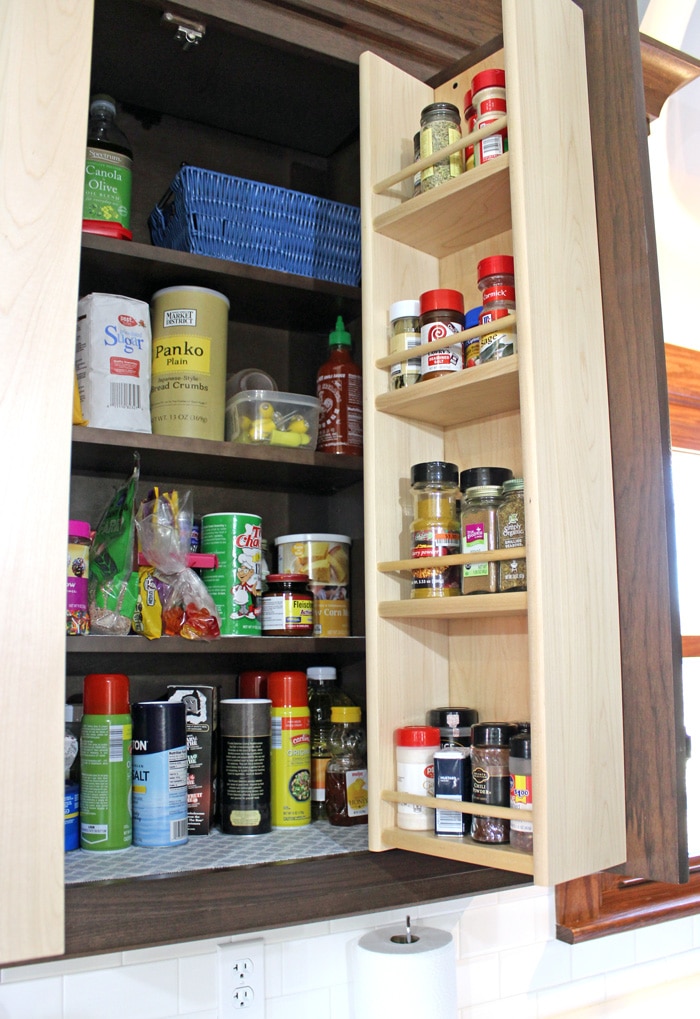
In terms of extras, we did add a few to our kitchen design. I added this spice cabinet. I’m not sure I’m in love with it. It’s somewhat easier to see what I have but it’s hard to reach everything. The jury is still out whether this was the best use of space.
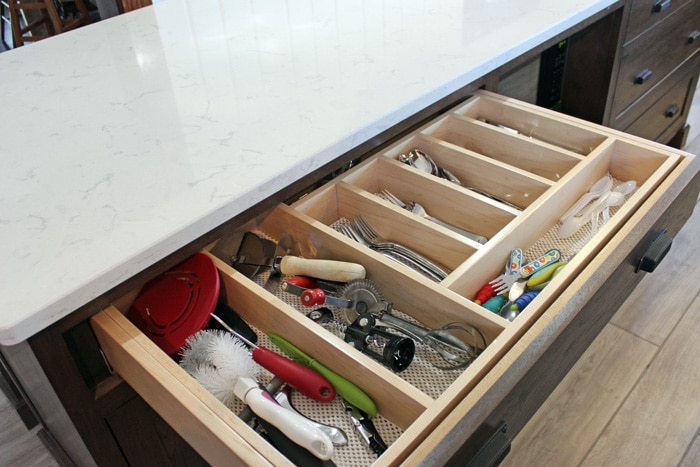
Where we could, we had built in dividers added. This, I love. It keeps everything so organized and you can see what you have at a glance.
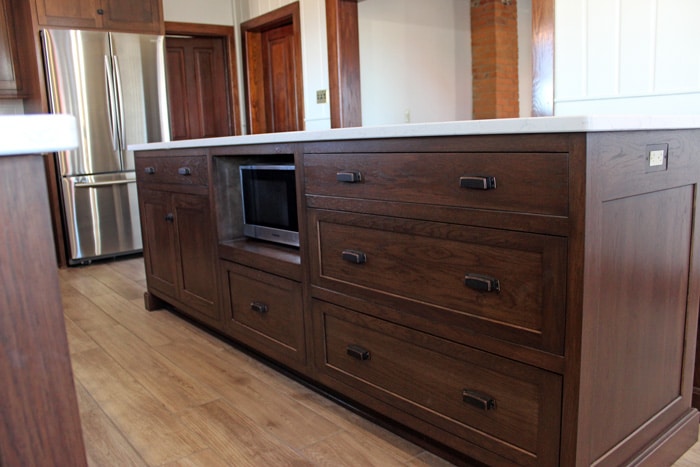
The island is one of the key places in the kitchen. We did NOT want the microwave above our stove so we decided to have a cutout opening put into the island. You can get built-in microwaves but they are so expensive. Instead, we bought a cheap microwave and can put it into this little area of the island and when it dies – which microwaves always do, we can buy another cheap microwave to replace it.
There are so many little details in this renovation so I made a video to walk you through our space.
All in all, while this room was the most expensive renovation in the home, it was well worth it. It’s provided a beautiful space to entertain. Below you’ll find details on our kitchen in case you’re looking to renovate a kitchen yourself and like some of the details you see.
Countertop: Quartz, Swanbridge design by Cambria
Cabinets: Hickory wood stained with Wynwood, built by Mullett Cabinets
Flooring: Shelburne Cinder Wood Plank Tile, from Floor & Decor
Backsplash: Cheap white subway tile, the best deal in the whole space!
Grout: White on backsplash
Lighting: Patriot Lighting from Menards for island
Paint: Ivory Palace by Behr on walls
Oven: Samsung Duel Fuel Oven
Refrigerator: Samsung Refrigerator
Dishwasher: Bosch (love my dishwasher!)
Stay tuned for more before and afters of our farmhouse renovation! If you missed all 21 weeks of this process, you can catch up here.


Comments & Reviews
An you please tell me what flooring you used?
Hi! We used a tile floor with a grey wood grain. I’m sorry, but I don’t remember the name of the tile company.
Hi There Beautiful kitchen or What brand of stain is on the cabinet Thanks
Hi, the color is Wynwood. I’m not sure what the stain brand is. Sorry!
Beautiful kitchen! May I ask what size the island is? TIA
Thank you!! Our kitchen island is 8 feet long by 3 feet.
Hi There – Beautiful kitchen! What brand of stain is on the cabinets? Thanks!!
Thanks! I’m not sure of the brand as the company we bought the cabinets through used the color Wynwood in whatever brand they use. I wish I could be more help. We LOVE the color.
I’m curious as to what size your kitchen remodel is? I’m preparing to remodel our mobile home kitchen and this is the exact layout I’d like to use! Look forward to hearing back from you! Thanks, Jackie
Our kitchen is 11 feet by around 20 feet. They suggest 12 feet wide for an island our size but it’s been fine with just 11 feet wide. Good luck with your remodel! It’s a big job but so worth it!
My first house also here in Ohio was built in the 1860’s I have suffered your pain,keep at it misery loves company.