Each time I sit down to share our before and after farmhouse renovation, it takes me down memory lane. There are the memories of how far we’ve come in the last year. (I thought I had blocked out most of the wallpaper removal until today.) There are also the sweet memories of the home as I grew up – and would often visit my grandma and grandpa. I spent a lot of time in this home over the decades. It still seems surreal that I get to live here and raise my boys where their ancestors were born.
I’m slowly getting each room decorated and so as I complete a room, I get excited to share with you the complete before and after. You can find our farmhouse kitchen renovation before and after here. Really, this is more like a story as I look through all the pictures of this process.
Where to start….
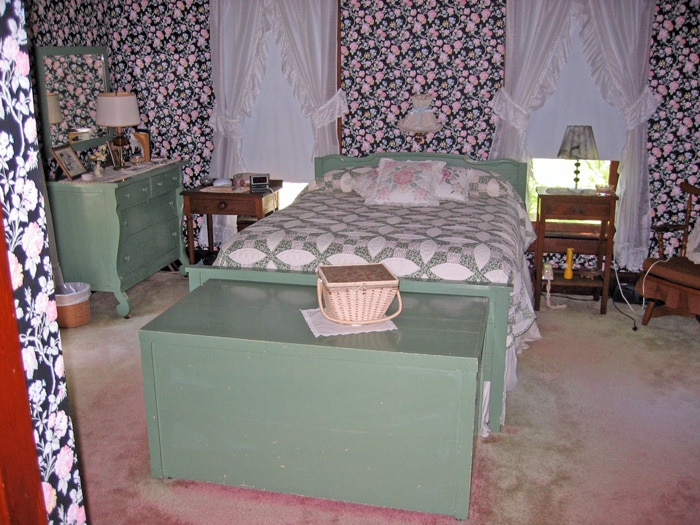
This is how I remember the master bedroom, pink carpet and all. The room has four large windows and is located at the front of the home on the second floor. When my husband and I were engaged, I actually lived here with my grandma to help her as she was in her 80’s. I slept in this room while she slept downstairs since we were afraid of her falling going up and down the steep stairway each night.
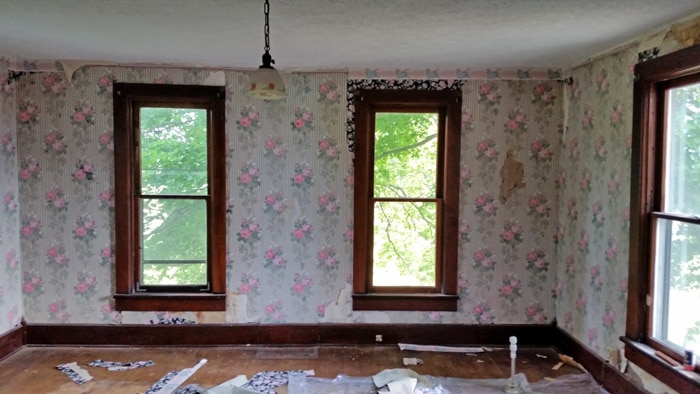
The first step to our renovation of this room was removing the carpet and the wallpaper.
What am I kidding? It was removing all the STUFF! I forget how many things my grandma had saved and tucked in every single nook and cranny. Most of it we were able to keep and it will be a task this summer to go through it all again as what other family members didn’t take, is now in our barn. But after the stuff was removed … the wallpaper.
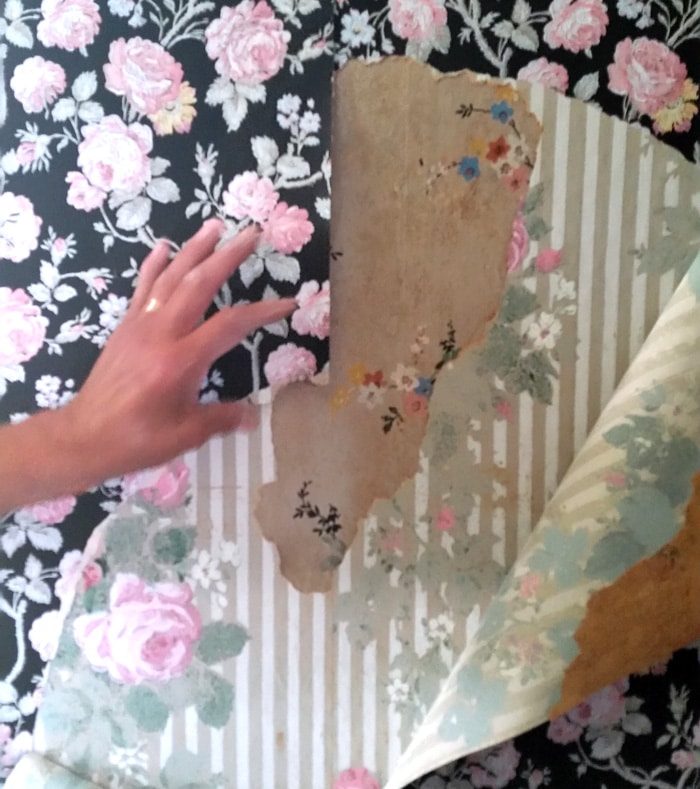
The first layer of wallpaper came off easy enough. The rest – well that’s the part I blocked out of my memory. Lots of dif and a professional wallpaper steamer we rented- and it only took two full days in this one room. Ack! In some ways it was therapeutic as it felt like taking off the layers of history – or at least that’s what I now tell myself. We did save quite a bit of money as our contractor didn’t have to charge us for the removal.
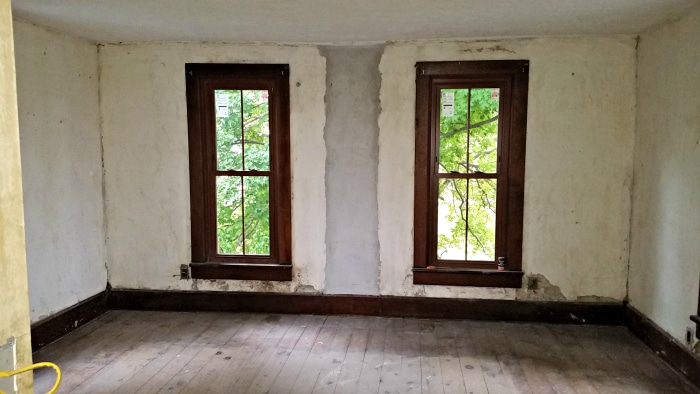
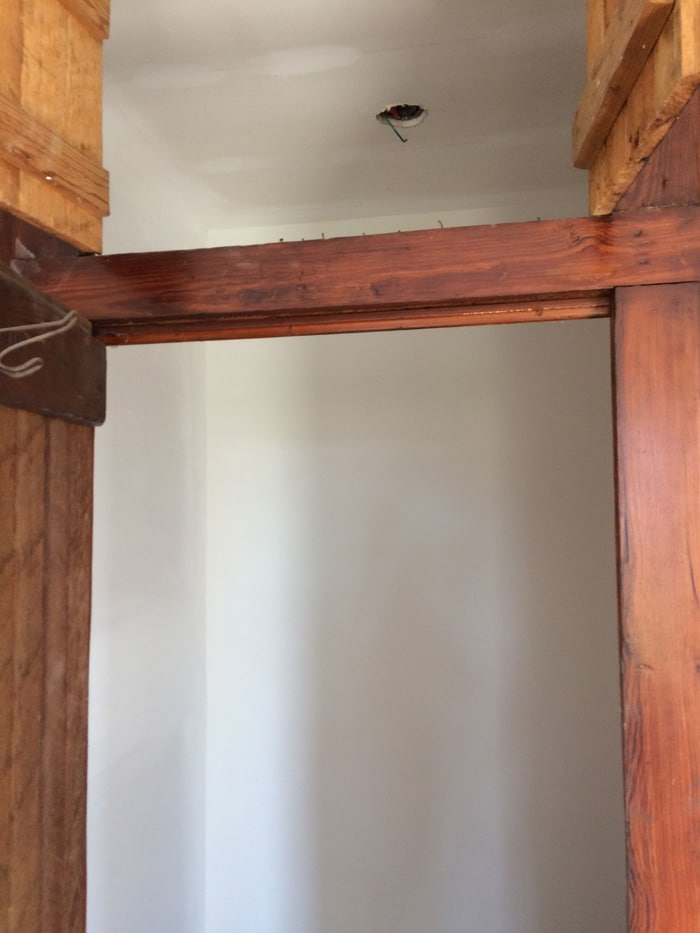
Once everything was removed, we discovered what we had suspicions about. The home had an indoor chimney in the front of the home at some point. When it was taken out, we’ll never know. They used cement to fill it in.
In this picture you can also see where the windows had been replaced and the new drywall on the ceilings was added.
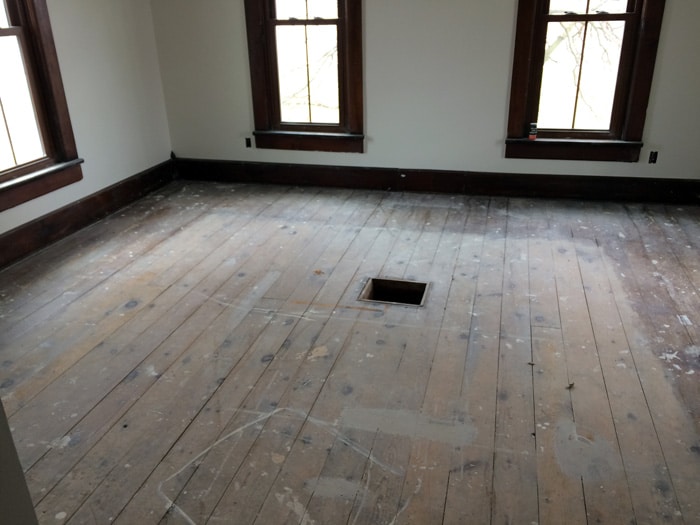
The carpet came up easy enough and exposed the original pine floors. We discovered a hole in the middle of the floor where they most likely had allowed heat to come up from the downstairs. There was no heat in the upstairs when we bought the home – so the old fashioned way to heat the upstairs would be to let the heat rise from the downstairs through a hole. You can also see where the outside of the floor area was stained but not the inside meaning they had originally had a rug. It also looks like my grandma painted a few pieces of furniture up there as well before carpeting.
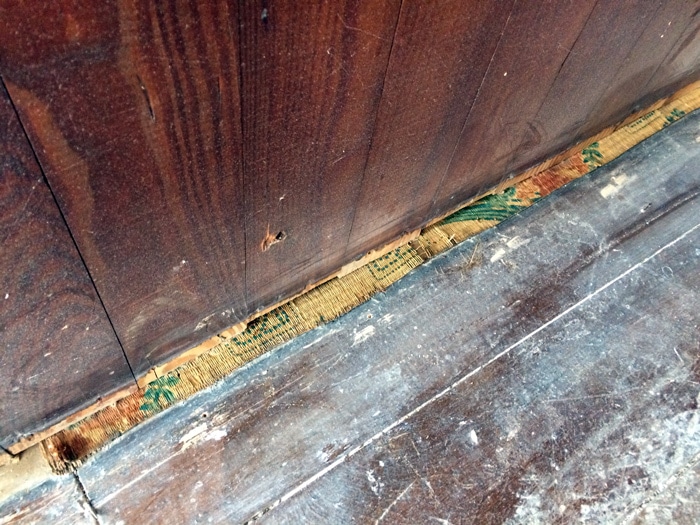
Another flooring clue – some kind of grass like carpet? They built one of the closets right on top of it. Why not?
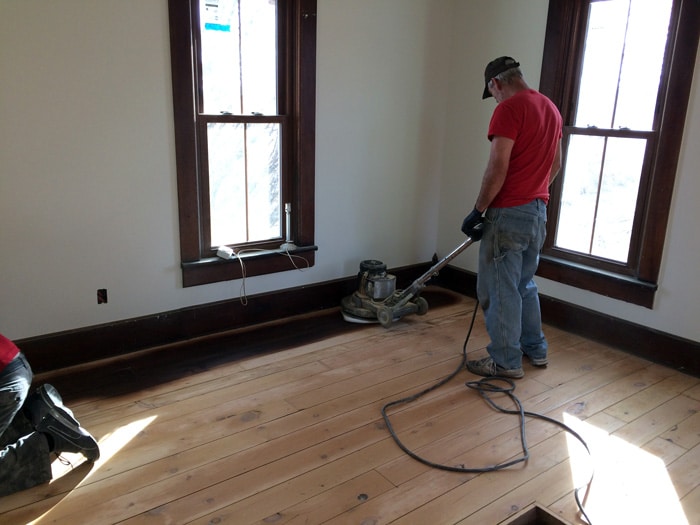
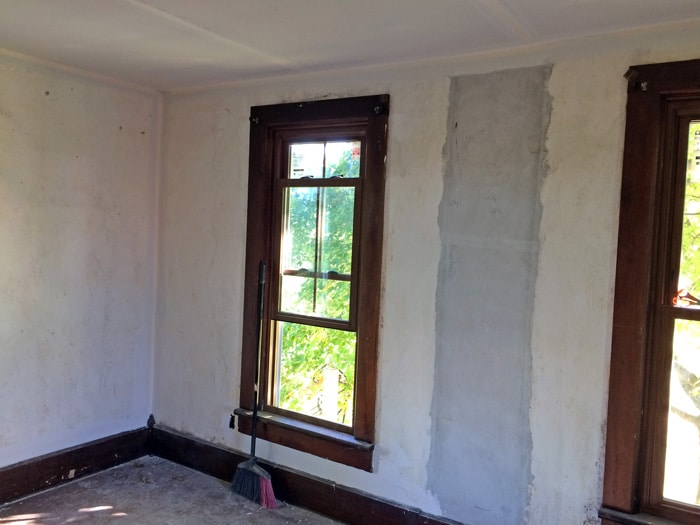
We had all the walls skimmed with plaster. The ceiling received dry wall – and the floors were sanded. Here they are putting the first bit of stain down on the floors. I remember thinking – woah! They are soooo dark! But as you can see, so is my woodwork and we wanted it to be original and we found clues that originally they were dark. Plus pine floors turn yellow with oil polyurethane. I didn’t want yellow. And although they do have water based poly which won’t do the same thing, the oil poly is a better product for the long haul – and remember, we are never doing this again. So, oil and dark stain it was.
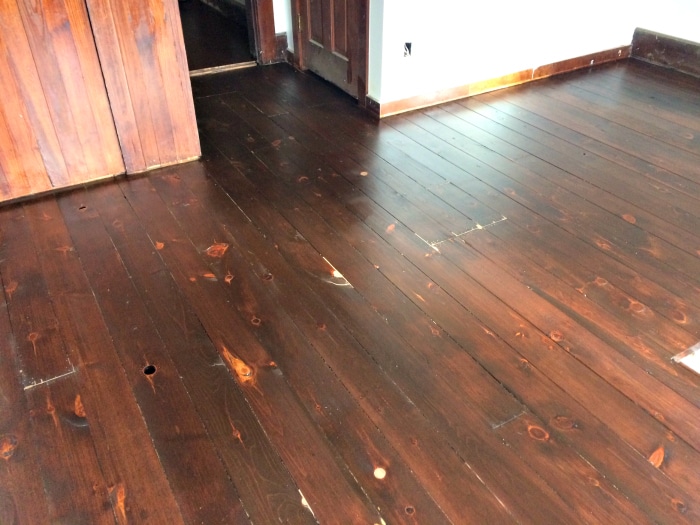
Here’s a look at how the floors looked after they were finished. Dark with lots of variance as we expected and love. The lighter spots are where our contractor thought it would be a good idea to “patch” areas of the floor with a “stainable” putty. No putty is stainable. Don’t do it. I was glad I got the icky feeling about it and told him to stop. I will most likely try to make it match with a marker or something. With all the variance it shouldn’t be hard to cover.
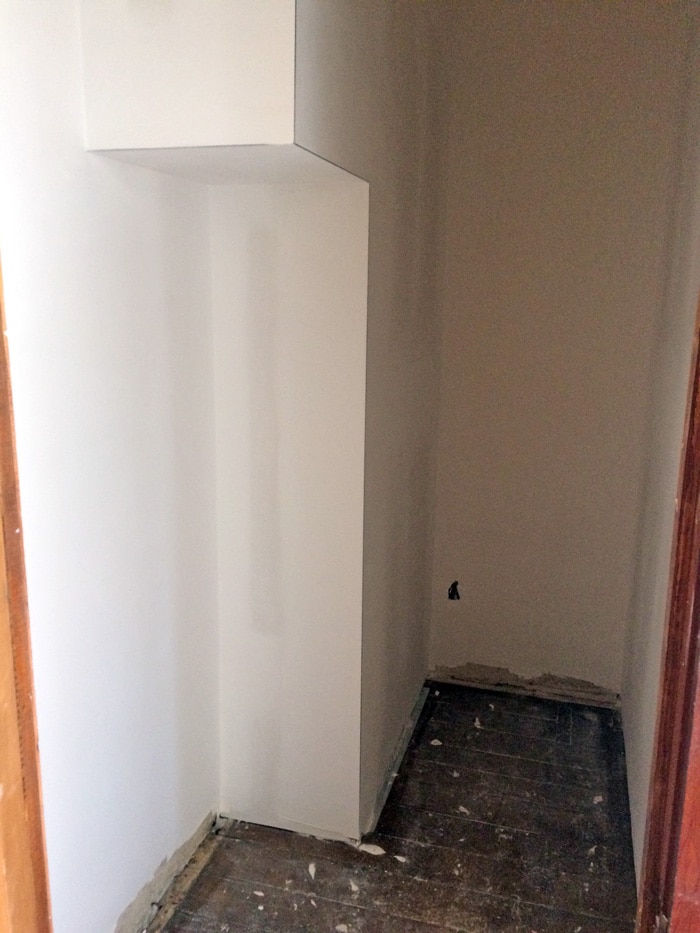
Another fix was inside the closest. We wanted heat in the upstairs so they ran the heating pipes from the basement, through the living room up through our closet – into the attic and then they branch down into the room. The closets are not original as they were built into the room at some point. This one was probably built into the room when my grandma moved in as she liked to look good and had a lot of clothes. We removed the original wood molding so that we could use it on the outside of the closet to match the rest of the room. The boxed in area you see above is where the heating pipes were put. They were huge! Also notice the dark wood floors – original! 🙂
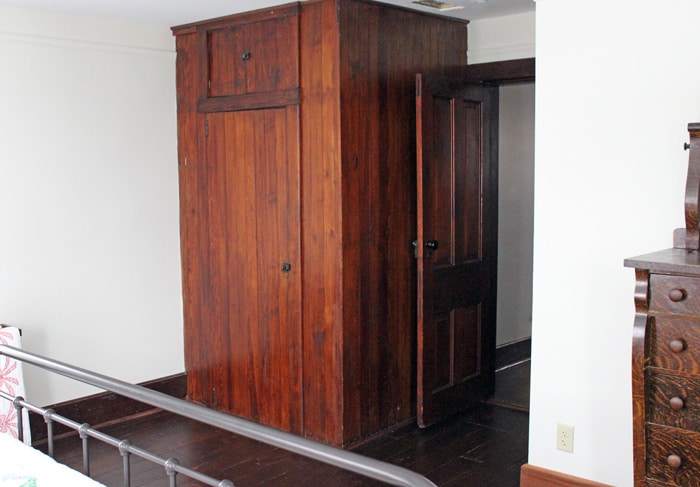
Here’s the more original closet although it had the woodwork in the inside as well so we know it wasn’t there the day they moved in, but probably added at some time. I almost thought about painting it – but one of the crews that gave us an estimate looked at me like I had a unicorn growing on my head when I mentioned it – and then I realized he was right. It’s a cool piece of furniture in some ways and very unique. I’m so glad I kept it dark.
I did however, remove the inside divider ceiling. The top area had a separate door than the bottom section of the closet. I knew that the top area would house things never to be seen again as it’s too tall. We removed the ceiling in the middle, and had the light installed on the true ceiling. In this closet room the plaster was off the walls in some areas but I can’t seem to find a picture of that.
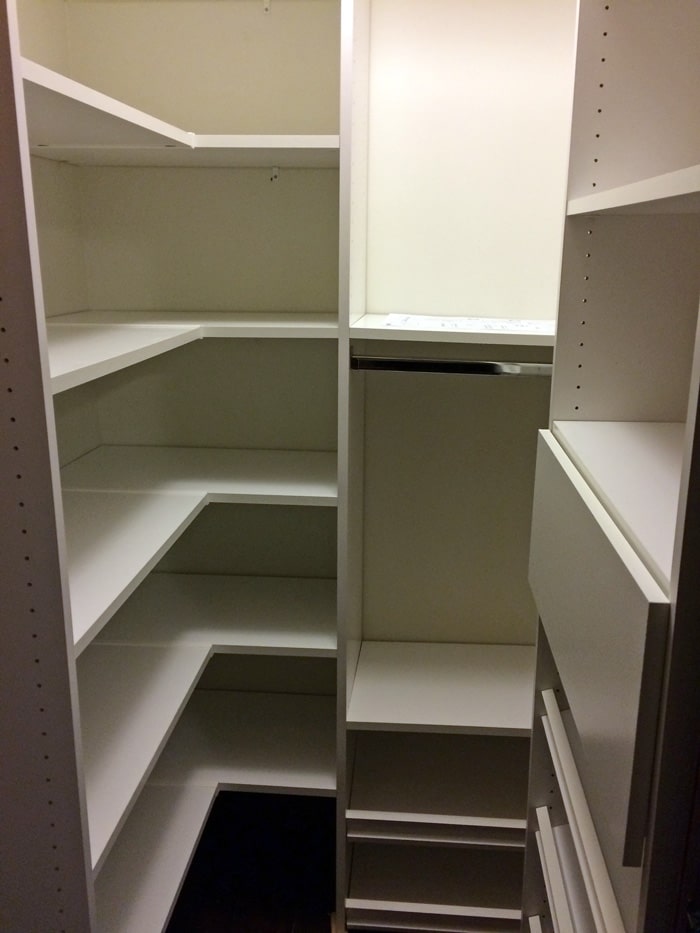
But here it is after. I installed these myself with my husband’s help! I’m so proud of myself! We bought the Dakota kits at Menards and spent 1/5 of what it would have cost to have it designed. It doesn’t quite look this good with all my stuff inside – but I have lots and lots of storage that goes to the ceiling.
Are you ready to see more afters?
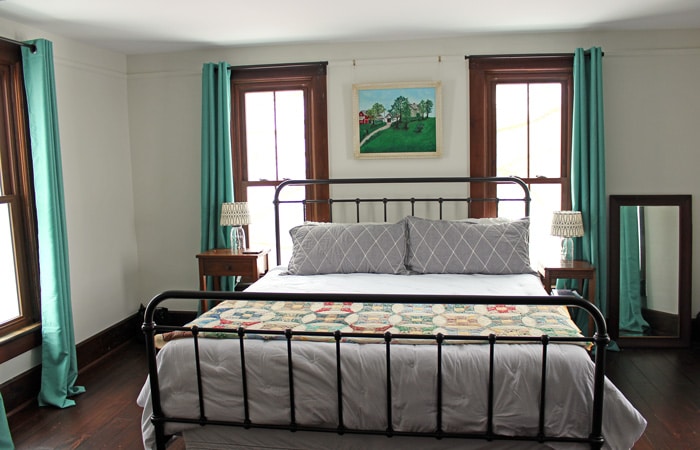
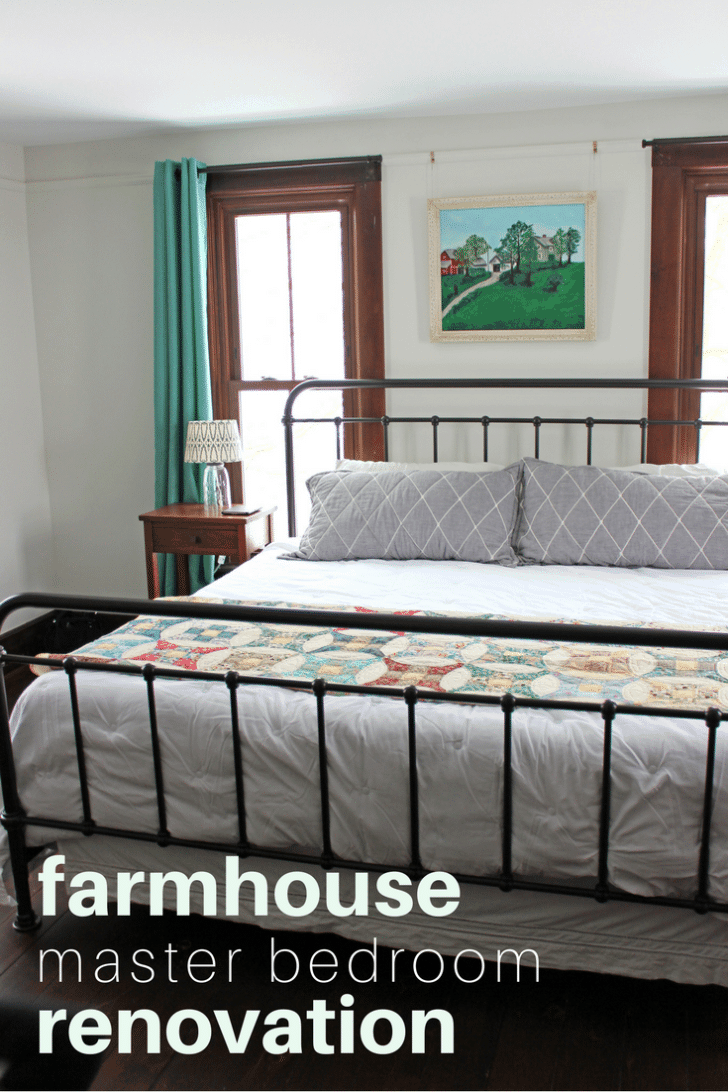
Here’s what the room looks like today. It’s bright and inviting and I love it.
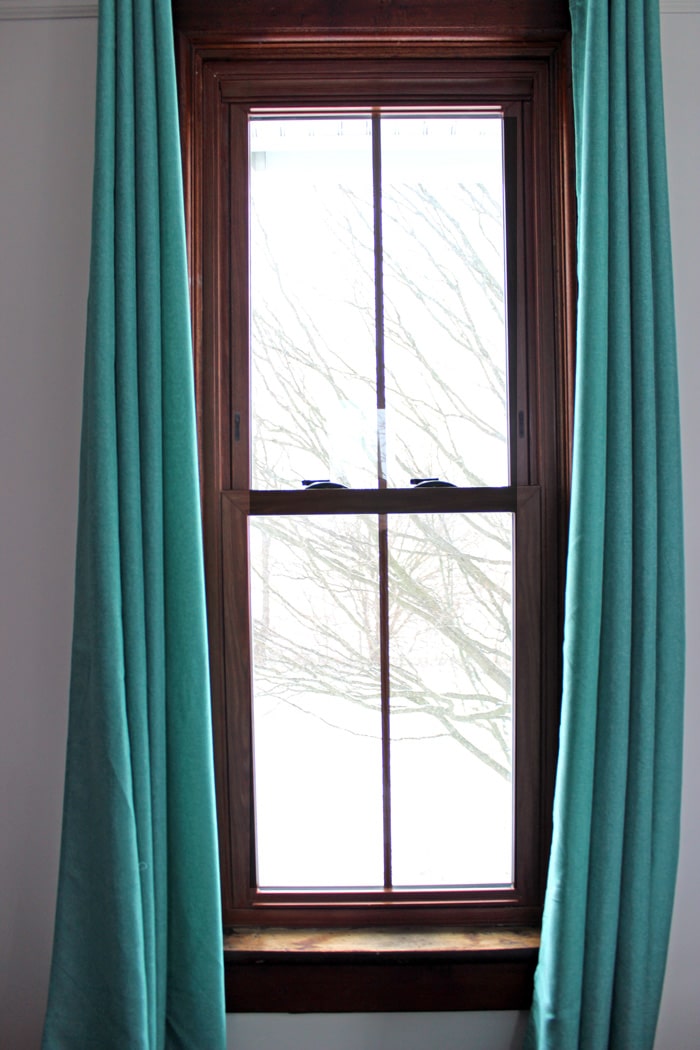
One of our first additions was these curtains. I almost didn’t want to put curtains on the windows but I stumbled onto these at TJMaxx for $10 a panel. You can’t buy the fabric for that?! Ironically they are a close match to the green paint that was painted in between layers of wallpaper in the home. My grandma LOVED green and I never realized how much until this home – so I think of her with these curtains.

I wanted to use quilts in the home since we discovered quite a few and we know our family members made them. It also fits the farmhouse and brings color to any room. This one smells like my grandma – she always smelled really good. I just can’t bring myself to wash it to get some of the older yellow color out of it.
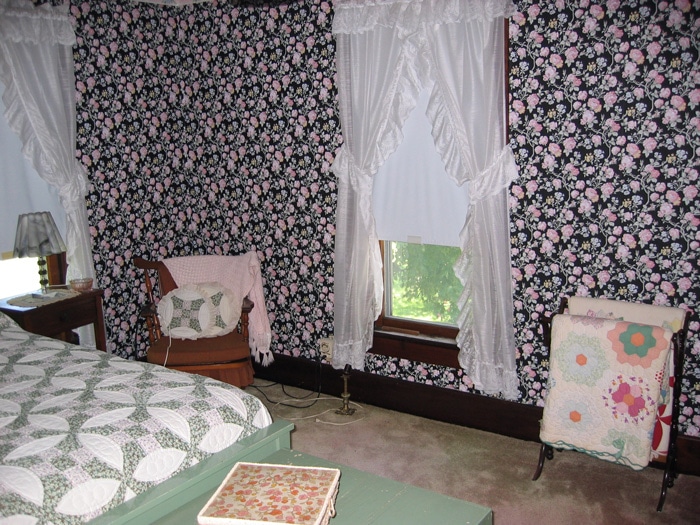
Before the room was very colorful. 🙂 But one thing that I realized while going back to a picture of the “before” was how much I subliminally remember.
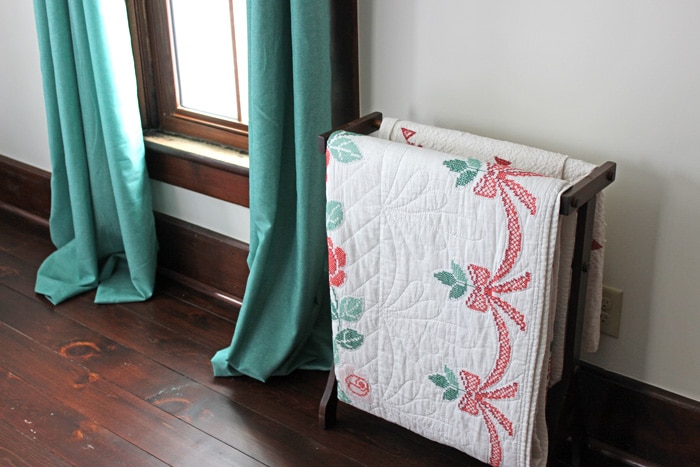
I put a quilt rack right next to the same window in the home, not even realizing that grandma had put hers there as well. As I was gathering pictures for this post, I stopped in my tracks knowing that I had put the quilt rack in the same exact spot as my grandma.
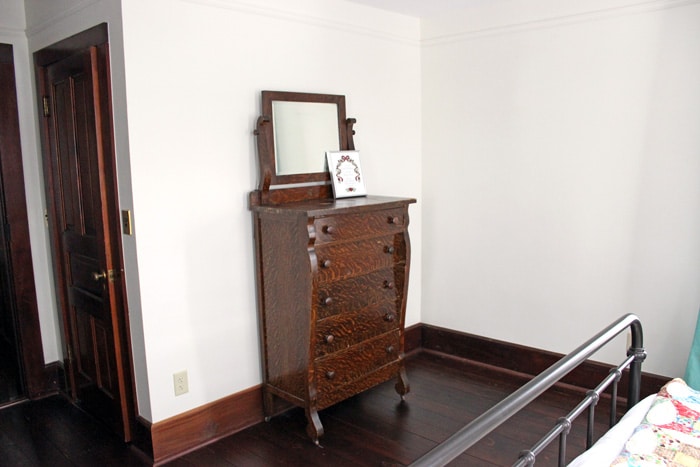
We also put the high boy dresser that was out in the hallway originally, in the bedroom. You can see the trim behind it is now high trim to match the rest of the house. To the left of the dresser is actually new trim and the right is the old trim. They did such a fine job matching it.
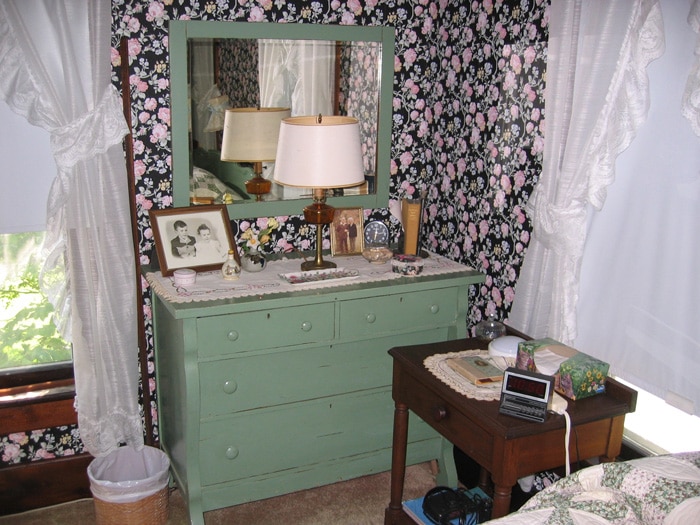
Grandma had antique end tables, and so do I.
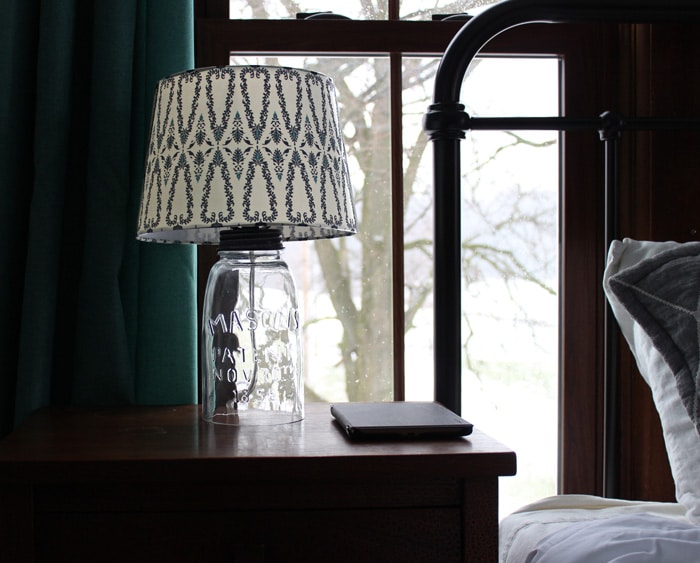
On my antique side tables (one of them original to the room) I found lamps to place. I didn’t know what I was going for, but stumbled onto these at World Market. I like that the light shines through them since the window is directly behind our bed. There’s no way to avoid it when you want a King bed in your old antique bedroom.
As I shared on instagram, we hung the painting my mom painted of the home when she was in high school above the bed. How special is that?
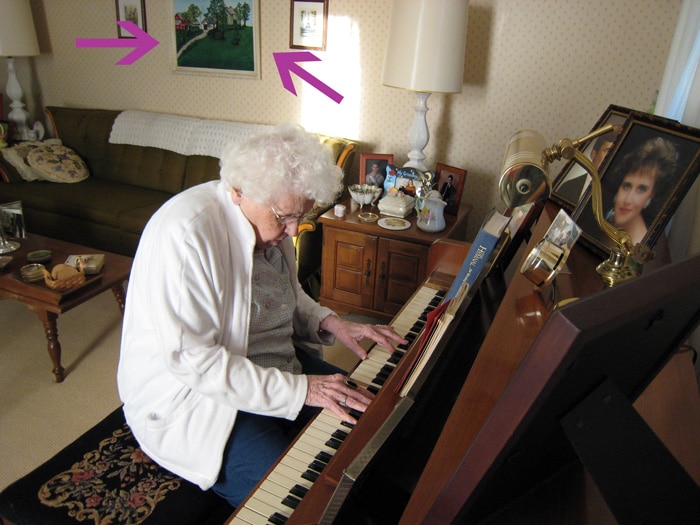
It’s just one more thing that reminds me of the home as it was. I love all the changes we’ve made for our family and the changes we needed to make to make the house last for the next generation. But as you can see above, we’ve taken pictures and mementos from the home and made sure they found their new place. My grandma loved to play the piano and decorate – so you can see the painting that my mom did above her couch. You can also find my mom’s glamour shot on the piano – she’s going to kill me that I pointed that out!


Comments & Reviews
The bedroom looks amazing, I love the colour of the curtains. I totally understand your pain with the wallpapers, the last time I tried to remove 4 layers of wallpapers on a wall I ended up calling a professional.
Doris, I wish we could have called a professional – unfortunately it wasn’t in the budget. The good news is, it’s done! 🙂
Lynette,
You resemble your mother quite beautifully! So many details in your home that I remember as a kid in my parents home that was my grandparents home. The original layer of wallpaper was also in my bedroom as a kid, the current bed is the same as my parents bed, the love of family heirloom quilts to display, the added closets and lack of up stairs heat except the hole in the floor. I recall telling my dad that my bed pillow was froze to the wall!!! I know I have a picture to prove it! Thanks for sharing your family and journey with us. You are doing an amazing job.
I love seeing your progress!