
Chocolate covered pretzels have been around for centuries. Perhaps you know the story…it has been said that sometime in the 16th century, a German bakery was next to a candy shop and a baker decided to drizzle some chocolate on his pretzel to create what I like to call the perfect matrimony of salty and sweet. The man was a genius. Little did he know that his creation would be ever so popular in the 21st century….You can find chocolate covered pretzels in the snack aisle of your local grocery, in the checkout line of sporting goods stores and on display at expensive chocolate shops in the mall. Centuries after their creation, chocolate covered pretzels are beloved by all kinds of people and from all walks of life.
More about Chocolate Covered Pretzels:
How to Melt The Chocolate In the Microwave To Make Chocolate Covered Pretzels
Valentine’s Day Chocolate Covered Pretzels
What you may not realize, however, is how incredibly innovative these salty and sweet treats can be. May I introduce to you the chocolate mold?
By simply adding a little chocolate mold to each chocolate coated pretzel, I discovered that you can take them to an entirely different rank in the world of sweets. Dare I say, regular becomes remarkable?
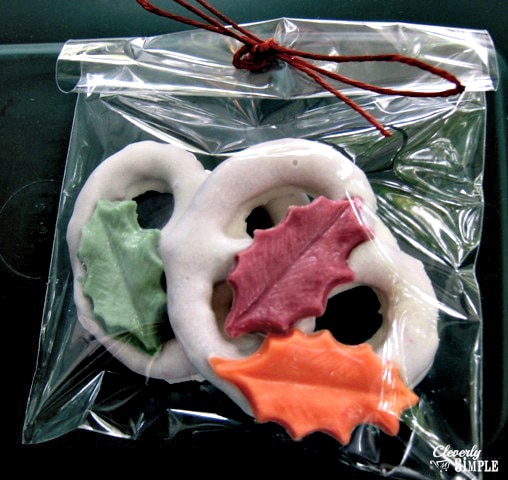
In 2007, I made these favors for an autumn wedding. Can you guess what the bride’s colors were? Avocado, Orange and Wine.
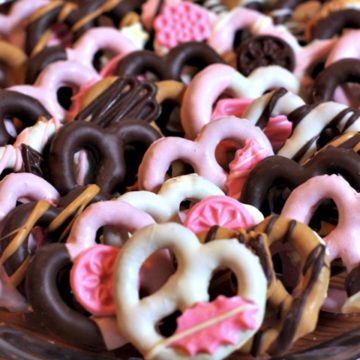
How about these….
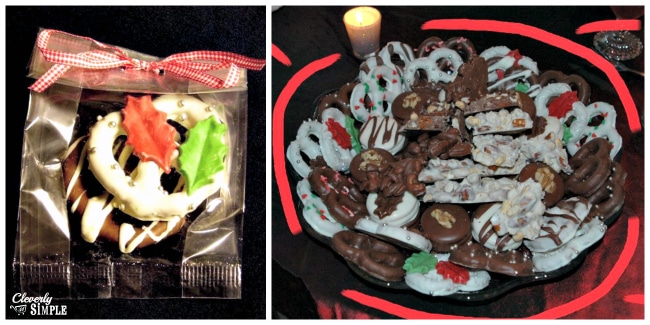
A couple years later, I made some giveaway bags for a work Christmas party and also included them on a dessert platter. They couldn’t have been easier!
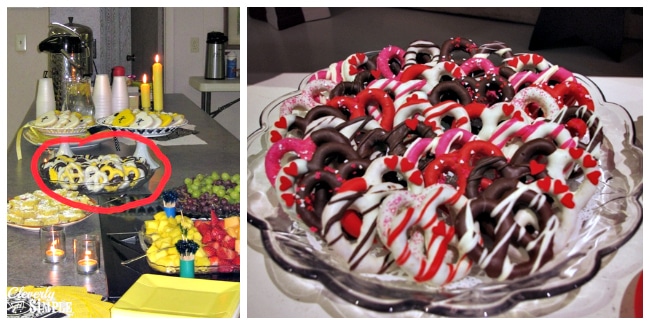
Wedding showers? No worries.
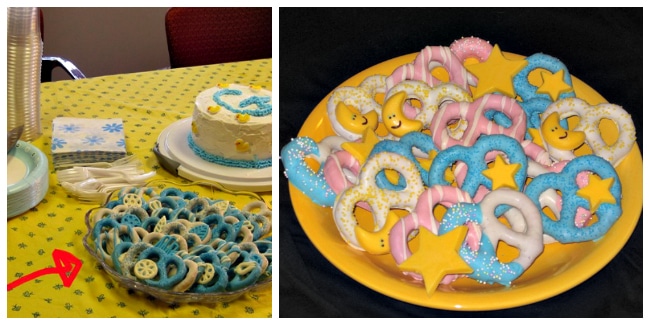
Baby Showers? Easy peasy.
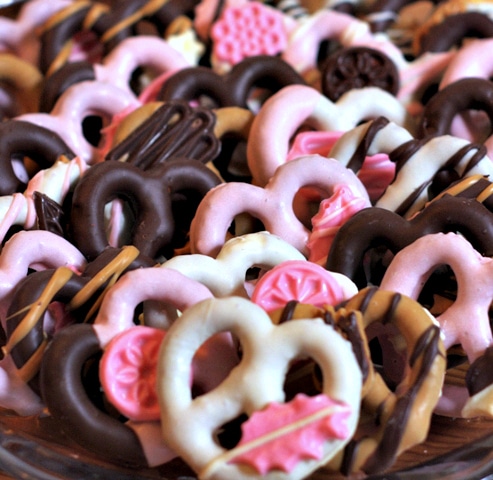
The sky is the limit when you use chocolate molds to decorate a pretzel. Recently, I was asked to make pretzels for a wedding rehearsal dinner of 70 guests. This time, the bride’s colors were blush pink and burlap brown. I welcomed the challenge!
Come on into my kitchen!
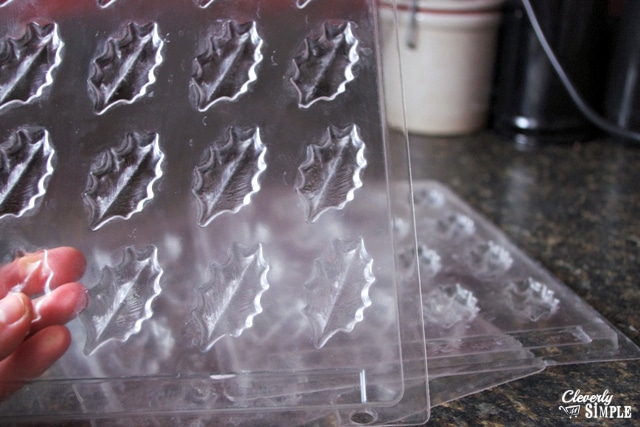
First, I got out my handy dandy plastic candy molds. You can find them at craft stores, bulk food stores and online. They are very affordable and last a lifetime. I’ve had these for years and I think I only paid $2 for each one. Keep in mind, if you stock up on several trays of the same design, you will be able to move quicker when doing a large platter.
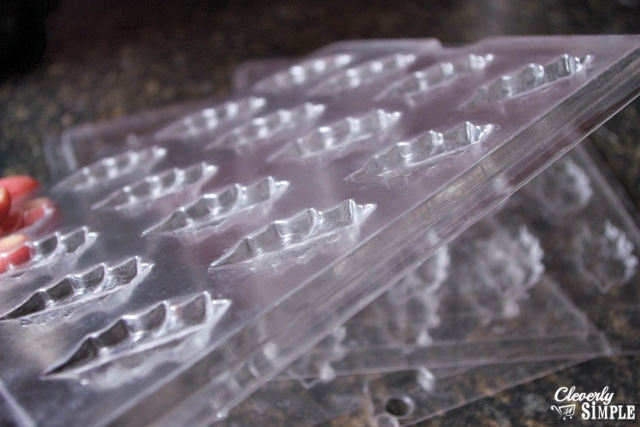
The only rule with candy molding is to make sure the imprint is both shallow and small (These leaves stretch 2 inches in length and stand ¼ inch in height). You don’t want the mold to overtake the pretzel and you certainly don’t want someone biting into a 1 inch high mold either.
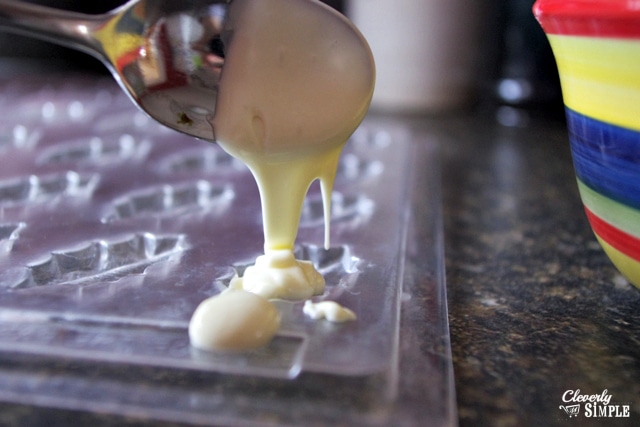
Let’s mold it, my friend! Melt your favorite candy coating chocolate in a microwave safe bowl and with a spoon, fill the molds with the chocolate.
Gently tap the molds on the counter. This will even eliminate any air bubbles and distribute the chocolate evenly.
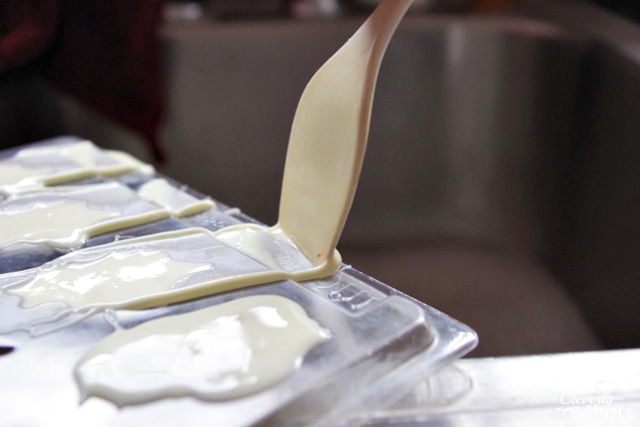
Now, using a small spatula, scrap off any excess chocolate as best you can so that the back of the molds are flush with the plastic.
Let the filled molds sit out on the counter until they are hardened, or for quick results, pop them in the fridge until hard. This shouldn’t take more than a couple of minutes. When hard, gently push in on the underside until they lift out. If you find the mold is cracking down the middle as you push in, they are not hard enough yet and still need a minute or two.
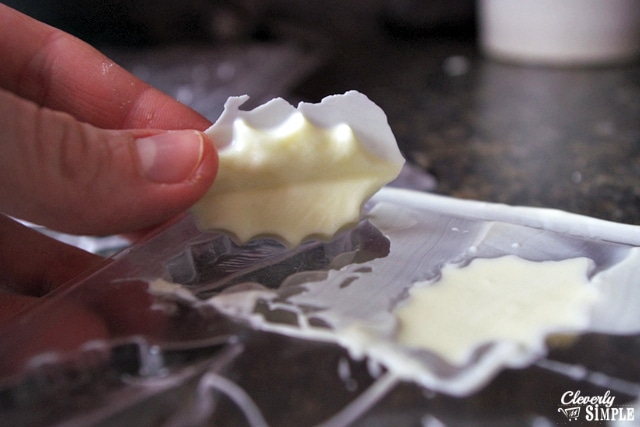
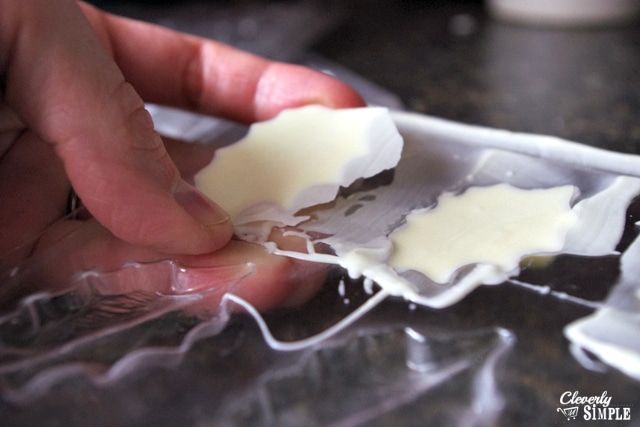
You can see here that the mold may have some unwanted chocolate on the edges after you lift it out…
Easy fix! Just use your fingers to break off the excess chocolate. This is easy to do because the excess chocolate is thin and brittle. Don’t worry, you won’t hurt the mold.
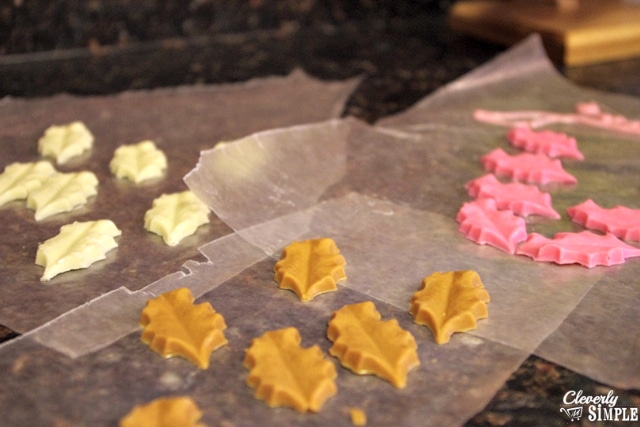
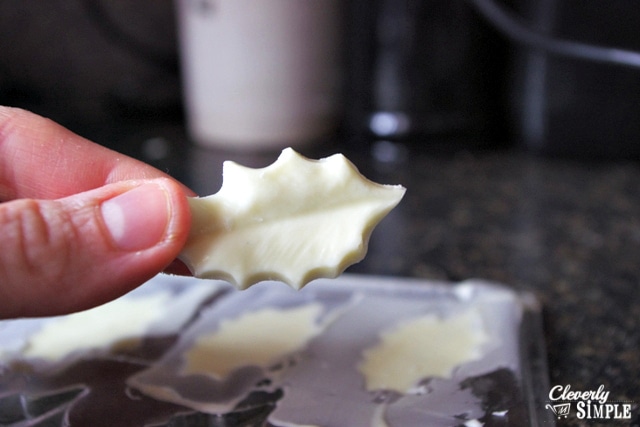
There you have it. Different colored leaf molds in very little time. When you are finished with all of your molding, you can keep them in an airtight container for a few days before making the actual pretzels. Or, set them aside on wax paper and keep going…
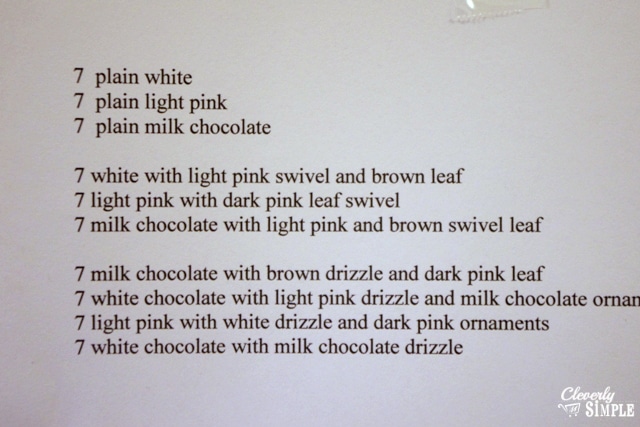
Come up with a plan for your final product. Good planning is essential when you are working with melted chocolate. Since I need to make 70 pretzels for the wedding rehearsal, I came up with a plan creating 10 different designs (7 each) and taped it onto the kitchen cabinet in front of me. Use the plan simply as a point of reference. You will see at the end that I ended up changing some of the designs as I went. That’s ok!
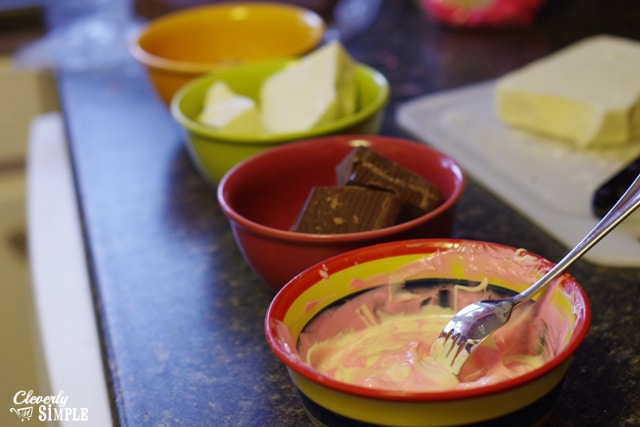
After you’ve got a good plan, set up your assembly line of melted chocolate for the pretzels. You can make this basic with just one color of chocolate or more advanced with multiple colors.
Now, a quick lesson on color…Since the wedding colors included blush pink, I combined white chocolate with hot pink chocolate to get the right shade of pink for my molds.
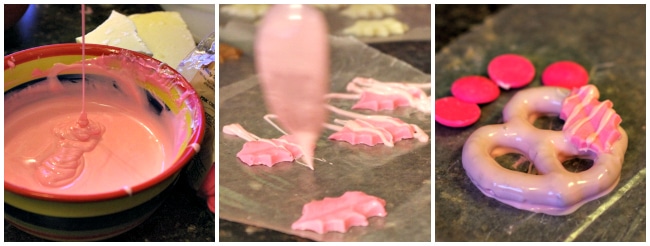
After I made the molds, I took it a step further and added more white chocolate to the mix to get an even lighter pink, drizzling that on top of the hardened molds. This may be much more than you want to do, but I just wanted to show you how easy it is to create color variation in your chocolate!
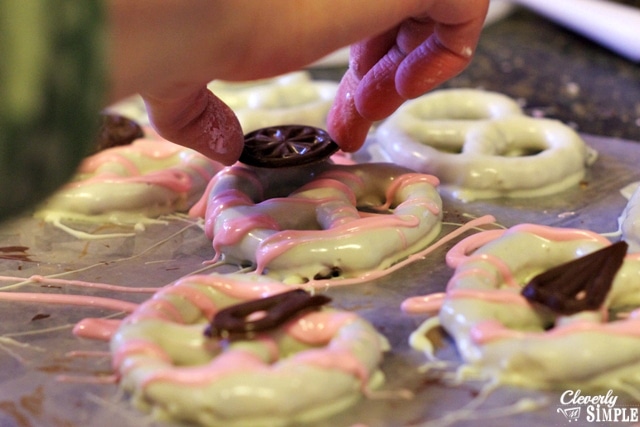
How do you add the mold to the pretzel, you say? Very, very simple. Right after dipping your pretzel in chocolate and placing it on wax paper, position the hard mold on top. The wet chocolate from the pretzel will act as glue between the mold and pretzel.
Here is another shot of the assembling. If you are working with different colors, you may find that a color gets too cool and begins to harden. No problem. You can reheat it in the microwave at 10 sec. intervals until it is liquefied again.
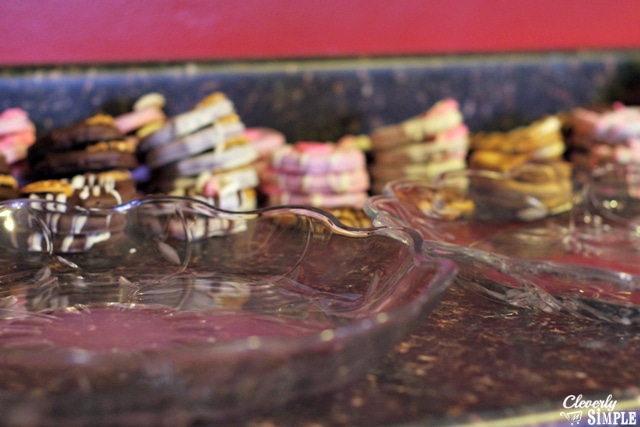
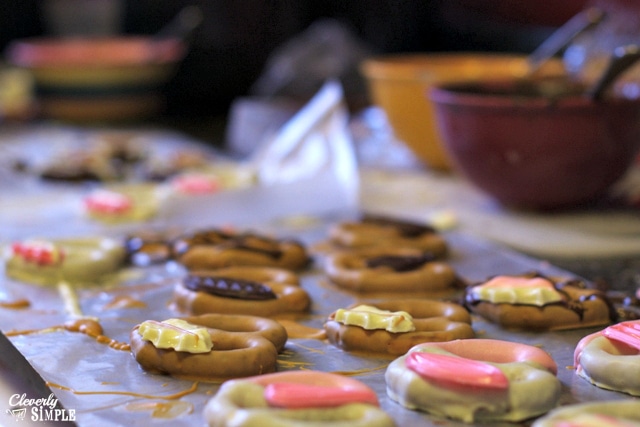
When the pretzels are completely hardened, place them in stacks of similar design to keep them organized. This will make it easy when it comes time to plate!
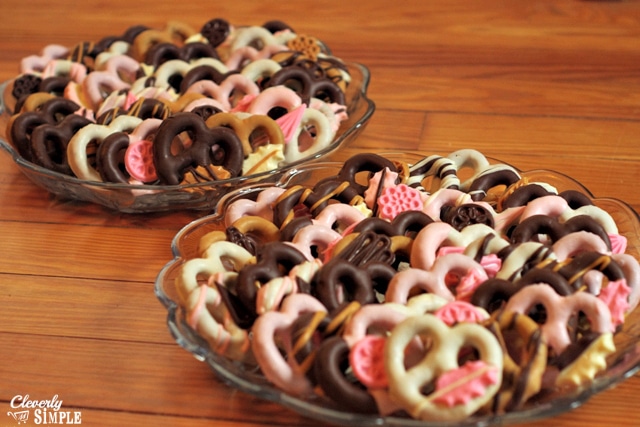
From start to finish (including cleanup), I made these pretzels in less than 3 hours. If I had kept to a more basic plan with just a couple of designs and colors, it would have taken less time….but oh how much fun I had!
Oh yes, and everybody at the rehearsal dinner LOVED them 😉
Enjoy!!
More about Chocolate Covered Pretzels:
How to Melt The Chocolate In the Microwave To Make Chocolate Covered Pretzels
Valentine’s Day Chocolate Covered Pretzels
How to Make Chocolate Covered Pretzels Fancy
Ingredients
- 1 lb melting chocolate
- 16 Snyder’s Old Tyme/Homestyle pretzels
Instructions
- Melt your favorite candy coating chocolate in a microwave safe bowl and with a spoon, fill the molds with the chocolate.
- Gently tap the molds on the counter.
- Using a small spatula, scrap off any excess chocolate as best you can so that the back of the molds are flush with the plastic.
- Let the filled molds sit out on the counter until they are hardened, or for quick results, pop them in the fridge until hard.
- When hard, gently push in on the underside until they lift out.
- Use your fingers to break off the excess chocolate around the mold and set aside.
- Plan your designs and set up your bowl(s) of melted chocolate for the pretzels.
- One at a time, dip a pretzel in chocolate and place it on wax paper.
- Immediately position the hardened mold on top of the wet pretzel.
- When all the pretzels are completely hardened, display them on a platter!


Comments & Reviews
Thanks, Alyssa! I like to use a regular dinner fork… one that has long prongs. Dip it into the chocolate and zig zag back across the pretzel. Hope that helps!
These look awesome. What is the best way to get an even drizzle on the pretzels? I always struggle with the drizzle!
Thanks!