Ikea Dressers Hack
I’m so excited to share with you the newest addition to our guest room. I was able to transform an Ikea Rast Dresser into something I’m super proud of. With just a little paint, new hardware, fabric and a piece of wood – this dresser is now a new bed side table that’s perfect for guests. They’ll now have storage if they need it, but also some room to place items that they need.
Are you ready to see how to make a shelf within one of the Rast Ikea Dressers?
(Get ready for some picture overload.) 🙂

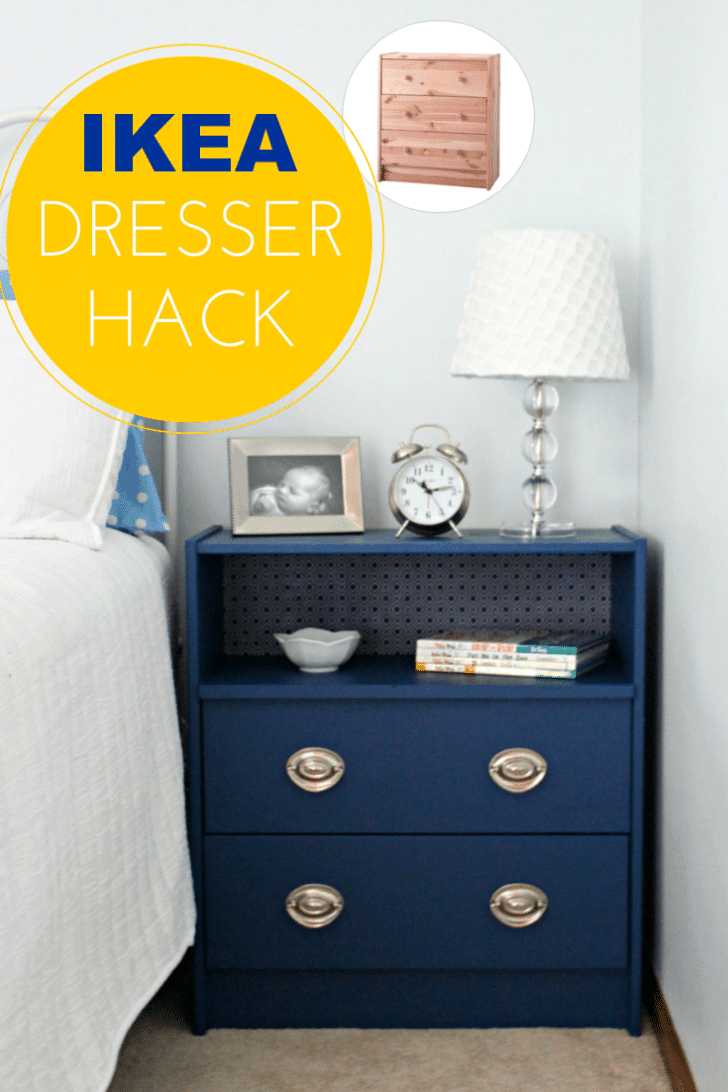
In addition to an Ikea Rast dresser, you will need to purchase a piece of wood for the shelf. This shelf is going to replace one of the drawers so that you’ll have space to display items. I purchased this piece of spruce wood from Menards. It was the perfect width of 12 inches. The length was about twice too long so we measured and had the length cut down to fit the Ikea dressers. Menards cut it for us which was nice since we don’t own any cutting tools.
The first things you’ll want to do is to put the Ikea Rast Dresser together by using the directions. To make things easier for yourself, make sure to leave the back piece of wood off the dresser. Attach the wood shelf by drilling screws into the sides. This is a two person job to make sure it’s level and straight and will line up with the dresser drawers. To be honest, my dad and husband tackled this job for me. 🙂
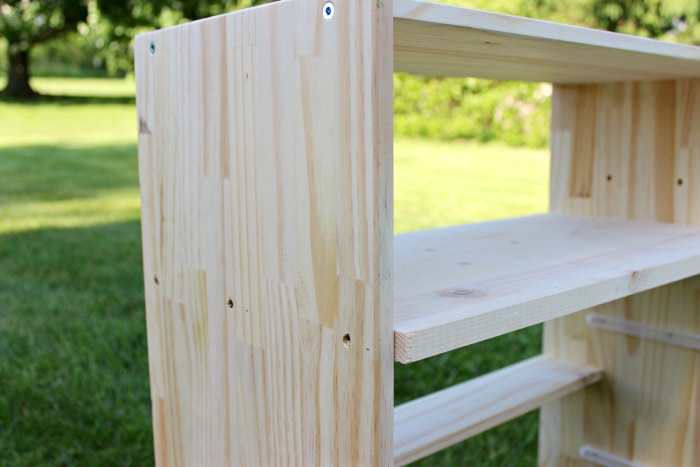
To make my life easier, my dad and husband also drilled new holes for the Hickory Hardware I had picked out for this project. It was much easier to do it before I painted. Be sure to measure, if you have to drill two holes for your hardware. I also found that the holes that were pre-drilled were not centered. The two holes above with arrows show the new holes I drilled for the hardware. See how off-center they look? They’re not. They’re perfect – it’s the Ikea holes that were not measured correctly.

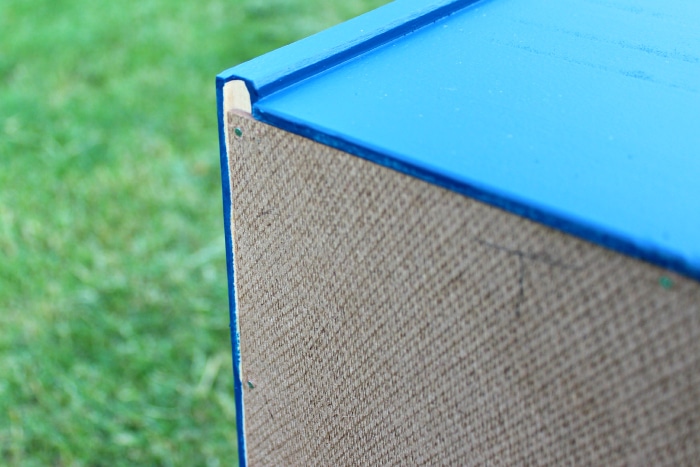
I decided to use Pittsburgh Paints, also found at Menards. They have paint and primer in one. Since I was in the midst of painting my kitchen cabinets, I did not want to add anything to this project I didn’t have to. No primer! (It also makes it cheaper.) I bought a quart in a deep blue that matches the curtains in the room. I decided to go with a Satin finish since most online searches revealed that satin was a good decision for dressers.
Menards is also carrying the Trim, Door and Furniture interior and exterior paint by Pittsburgh paints. I missed that when shopping for this project. Have you tried it yet?

Here it is all painted! I decided to put three coats on. Two was really enough but with two young boys, I wanted to make sure. I also had a quart of paint that I wanted to use up. However, I still had some left even with the three coats. (By the way, I only really painted what you would see. I didn’t painted inside the drawers. Why?!
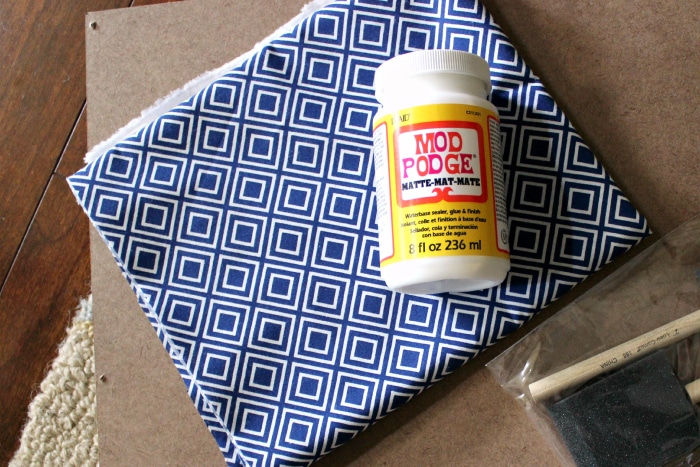
While the last coat was drying I grabbed some fabric I had picked out, and got ready to mod podge it to the Ikea supplied back. This is the reason it’s SO MUCH EASIER to do this before you nail it into the back of the dresser. I know from experience. Do you see the nail holes in the picture above. I made my hubby take it off after he had already nailed it. Thanks, dear!
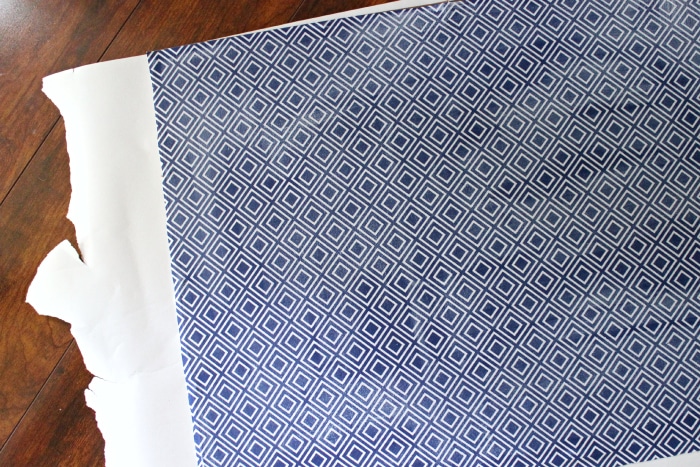
To make the fabric stick, I painted a thin layer of Mod Podge to the wood backing. I then laid the fabric flat and flattened and straightened it by hand. You’ll need to do this step quickly as it dries fast. I then put a thin layer of Mod Podge on the top. It will look streaky and white as you can see in the picture above. Don’t worry, as it will dry clear! Let it dry.
Once the fabric is secure, you can then nail the backing onto the dresser. The nails go in really easily and I loved how tightly the backing fit.
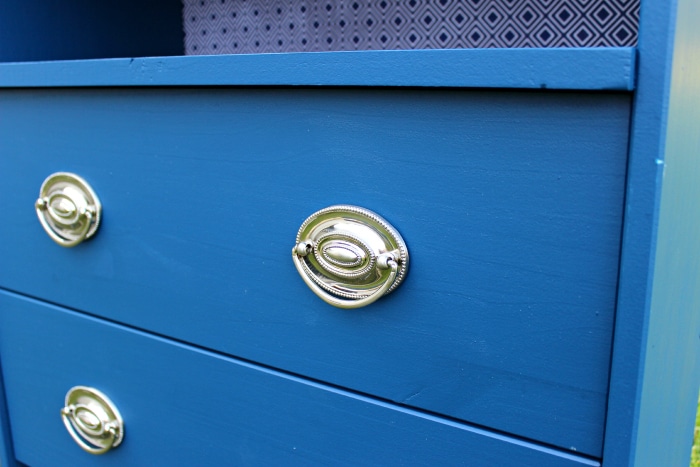
The last step was the hardware! I just love these knobs. I picked them out from Hickory Hardware and I think they “pop” with the deep blue background. They are a brilliant silver. (They have a green sheen in the picture because of the outside grass where I was assembling everything. What do you think?
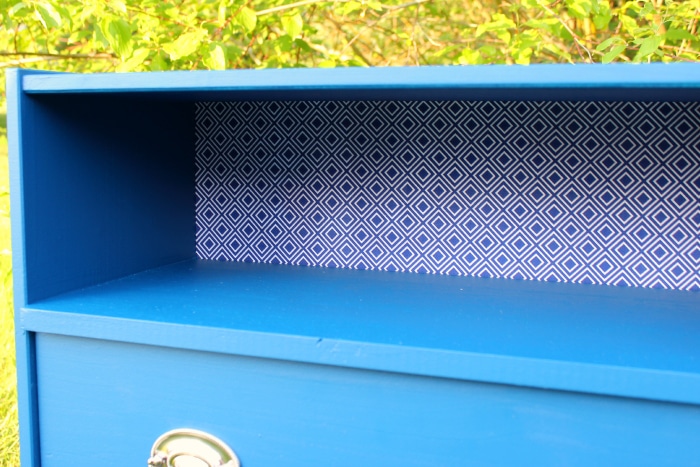
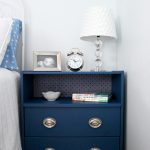
I just love the deep blue of the dresser with the background. The blue looks a little bit of cobalt here with the lighting. It’s really more of a deep navy color.

Here’s the shelf with all the accessories in our guest room! I decided to add some books because my oldest son spends a few hours in the afternoon reading while his younger brother naps each day. It’s his quiet time. I also added a small bowl that I found so that guests had a place to put their rings or earrings while traveling. The clock, I just absolutely love. And there’s my oldest as a baby pictured there.
Drum roll…
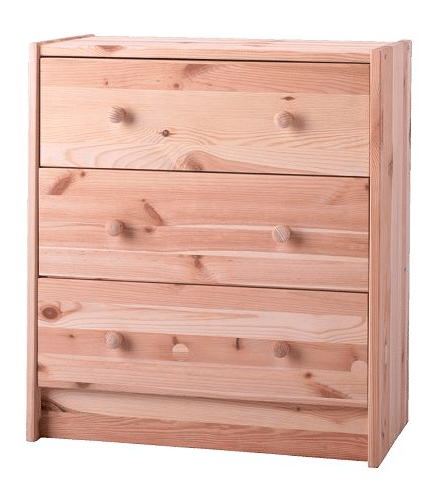
Here’s the before picture of the Ikea Dressers….
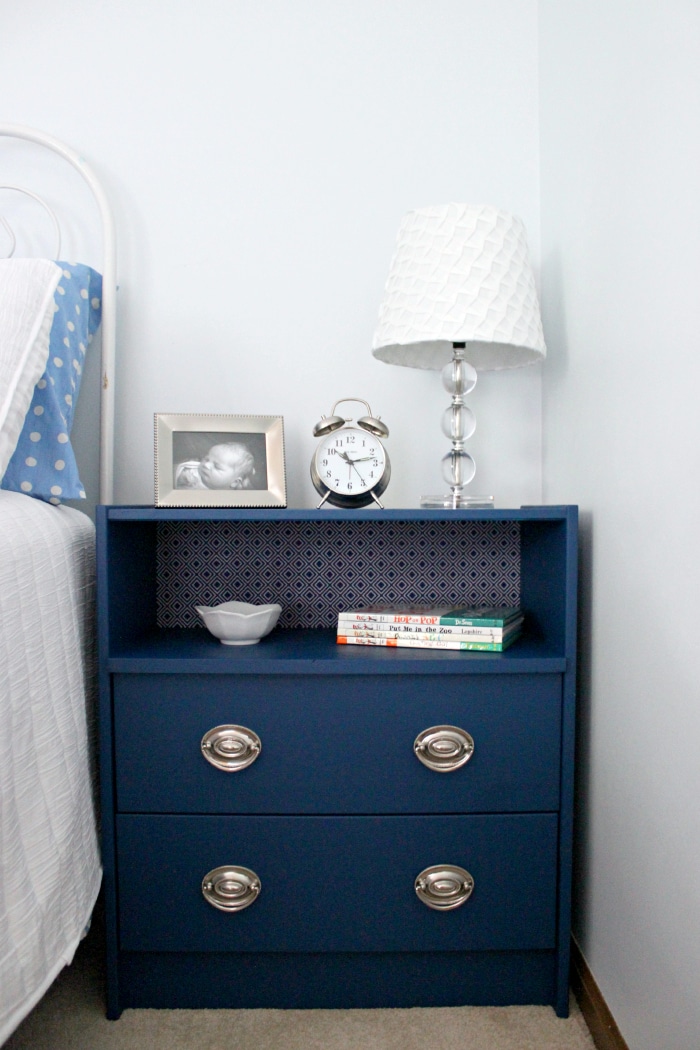
Here’s the final look! I think it looks completely different than the original. It’s amazing what a little paint and hardware with some creativity will do!
What do you think? Have you ever “hacked” one of the Ikea Dressers?


Comments & Reviews
Hey Lynette! I love your dresser. I was trying to find pulls like yours. Do you have a link to these pulls. I scoured the Hickory Hardware website and cant find them anywhere!
Hi Haley! I don’t think they carry them anymore. After a little research, it looks like they are called Hepplewhite Drawer Pulls. I found some around the internet. This company has them. I’ve ordered from them before, and they always have great quality. I don’t see them in silver, though. I found them in silver here. I’ve never heard of this company, so I can’t attest to the quality, but they are cheaper and they are silver.
Love the project! What is the name of the navy blue color paint you used?
Hi! Well, that would have been helpful if I had listed that, right?! I can’t remember the color and I no longer have the paint can. So sorry! I just hopped over to look at Pittsburgh Paints and it looks similar to the Port Au Prince, Rave Regatta or Suddenly Sapphire.
What did you do with the extra pics of wood?
looks beautiful
I really love this. Has anyone tried this? Would I install the shelf in exactly where the first drawer would sit on the brackets?
I was wondering – would it have been possible to use the drawer front for the third drawer as the shelf instead of buying a new piece of wood?
Hi Katherine, I’m not sure it’s the right size. If it measures correctly, then yes. If not, then it wouldn’t work.
This blog is really cool. I have bookmarked it. Do you allow guest posting on your
site ? I can provide high quality posts for you. Let me know.
Very nicely done! Looks fantastic and “high-end”Being Swedish, love IKEA hacks, there are many great ones out there!
Nice job! I’m trying to determine which blue you used, Brilliant Blue, Stunning Sapphire or maybe Blue Tang? I saw another user also interested in the color but didn’t see it posted. Now if Menards would just come to California ? Thanks
What color navy Pittsburgh Paints did you use?