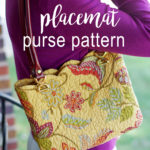
Make a unique placemat into a stylish purse from this simple DIY pattern.
Most every woman I know carries a purse around. Mine is filled with keys, shopping cards, receipts, lipstick and coupons. The modern purse came about during the Industrial Revolution when so many women traveled by railway. Their practicality to carry things from a far distance overruled their looks. Today, it seems a pretty purse around our shoulder becomes part of our outfit; a way to look put together…and who says we can’t have it both ways? In the busy 21st century, nothing prettier could be more practical.
Today, I’m going to show you how to make an inexpensive purse from a placemat…. yep, a placemat. I love to make creations from quilted placemats. You won’t find one on our dining table, but you’ll see them strewn about my sewing room. Last spring on Cleverly Simple, we created a fun placemat organizer for special keepsake items. Today’s purse is washable, has a pocket for your Smartphone and nobody will ever guess it is made from a placemat!
Are you ready to make a Placemat Purse with me?
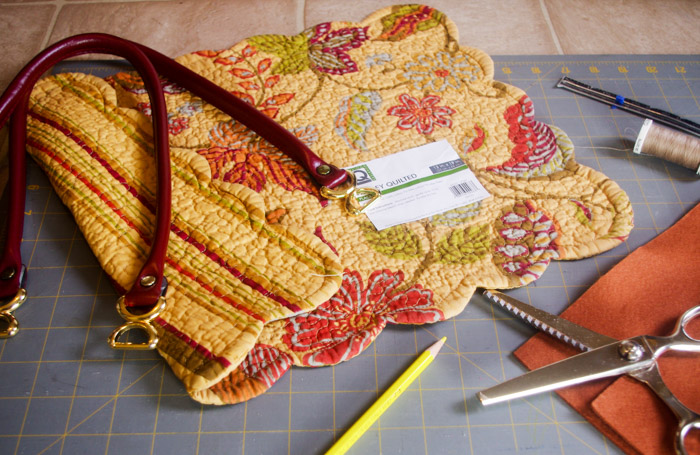
Reversible quilted placemats come in an array of beautiful patterns. Some of them remind me of Miss Vera! The autumn design I am using today retails for 9 dollars on Amazon, but if you can find one at garage sales or thrift stores, even better! Since every purse needs to be carried, I purchased a pair of 25″ faux leather handles for less than 6 dollars on Amazon. The other supplies you will need include a ruler, marking tool, needle and thread, pinking shears and your handy dandy sewing machine.
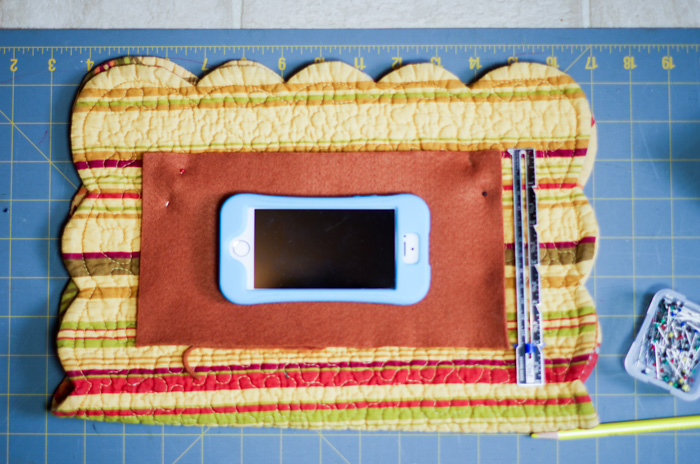
To begin creating your purse, fold your placemat wrong side out “hamburger style” until the edges match. Next, make a cut from a standard 9×12 inch piece of felt for your pocket. Felt is perfect for this because it’s lightweight and doesn’t fray. The size of your pocket will depend on the size of your phone. For my IPhone 5, I cut off 5 inches from the length of 12 inches, but kept the width of 9 inches. Don’t worry if the pocket seems too big. We will make an adjustment.
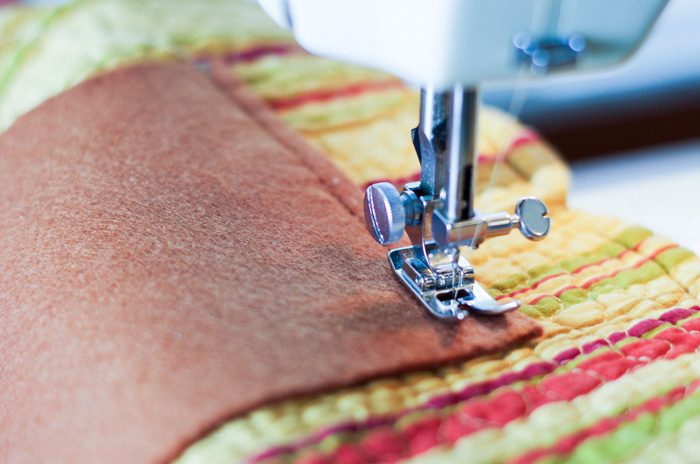
Using an all purpose foot, sew down the sides and bottom of your pocket, creating a standard 1/4 inch seam allowance.
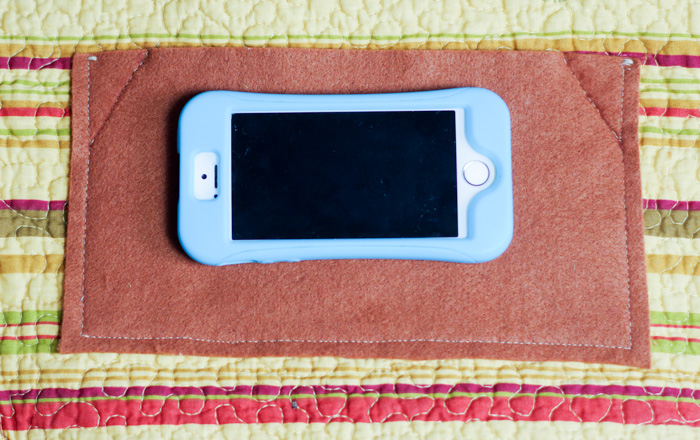
To make my phone fit more snug into the pocket, I sewed a diagonal line from the side seam to the top of the pocket. Here I marked 1 1/2 inches down each side seam and I marked 1 inch in along the top. I connected the markings with stitches. By doing this, I have a nice size pocket, but a smaller opening at the top to keep my phone more secure. If you prefer a pocket that closes, you can add velcro or snaps to the top.
We are now ready to sew up the sides of our placemat. Starting at the top opening, make several markings 5/8 inch from one side edge and down until you get to 1 1/4 inches from the bottom fold. Draw a line connecting your 5/8 inch markings. Next, make a second mark at the bottom fold, 2 inches in from the side edge. Draw a line connecting the bottom most 5/8 inch to this second mark. You are making a diagonal line that will help shape our purse so it’s not so boxy.
Repeat these same markings and lines with the opposite side.
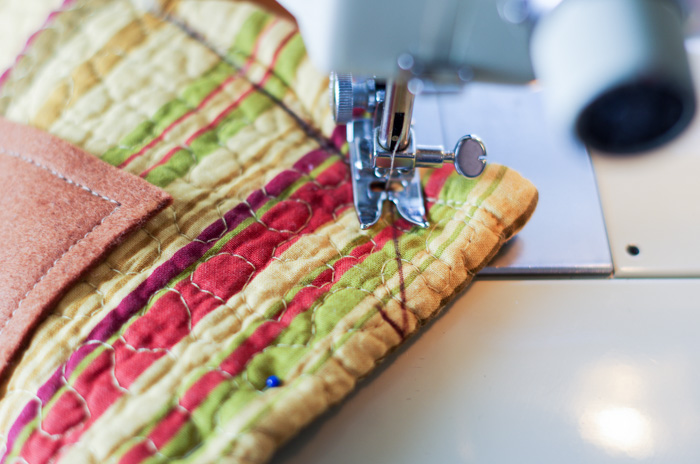
Sew both sides, pivoting your sewing foot when you get to the bottom angle. Be sure to backstitch at the beginning and end of your lines to secure them.
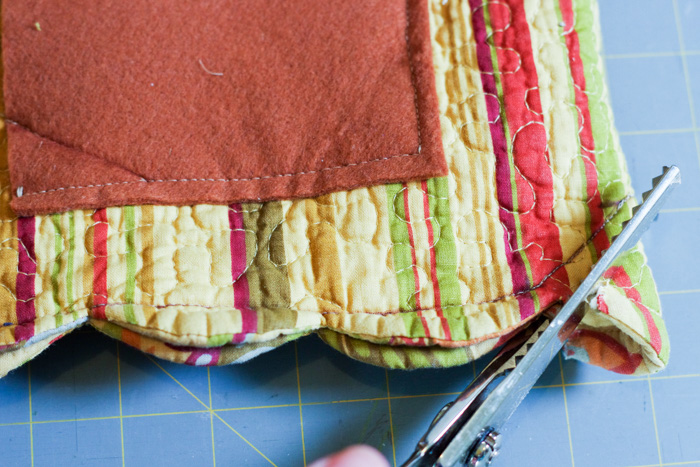
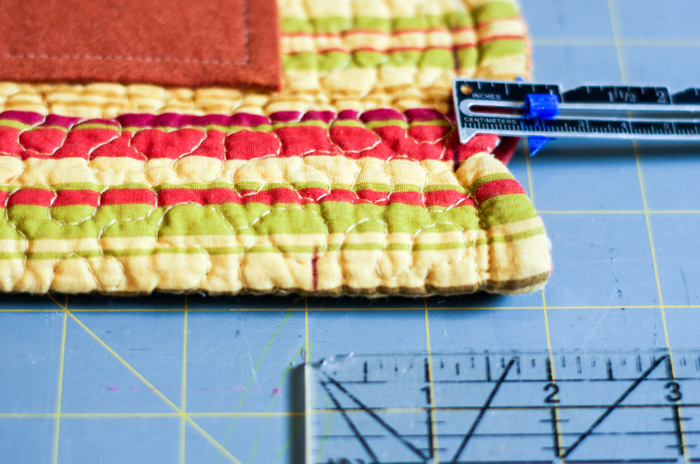
After turning our purse right side out, the bottom corners will be quite bulky. To fix this, use pinking shears to cut them down.
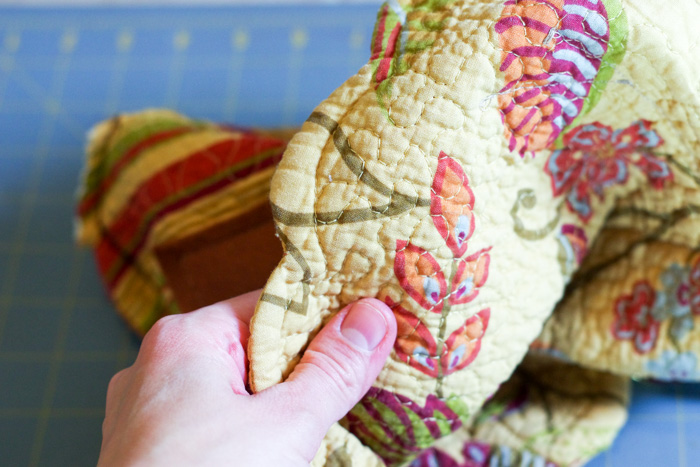
Turn your purse right side out and enjoy your work! Be sure to push out all the seams with your fingers.
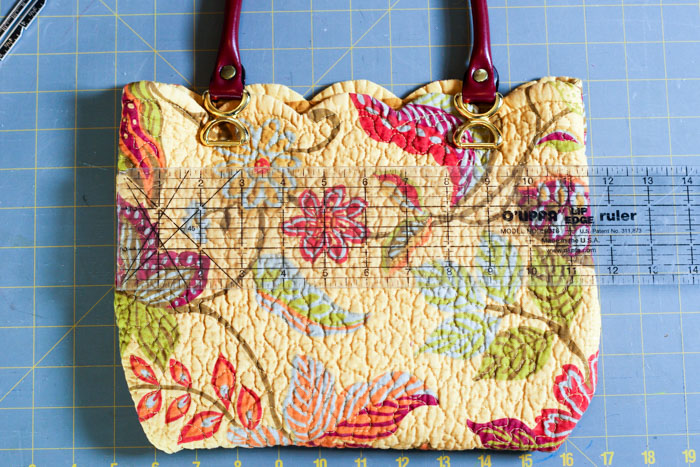
Almost finished! What’s a purse without handles, right? I like the purse to cup around my shoulders so I’m using 25 inch handles. But do what you like! Before attaching them, I measured the total width across our purse to find our halfway points for even spacing.
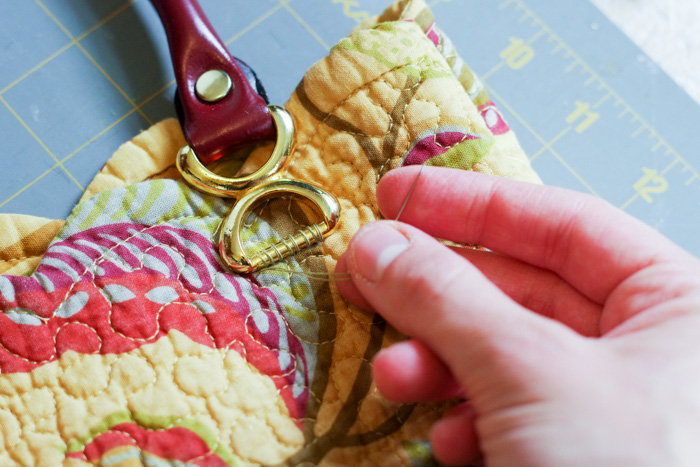
Using doubled up heavy duty thread, hand sew your handles onto the outside of the purse.
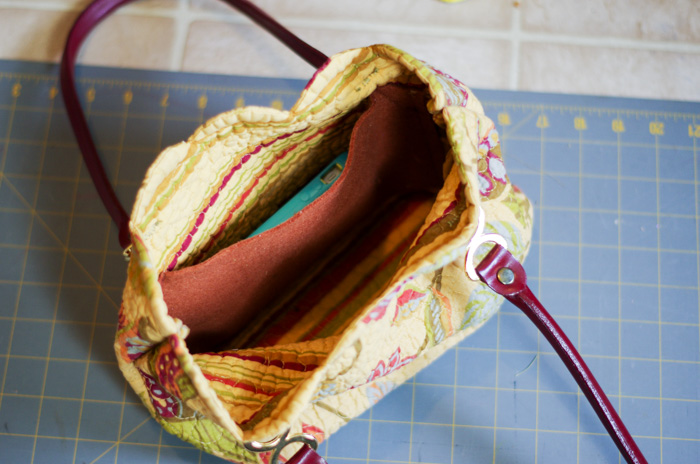
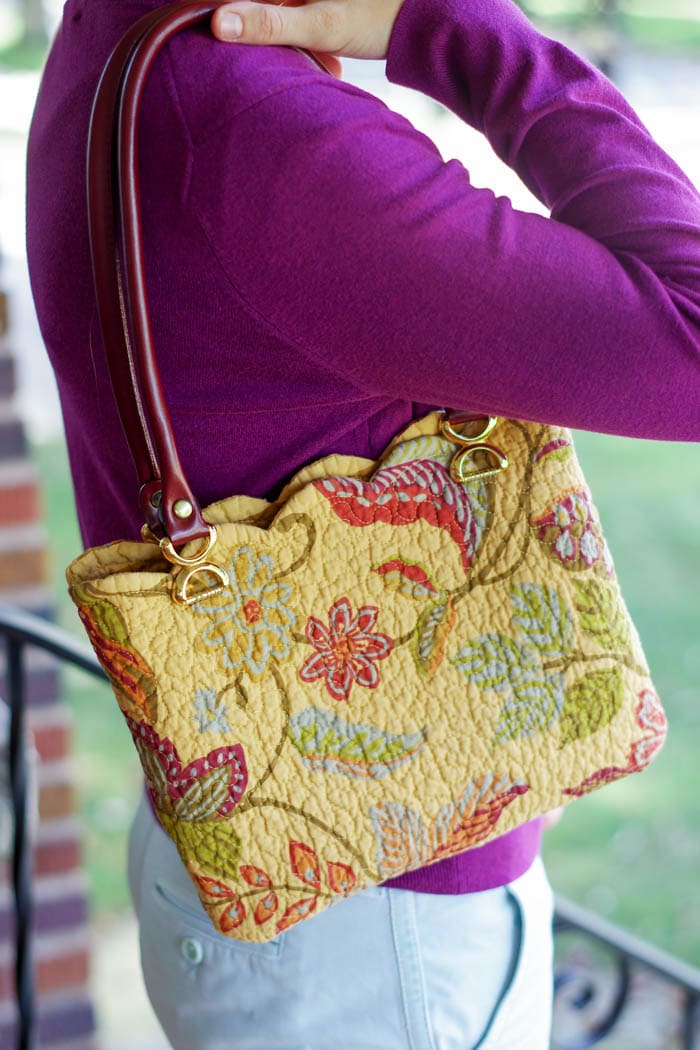
Here is an “aerial” shot of our finished creation 🙂 Our phone fits snuggly inside our pocket and there is plenty of room for those keys, shopping cards, receipts, lipstick and coupons.
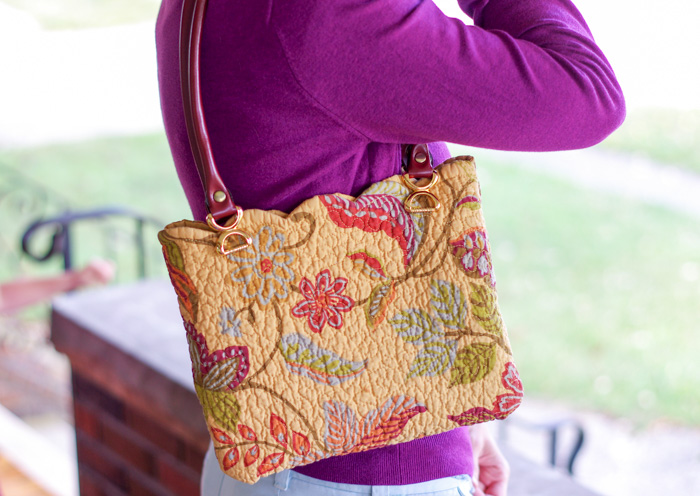
A beautiful and practical purse made from a placemat. Your secret is safe with me! Now go fill it up and live life to the fullest.
Enjoy!


Comments & Reviews
Hello, I just ran across your tutorial and love the placemat purse. Would love to have the printed instructions to make this. Can you make your own handles to attach as well?
Thank you in advance for your help.
Hi Mabel!
I’m sorry I don’t have the printed instructions for you at this time, but I’m so glad you like it! You can certainly make your own handles. I found mine at a craft store for less than $5.
Happy sewing!
Is there a no sew way to do this? And where did you get the handles?
You can find that same place at at Wal-Mart for under $4 dollars.
Just want to tell you that you have done by far a superior job with design, as well as explanation and photos, than any of the other placemat purse patterns I have found searching online. Thank you for providing this!
Thank you for your kind works, Joyce! ☺️
Hi Lynette,
I sew and this placemat purse is really cute! I would like the instructions please. If you could email them to me that would be great!
Thanks and have a great week!
Hi Corazon!
I just emailed you the text from the post, which includes the instructions, but not the pictures. Hope that helps!!
Meredith 🙂
Hi, i have never sent a msg to anyone that had something i liked on pinterest. I hope this works. I really like your placemat purse. Is there a way to print out the info. And instructions with the pics? There are so many ads included ans if they have to be on there that is ok. I am not seeing anything that says print. Thank you for your help. March 13, 2019
Hi Karen!
I just emailed you the instructions (without pictures or ads). If you can print the email, you should be good to go! Let me know if you need anything else 🙂
I’m reviewing items I had saved on my IPad! You may or may not receive this but hope you do! Is it possible for you to email the instructions for making handbags from placemats? I am cleaning out my hall closet & just found a number of new/unused placemats. I apparently lost the instructions I had. Your help/assistance will be greatly appreciated! Tnanks!
I have a beautiful Placem at with scalloped
edges .It appears your was scalloped also. Did you cut the scallop off the sides?
Hi Sharon!
Yes, my placement had scalloped edges. I did not cut them off, but left them as is. Thought it looked prettier that way! 🙂
Is there a way to stiffen the top edge with metal or plastic so that it doesn’t collapse together when hanging by the handles?
Hi Diann!
The only simple way to make the top stiff enough to not collapse would be to use a fabric stiffener. I like the brand “Stiffy” – You brush on the liquid and let it set. The purse will then become somewhat hard and stay open. Otherwise, you could insert a wire around the top through holes at the end of each long side. Close up the holes after the wire has been inserted. That would be more complicated of a fix, but could work! Hope that helps 🙂
I love this idea.. very creative
Thank you Cheryl!
Placemats are oh so fun!