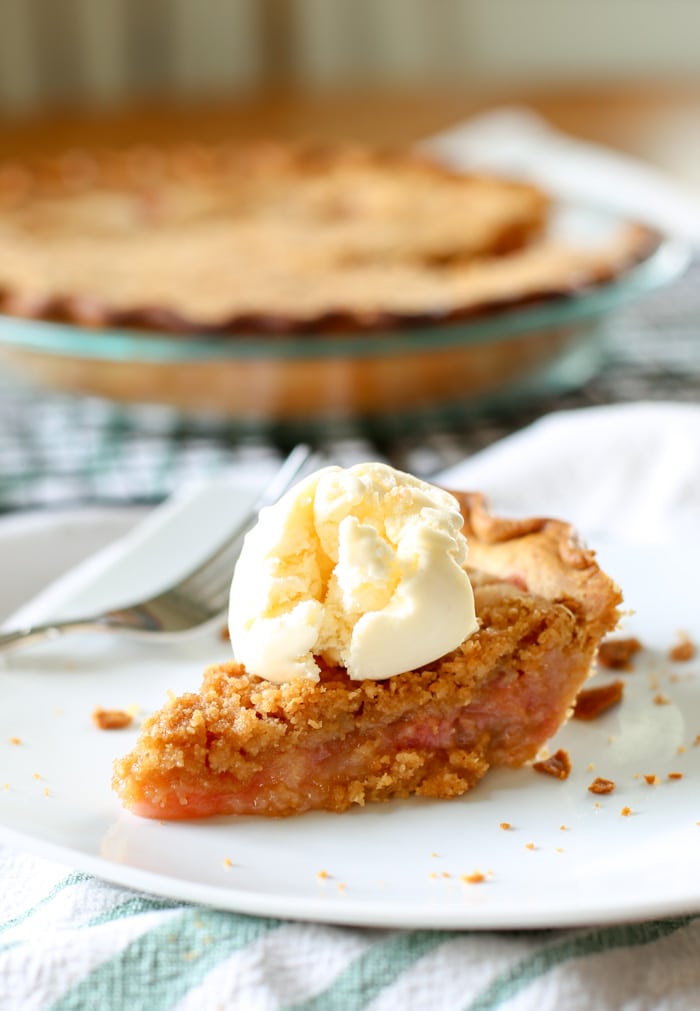
The tartness of rhubarb with a sweet pie filling and topped with a brown sugar crumb crust. The perfect combination of tartness and sweetness in a rhubarb pie!
If you have friends who grow rhubarb, then you know it’s a good time to make a rhubarb pie. This time of year, people are giving it away! Rhubarb isn’t something I’ve always been a fan of, but once you find a good recipe like this, you understand the love of this vegetable. It’s not something I would bite into like a stalk of celery, but in my opinion it has the perfect tartness to go into a baked good … like this pie!
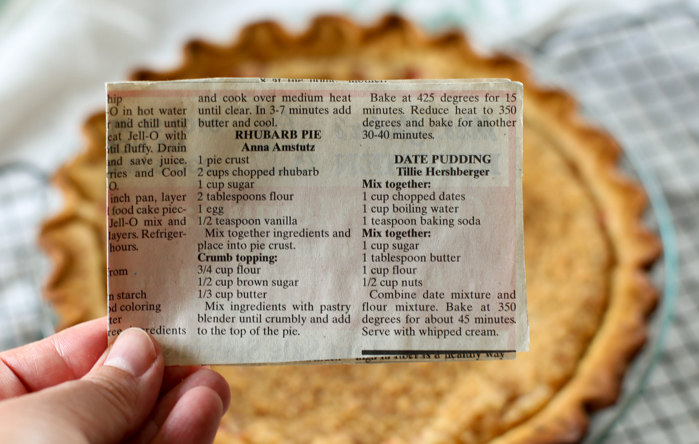
This recipe I found in my grandma’s recipe box (like her nut bread) as a newspaper article. I like these kinds of recipes because not only did my grandma find it was a good enough recipe to not only cut out, but to keep. But anyone knows that if you’re going to submit your recipe to the newspaper and put your name on it, it’s going to be your best. Thank you Anna Amstutz, whoever you are.
Since rhubarb is not super common, here’s a few answers to the questions you might have about this tart celery-like vegetable you’re about to make a pie with.
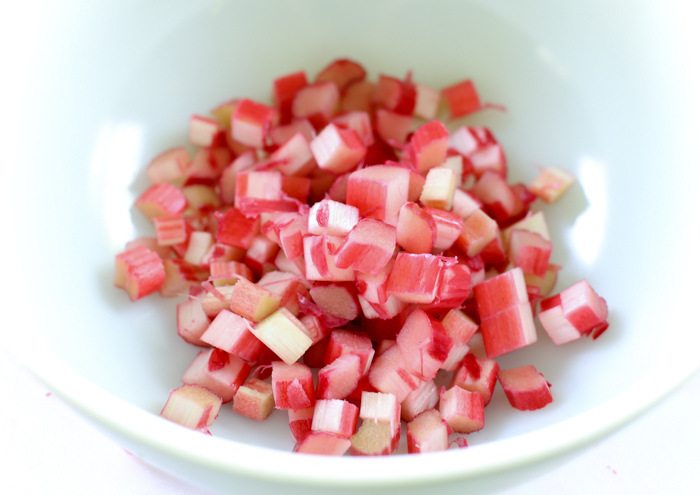
Table of Contents
Where do you find Rhubarb?
The first step to a rhubarb pie is to find good rhubarb. Well, if your neighbors have this perennial vegetable, you’ll know about it. You can also find it at certain grocery stores. I found that not all sell it, but in season some do. I found mine at an Amish bakery who also sells in season produce.
Want to save this recipe?
Enter your email & I'll send it to your inbox. Plus, get great new recipes from me every week!
Do You Have To Peel Rhubarb?
No. The baking temperature breaks down the rhubarb so that no peeling is required. And thank goodness for that!
What Does Rhubarb Taste Like?
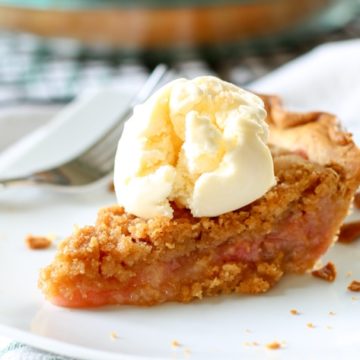
It’s tart. It’s perfectly paired with a lot of sugar or with a sweeter fruit like strawberries. For this rhubarb pie, the crumbly crust paired with the sweetness of the pie filling, balance the tartness quite perfectly.
Now, let’s make some pie!
Rhubarb Pie Filling
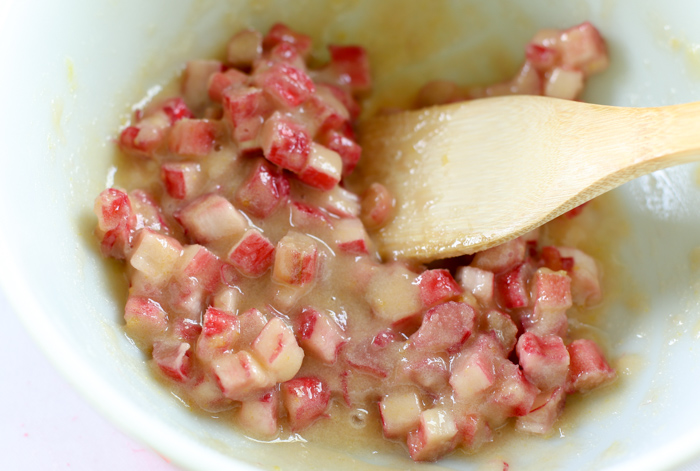
The first step to this recipe is to cut your rhubarb lengthwise and then again into small pieces. The filling in this pie, is super easy! Combine the chopped rhubarb, sugar, flour, egg and vanilla and mix until well incorporated.
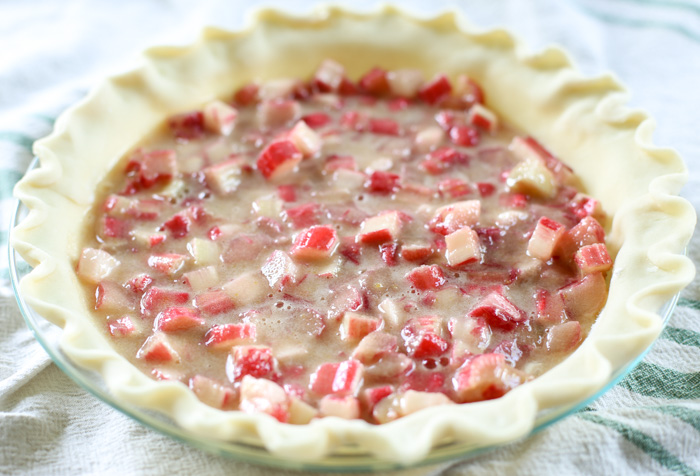
The pie crust can be homemade, like my go-to pie crust recipe here. However, you can also buy a pie crust at the store and go from there.
Before I add the filling to the pie crust, I do like to sprinkle a little bit of flour on the bottom. My great-grandma always did, and therefore so do I. It works, so I don’t question it.
Rhubarb Pie Crumble Top
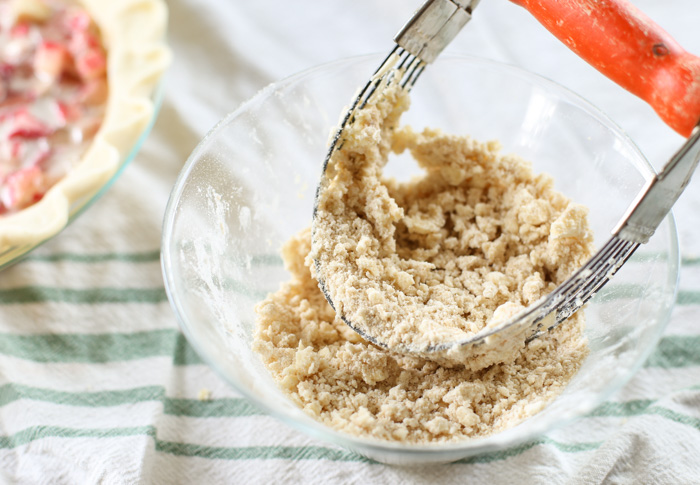
Equally as easy, is the crumble topping of this rhubarb pie. Combine flour, brown sugar and butter. Cut in the flour using a pastry blender until it’s crumbly.
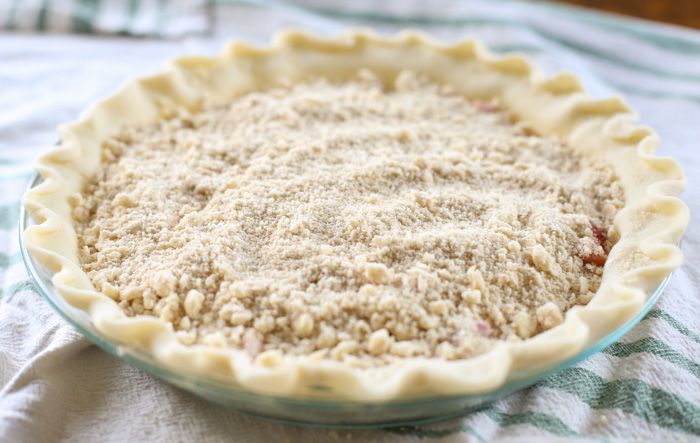
Easy! Just add your crumbles to the top of the pie filling.
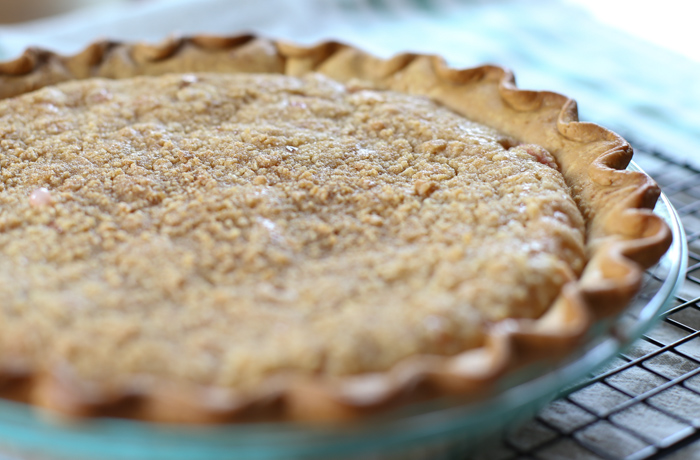
Bake at 425° F for 15 minutes. Reduce the heat to 350° F for another 30 minutes or until you see the rhubarb starting to bubble.

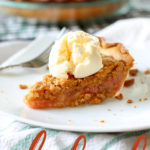
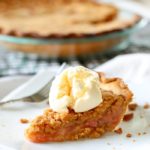
And that’s it! This pie is super easy to make, and makes you feel like a super star using a fresh in-season ingredient. Enjoy with a big scoop of vanilla ice cream!
How to Make Rhubarb Pie
More Old-Fashioned Pie Recipes
Rhubarb Pie
Ingredients
Pie Filling
- 2 cups rhubarb chopped
- 1 cup sugar
- 2 tablespoons flour
- 1 large egg
- 1/2 teaspoon vanilla extract
Crumb Topping:
- 3/4 cup all purpose flour
- 1/2 cup light brown sugar
- 1/3 cup butter
Instructions
- Mix together the pie filling ingredients and place into crust.
- In a bowl, combine the crumb topping ingredients with pastry blender until crumbly. Add to the top of the pie.
- Bake at 425° F for 15 minutes. Reduce heat to 350° F and bake for another 30 minutes or until the rhubarb filling is bubbling.


Comments & Reviews
We really enjoyed this rhubarb pie, even my rhubarb hating husband. A couple tweaks I made:
1.) I added a half teaspoon of cinnamon to the crumb topping. I like cinnamon in my rhubarb crumble, so I figured it would be good here. It was.
2.) After 30 minutes at 350 the center of my pie was still lower than the outer ring and it was jiggly. I was baking in glass which allowed me to peek at the underside of the crust. It was still pale. I hate a soggy bottom, so I put it back in. Ultimately it took another 15-20 minutes before the filling had risen and the bottom looked done. When cool, the filling was nicely set and the crust was flaky. No soggy bottom!
Thank you for your updates! I’m so glad you all enjoyed it!