
Christmas will be here before we know it! My December calendar is filling up with shopping, baking dates, church events and parties. Honestly, the thought of making a homemade card this time of year can be just that – a thought! Most of us buy pre-packaged cards to mail or insert photos onto templates with companies who will even post them for us. There is just so much to do in so little time. But… you have to admit that when a beautiful homemade Christmas card comes through your hands, you can’t help but feel appreciation and awe. Since the 19th century, people have crafted their own Christmas cards to provide sentimental value during the Christmas season, even if only for a few select loved ones.
DIY Christmas Cards
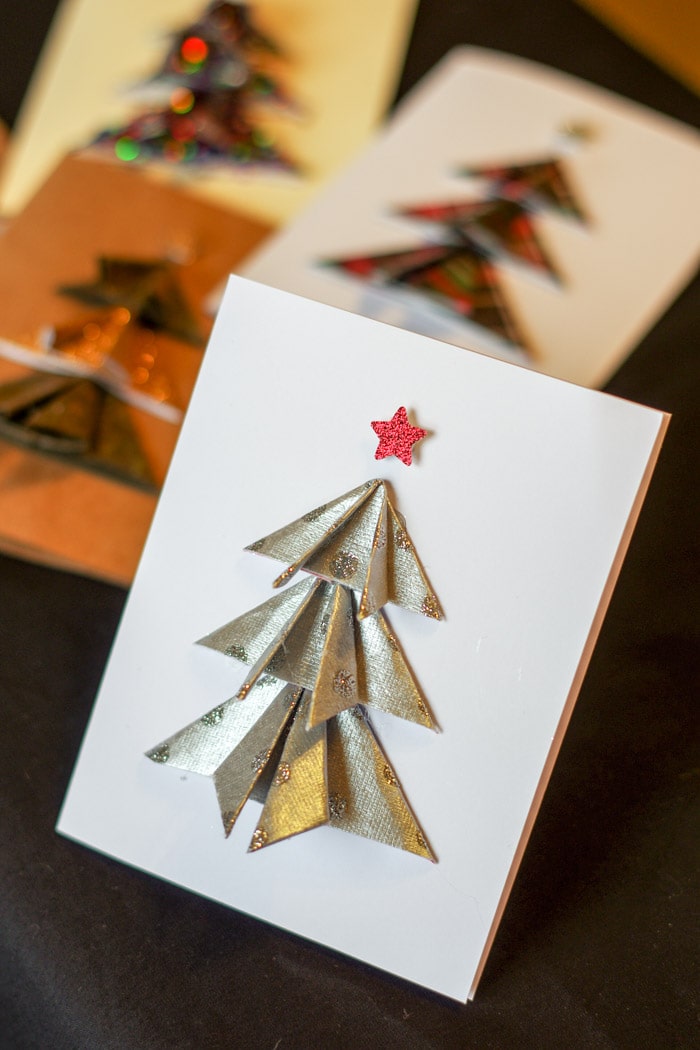
Today I’m going to show you how to make some stunning paper tree cards. I was blessed with a tree card several years ago and couldn’t help but learn all about them. The supplies are really simple: blank cards, paper, ruler, scissors and hot glue. In the busyness of the season, I was also delighted to learn how quick they were to create. In about 20 minutes, I made five different examples for you. Of course, you could add things like stamping or fancy lettering, but I like them just as they are. The simplicity of these cards is what give them wonder and that is my favorite thing about them.
Are you ready to make some DIY paper tree cards with me?
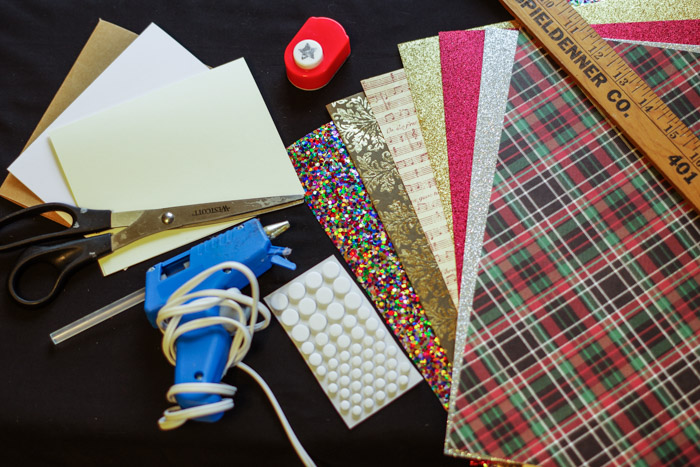
Here is a shot of what you’ll need and a couple extras. To make card, you will need a blank folded card, paper for the tree and star, a ruler, scissors and a hot glue gun. You can use most any kind of paper for the tree. Lightweight paper will fold the best and fit most easily in an envelope. However, cardstock works too! The heavier the paper, the more your tree will extend off the card. Also pictured is a star punch to make quick stars and some sticky dots I bought at the craft store to make the star dimensional. Both of these are optional.
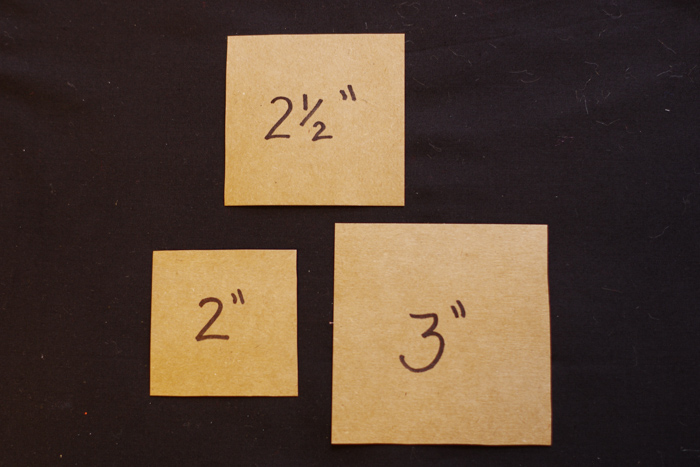
Our trees consist of three folded squares of paper. To begin, you will need to cut out three size squares – 3 inches, 21/2 inches and 2 inches.

Each of the squares are folded the same. I have drawn purple lines to show the vertical and horizontal folds and orange lines to show the two diagonal folds. Start by folding the vertical and horizontal lines, but release the fold after each one. We only want to make an indent.
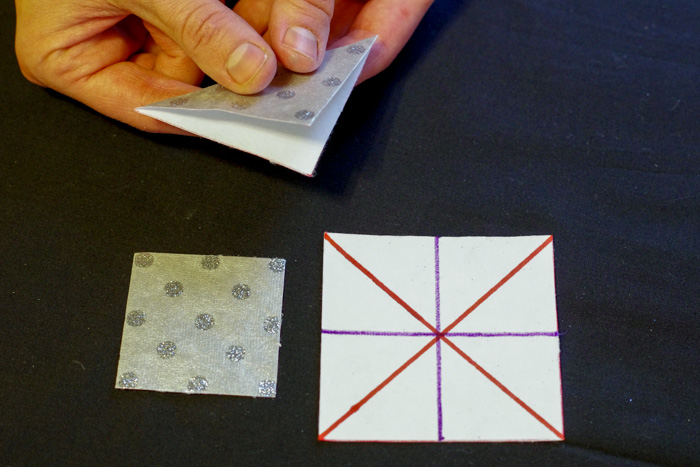
Next, make your two diagonal folds and release them. You should now have four different folds indented on your paper square. Repeat with the other two squares.
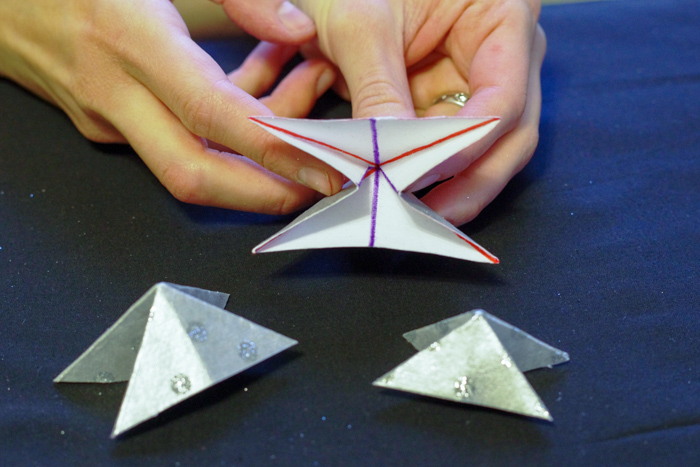
Push in the sides of your square to make a folded triangle with a top triangle and a bottom triangle. However, do not release this fold. It will stay a triangle, so make sure to press the folds well. Repeat with the other two squares.
Pull the bottom corners forward and down on your top triangle, using the center indent as your guide.

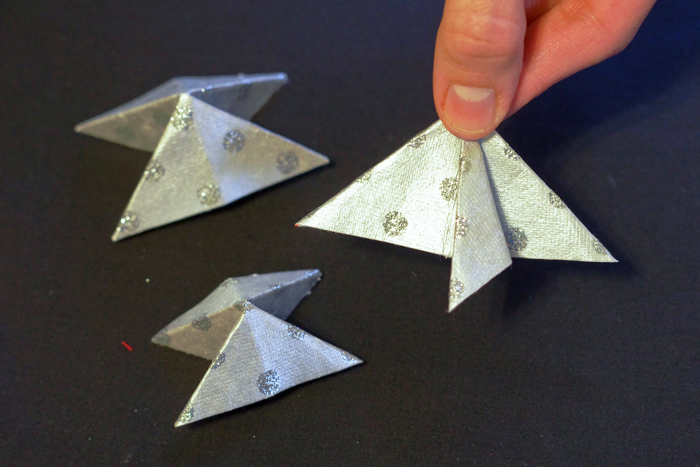
Repeat will the other two squares until you have what looks like three little spaceships 🙂
With a hot glue gun, secure the back of each triangle onto the folded card. The smallest triangle goes on top. The biggest triangle goes on the bottom. Overlap them a little so that it looks like they belong to the same tree trunk. Cut or punch out your star and attach it with a dimensional sticky dot if desired.
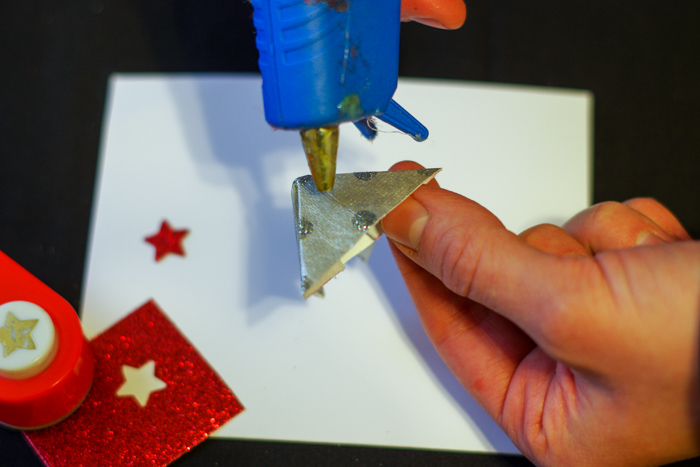
Last step! I like to adhere more glue to the bottom opening of my triangles, pressing down on top of the point from the triangle below. This is a picture BEFORE doing that…
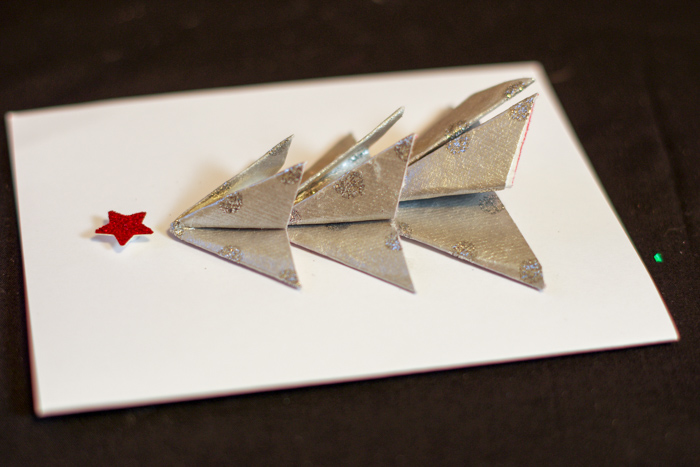
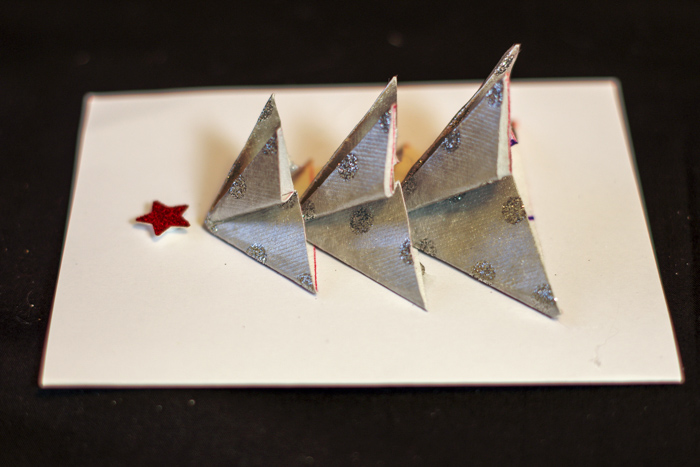
This is a picture AFTER. I think this extra step makes them look more refined, don’t you? Let’s take a look at some of the other cards I made!

Here is a one with vintage music paper and a red sparkle star. Have an old hymnal laying around? Folding up some of that old music would give a timeless look!
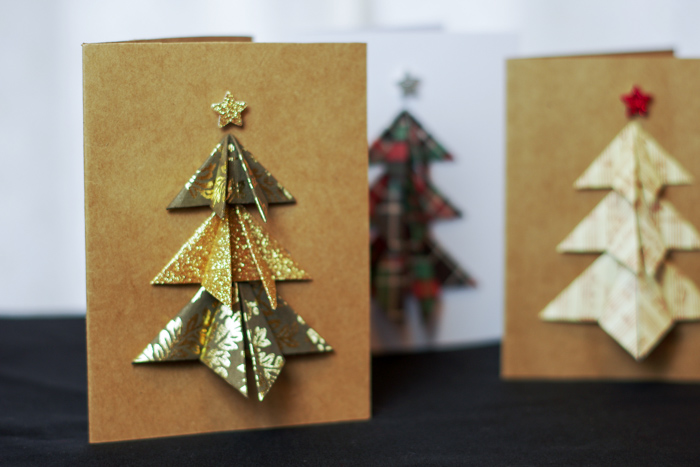
Since there are three triangles in our tree, feel free to mix up the design however you want. Here I have a sparkly gold star that matches the middle triangle of the tree. Very elegant!
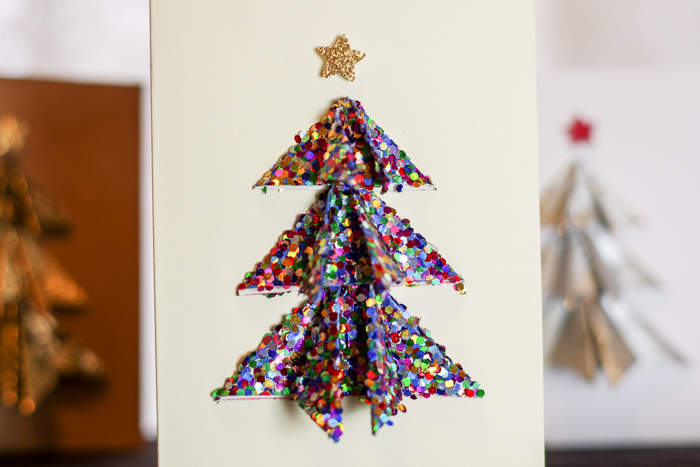
This one is my favorite. I found some heavy cardstock with tiny rainbow sequins that simulate Christmas lights!
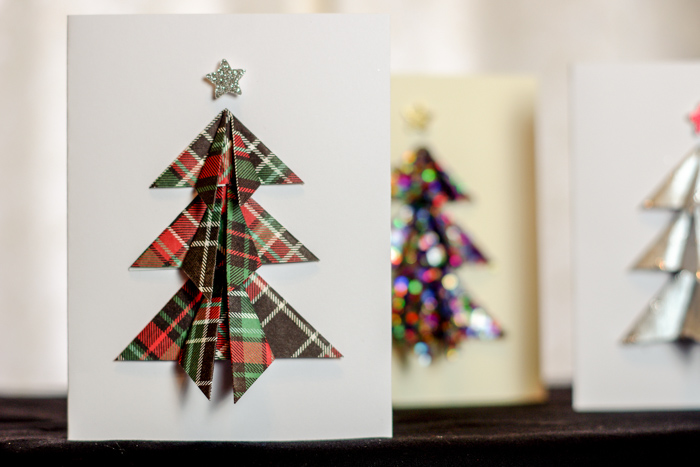
Here is a classic look with red and green plaid and a silver glitter star.
Inexpensive, simple and stunning homemade paper tree cards ready for the mail or special delivery into the hands of a loved one. Either way, there will be appreciation and awe during this Christmas season.
Enjoy!


Comments & Reviews
We know how important your wedding day is, and we’re here to help make it as special as possible. Our wedding limo packages are best and affordable
Very nice. I will try this with my niece this year 🙂
Thank you for such a simple idea I could realize without difficulty. I used the pages of an old road atlas and they are all recicled! Have a very good Xmas and a New Year better than the one we are having now!
Hi Livia!
Great idea to use an old road atlas! Thanks for your comment.
A most Merry Christmas and Happy New Year 🙂