
DIY dry erase magnetic calendar made from galvanized metal. A great office decor idea!
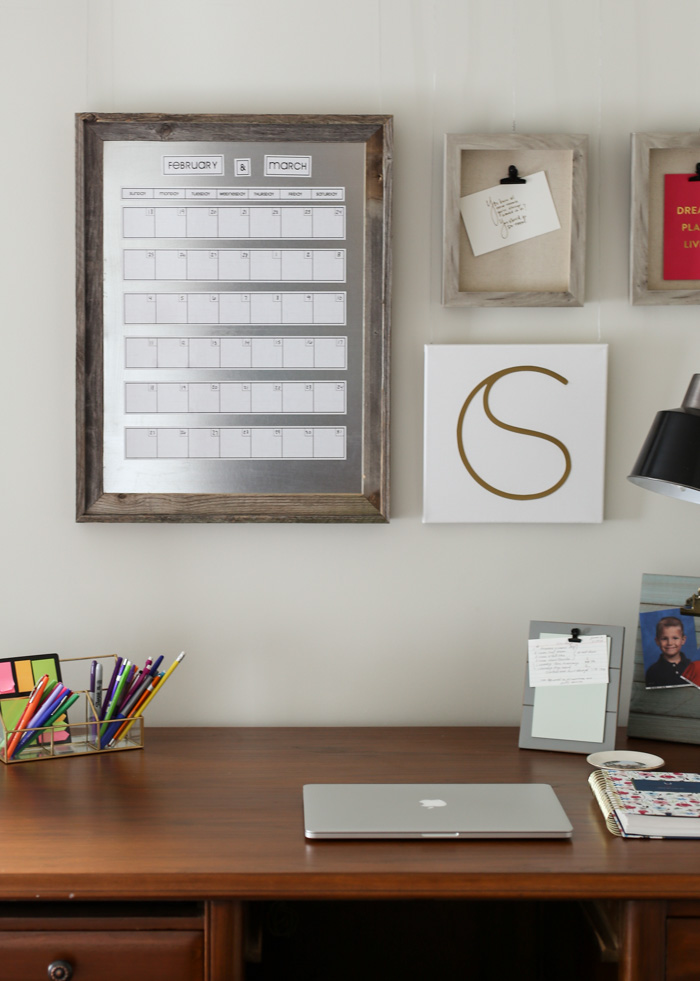
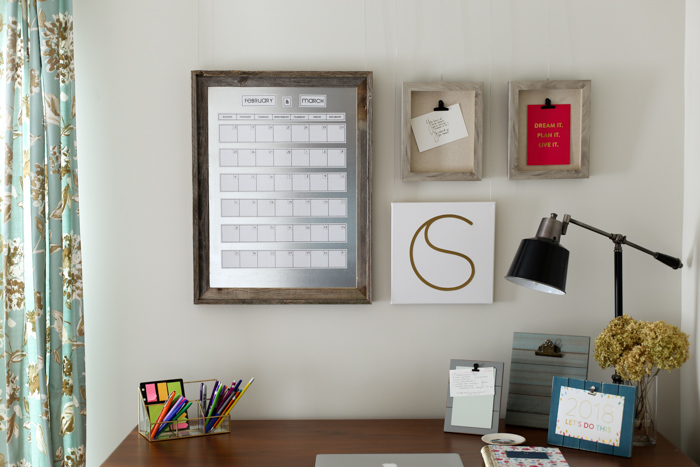
Last week when I shared our new office decor renovation, I also shared my new galvanized metal magnetic calendar that I love! When creating the space I wanted items that looked good but also were functional for the day-to-day. A wipe-off calendar was a must-have – but I found the pre-made ones in the store to look too stark, and I didn’t feel like they blended with an old home if you know what I mean.
I, therefore, went on the hunt for a magnetic calendar that looked more “homey” only to discover that while the frames were a nice wood color, the white on the calendar was just too much. I also wanted to see more than a month at a time. I started to research online and came across some galvanized metal organizational magnetic boards and decided that it was exactly what I wanted to create. I like that the metal gives it a farmhouse feel and I also like that it is magnetic.
Now, to figure out how to make one… I found a few online that I could buy, but they were out of my budget. So I wandered the aisles of home improvement stores and found that they carry reasonably sized sheets of galvanized metal. Yippeee! Now, I only had to find a frame to fit it. I found one I loved at Hobby Lobby. The barn wood frame was just what I had in mind.
*FYI. Let me pause here to say, make sure you’re buying metal. I thought I was, only to find that I had bought aluminum which is not magnetic. It’s also three times the price. Luckily, I noticed it early enough and could return it – so double-check! 😉
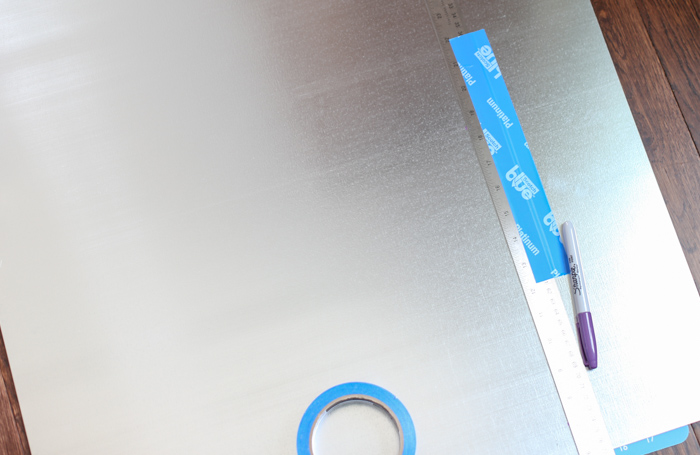
The first step to making a magnetic calendar like this one is to cut the galvanized metal to the size of the frame. The metal was 24 inches by 24 inches. The frame was 18 inches by 24 inches. Therefore I had to cut 6 inches off one side. If you’re going to make this project, I recommend finding the metal first, and the frame second to make it easier. The key is to make sure you have a nice line before cutting.
Also, clean it. The metal has oil on it. Learn from me.
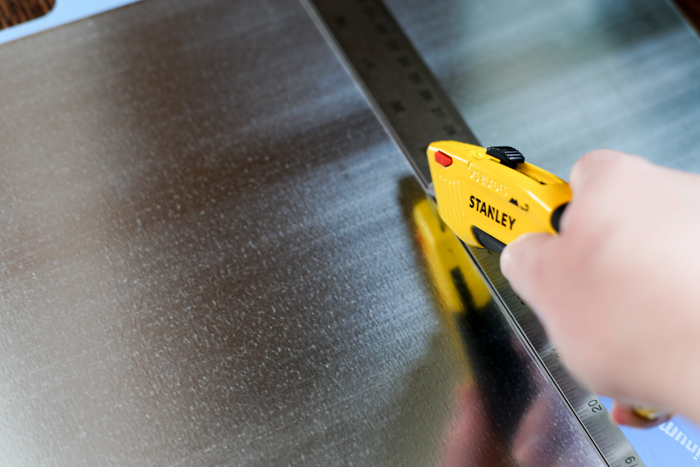
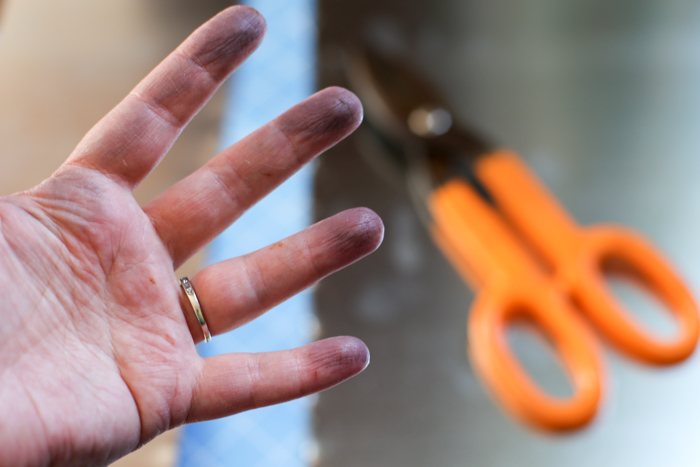
I taped my guide ruler onto the metal to help keep it in place. I watched a video of Martha Stewart’s where she claimed that you could run a utility knife 10 times over the top and it would cut it. Yeah, that does not work. I tried. At about the 100th pass on the metal, I knew it was not going to happen. I called my brother and borrowed his tin snips. A great straight line was made with the etching of the utility knife so at least it was worth something.
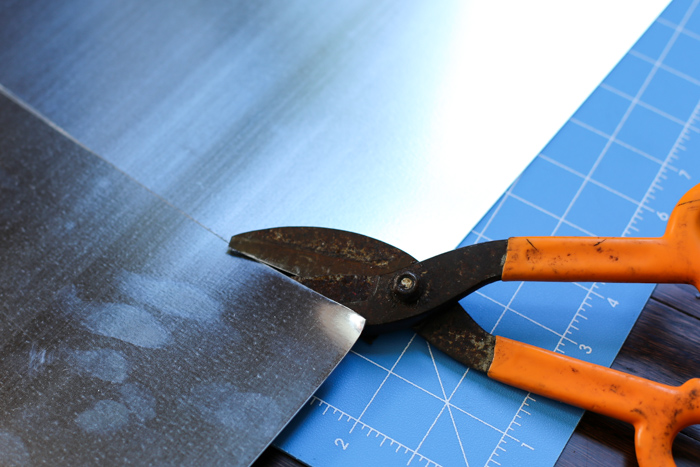
Tin snips for the win! They cut right through it.
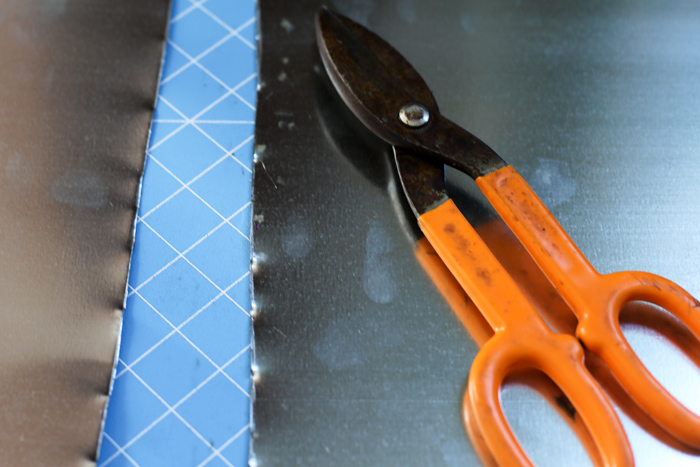
They didn’t make the most clean edge, but that didn’t matter as it was going behind the frame. Be careful, the edges are sharp!
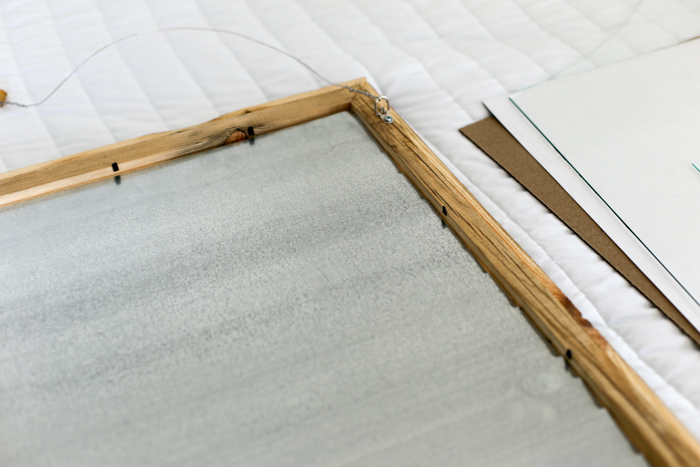
The next step was to remove the glass in the frame and add the galvanized metal. I accidentally broke the glass when removing it, soooooo… I would have put it back into the frame after the metal….but that was no longer an option. I just popped the backing in, pushed in the little holders and it was done and ready to hang!
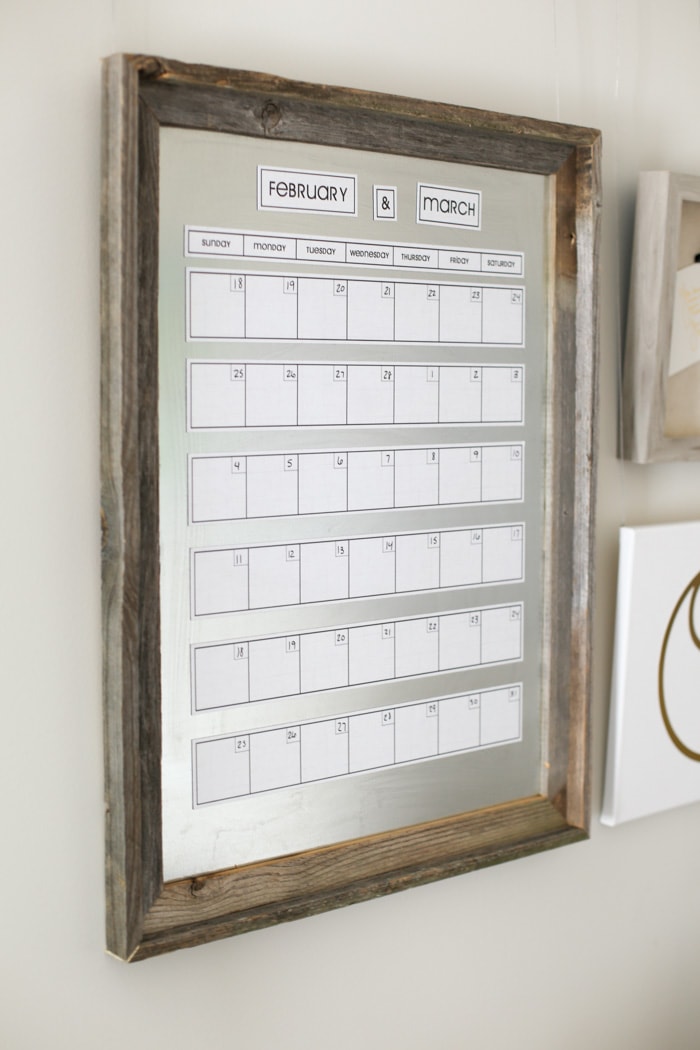
That is, except for the calendar part. On Etsy, I found calendar strips that were magnetic. They cost more than the frame and metal combined, but I couldn’t figure out to make my own with good-quality magnets so I just bought it. It still brought my price well below buying the entire calendar that was ready-made.
The total cost for this project was $60.
Calendar Magnets – $36
Galvanized Metal – $11
Frame – $13 (50% off at Hobby Lobby)
Tin Snips – Free (Thanks to my bro!)
It’s much cheaper if you have your own calendar magnets, but I got the look for less than I thought I might pay, so I’m happy. If you don’t need the calendar and just want a place to hang notes and messages, you can really make this a cheap project!
What do you think? Love metal?


Comments & Reviews
I am looking for these for fact calendar strips and can’t seem to find them. Do you have any links?
I love using metal for boards of all kinds. I’ve made ones with a frame, ones I’ve screwed right onto a wall, and I’ve also made ones with the metal simply nailed to a board with pretty furniture pins or fancy-headed screws.
If you don’t want to buy the metal, measure and snip yourself (which doesn’t always give a nice straight edge if you want to just nail it to a board or the wall), find a furnace and heating store, and they will usually cut a piece to size for you! The cost is usually great too.
Great tip! I had the hardest time finding the right kind of metal I needed. The next time I will try the furnace store in town. Thanks!