You would be amazed at the number of people I know who religiously carry things around like tissues and breath mints, but don’t have access to a simple homemade first aid kit. The thing about emergencies is that we never know when they will occur. My husband and I were convicted of this when we visited a friend with cats a few years ago. Our two year old daughter was with us and unbeknownst to us, she was allergic to cats. Within a few minutes, her skin started to break out and itch. If only we had some Benadryl on hand! Since that day, we keep a small emergency kit in the diaper bag and in both vehicles.
Perhaps no one in your family has allergies, but have they ever gotten bad indigestion after a meal at a restaurant? How about a cut or scrap on the sidewalk when walking into a store? Just yesterday, the kids and I were at the park and a little boy had an accident on the monkey bars. I walked over to my car, pulled out our homemade emergency kit and patched up his knee. First aid kits are also a great means to meet people 🙂
Today, I’m going to show you how to create your own practical and portable first aid kit. Trust me, just when you think you don’t need one, you will need one! Life happens and this kit will help you be prepared for everything from soothing a simple headache to a applying pressure to a wound as you wait for an ambulance.
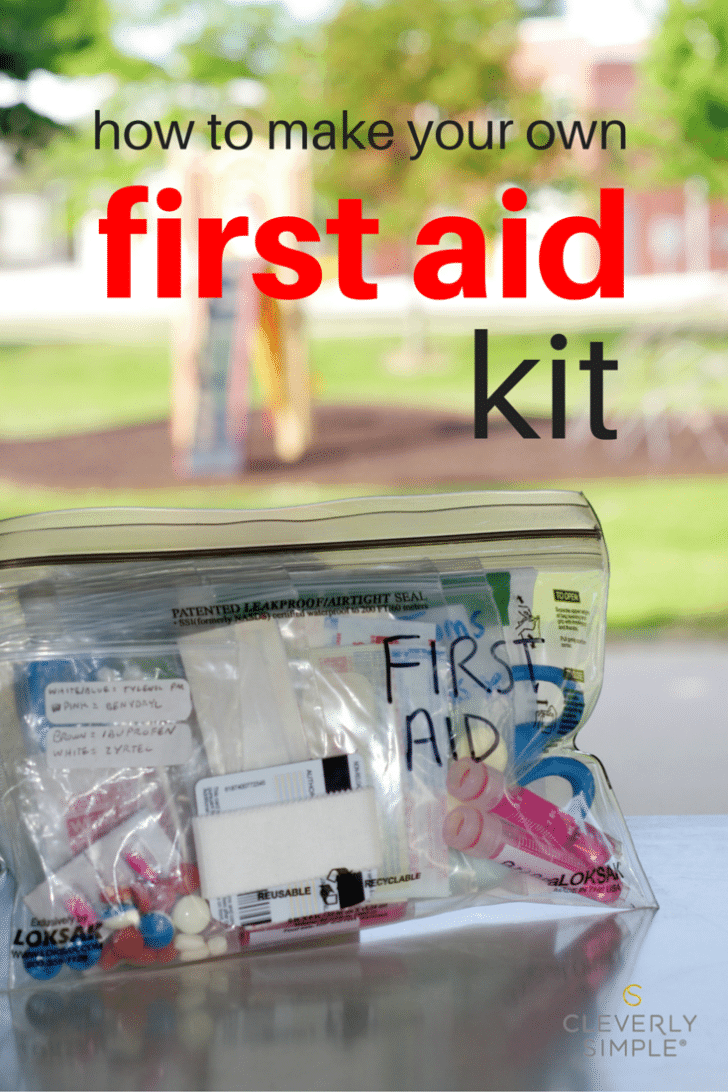
How to make your own homemade first aid kit.
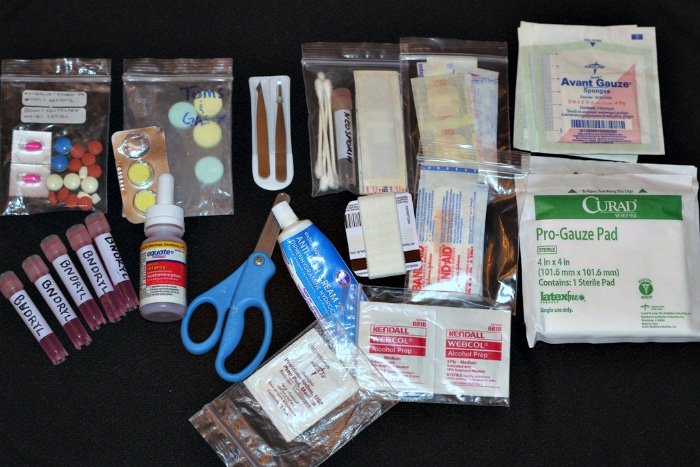
This is a look at what our family includes in our kit. We have customized it to our needs so you may have less or more than what you see here.
Top row, L to R:
- Resealable bag with pills. Here we have Tylenol PM, regular Tylenol, Ibuprofen, Zyrtec and Benedryl. It’s really important that you label the bag with a color code key so that you can see which pills are which. (blue = Tylenol PM) You don’t want to rely on your memory during a need. Also, if someone else borrows your bag of pills, the medicines can be quickly identified.
As we go along, you will see that we use quality plastic resealable bags for much of our kit. You can easily find these bags online. The size we are using is 3″ x 4″
- Resealable bag with digestion or gas tablets. Probably don’t need an explanation here. Again, it’s a good idea to label the bag.
- Set of tweezers. Painful splinters can happen anywhere!
- Resealable bag with antiseptic gel (i.e. Neosporin) cotton swabs and band aids. You will probably use this bag the most. The cotton swabs keep you from using your fingers when you spread on the gel.
- Resealable bag of additional band aids. Don’t tow around the box. Keep an assortment of extra bandaids in a compact bag so that you are ready for any size cut or scrap.
- Variety of gauze pads. These are essential for absorbing blood if a cut is deep.
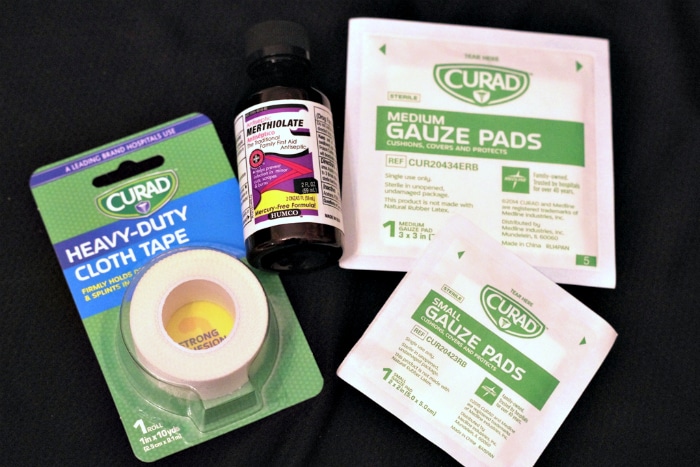
Here I am showing small and medium size gauze pads. They can also be called gauze sponges. In a pinch, maxi pads will work too! I am also showing some Merthiolate antiseptic, but you can also use Iodine, Betadine or Gentian Violet. All of these over the counter antiseptic solutions can be poured onto the gauze pad before taping the pad down with some heavy duty cloth tape. I will show you a creative way to store your cloth tape in #10! If the the antiseptic bottle is more than 1 fl oz (which most are) I would suggest using a transport tube to store.
Second row, L to R:
- Transport tubes with liquid medicine.
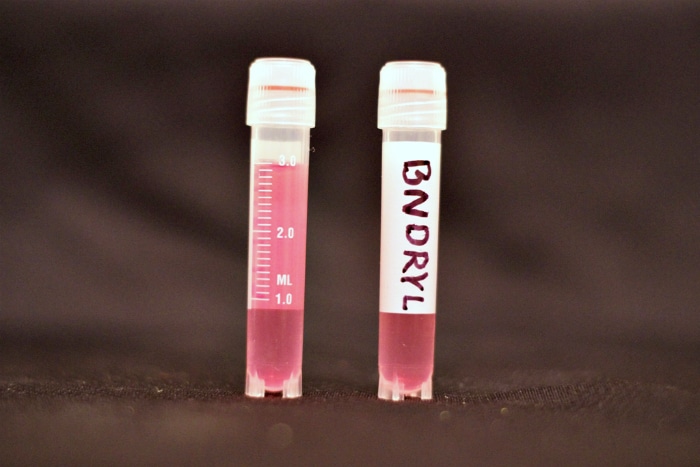
There is no need to transport large bottles of medicine with you on outings. If the medicine bottle is bigger than 1 fl oz, pour some into transport tubes. These tubes hold anywhere from 3 – 10 ml of liquid and can be found on online using key words like “test tubes,” “vial tubes,” or “transport tubes.” Be sure to label them!
- Small pair of scissors. Scissors come in handy for cutting off clothing to gain access to a wound. For example, if your child is wearing long jeans when they have a bad fall.
- Anti-itch cream. These creams are good for bug bites and allergic reactions. Small size creams shown in the picture are fine to include, but if they are bigger than 1 oz, I suggest squeezing some out into transport tubes and label.
- Old gift card wrapped with cloth tape.
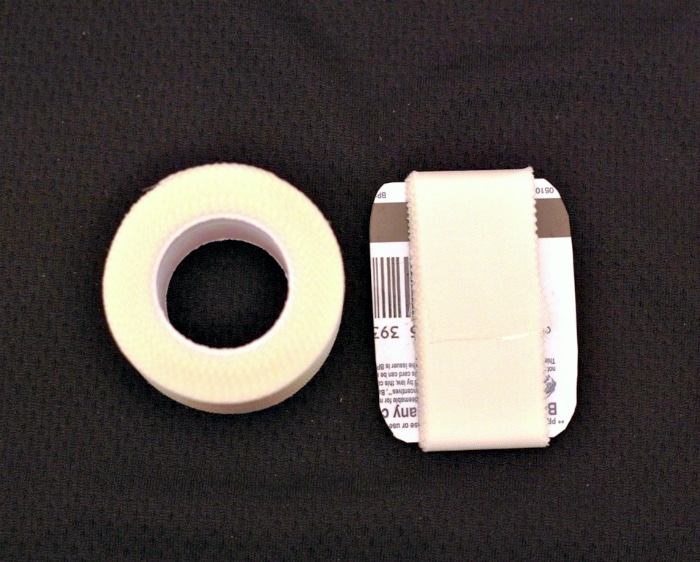
Here is a creative way to store your cloth tape! Cut an old gift card in half. Then, starting with the beginning of the roll, wrap 1 yard of tape around the gift card. This storage method keeps the thickness down as standard cloth tape rolls come in bulky 10 yard sizes. You can re-wrap new tape as you use it up. I mentioned earlier that heavy duty cloth tape can be used to tape a gauze pad to the wound, but you can also use cloth tape to secure a band aid around a finger, hand or other difficult to adhere spot!
Bottom row:
- Resealable bag of iodine pads and/or alcohol pads. The iodine pads are handy to clean small cuts or scrapes before applying a band-aid. The alcohol pads are great for sterilizing those tweezers!
Other ideas for your emergency kit…
– essential oils (for a variety of ailments)
– cough drops
– tissues (for nose bleeds)
Now…what do we store all of these emergency supplies in?
Glad you asked!

Any quality leakproof and airtight bag will do. Here I have a small red first aid tote with a zipper. This has depth to it, so I can layer my supplies on top of each other. I also have a smaller zippered pouch and a resealable plastic bag made by the company Locsak. Please do not use baggies! Those are for sandwiches, not first aid supplies 🙂
In less than 15 minutes, you can put together a complete and personal homemade first aid kit ready for summer adventures! And making one of these today couldn’t be easier. You don’t even have to leave your house to gather supplies since so much of our world is online. I suggest keeping at least one kit in the car and one kit in the house at all times for quick retrieval. Keeping one on your person is a good idea too. Purses, beach bags, diaper bags…. the list could go on. You can’t have too many. Homemade first aid kits are a great way to be prepare for when life happens!


Comments & Reviews
I love this post. It’s an excellent idea!
I’d like to recommend that if you’re going to put medicine in a travel sized dose, that you also label it with the expiration date. You never know how long you’ll store it before it gets used.
That’s a great tip Tiffany!
Thanks!