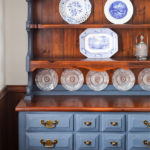
Before and after two tone blue chalk painted hutch in our farmhouse dining room. The transformation of this antique hutch is amazing!
I now have a painted hutch in our dining room – and I painted it with blue chalk paint! I needed some color in our dining room with all the dark wood in our home. I decided to go with chalk paint after the success my sister had when she shared her chalk paint tutorial here.
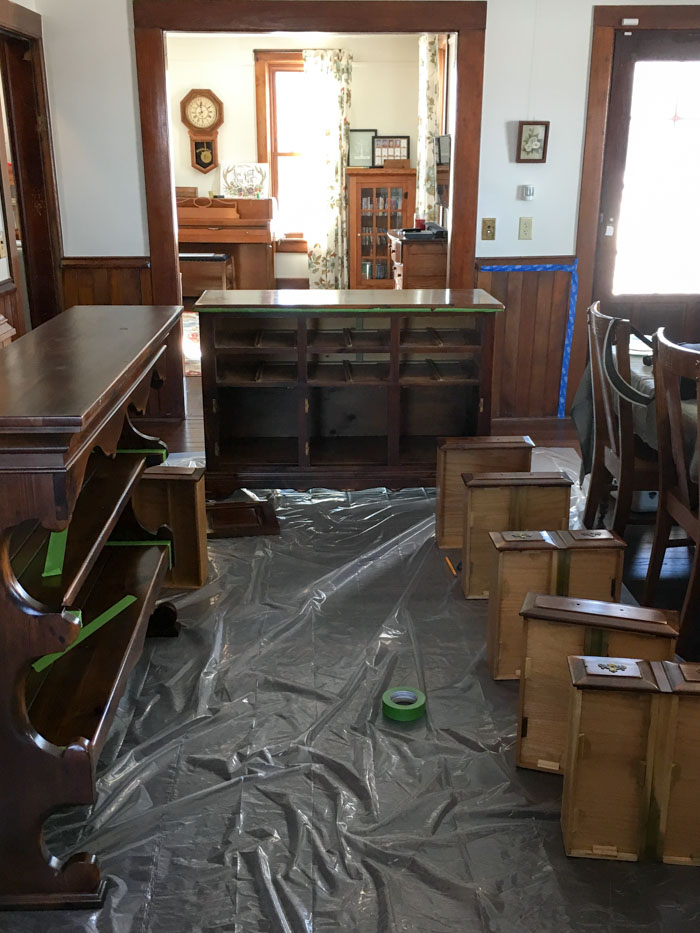
I’ve personally never used chalk paint on furniture, although I’ve heard wonderful things about it. And being that it’s winter, hauling a big dining room hutch outside so I could sand and paint was not going to happen. We don’t have a garage. We have an 1800’s barn that’s not conducive to paint projects in the winter. So, what’s a girl to do but paint her dining room hutch in the dining room. 😉 With chalk paint there were no strong odors and there was no sanding. It was the perfect combo!
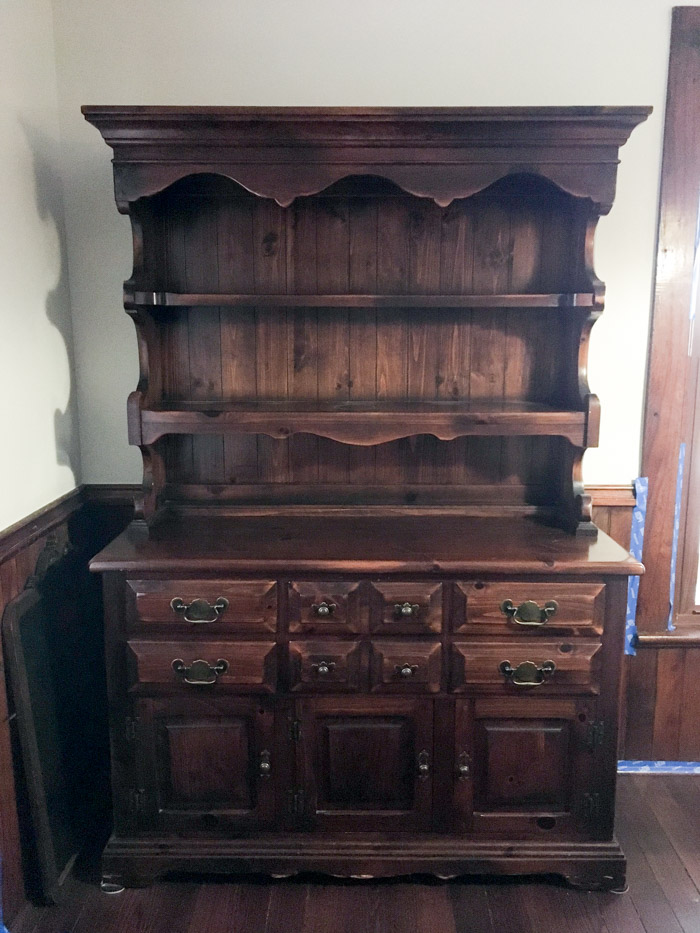
Here’s where I started. This hutch was in this exact room my entire life when my grandma lived here. The date on the back said 1966 so that’s probably around when she bought this particular hutch from Ethan Allen. I never really liked it. I love antiques, and I guess this is technically an antique but it felt so heavy in the room and not the style I was really going for.
For a long time I have been looking for a hutch to replace it, but haven’t found what I love. Let me rephrase that, I’ve not found a hutch that I love and I can afford. I love plate hutches like this one, but I kept looking back to my grandma’s hutch thinking about how much storage it provided (hello! six drawers!!!!), and it did give me an opportunity to display plates. And it was my grandma’s and still smells like my grandma’s linens when you open the drawers.
I looked to this picture for inspiration liking the idea of the deep blue. I love the lighter farmhouse colors but my house is full of dark wood that I love and I didn’t want too much of a contrast. I also wanted something that fit our dining room – not our kitchen. A dining room should feel a bit more grand in my opinion. Even if my kids run laps in the largest room in the house to get out the wiggles during cold weather. A girl can dream, right?
Deep blue chalk paint was my clear choice.
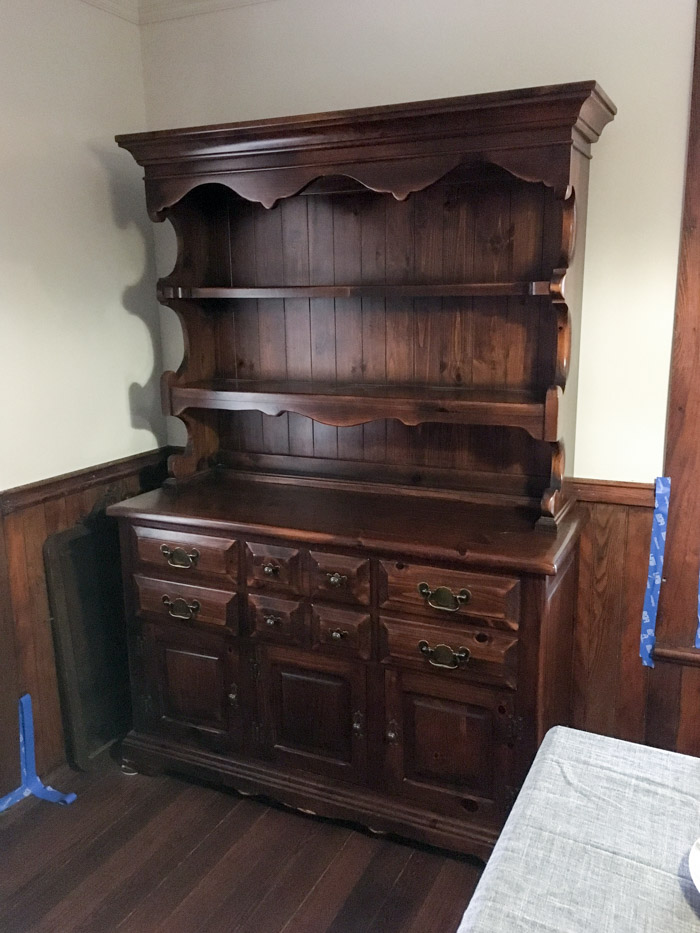
The state of the dining room on a cold winter day in Ohio. Thank goodness for this large room!
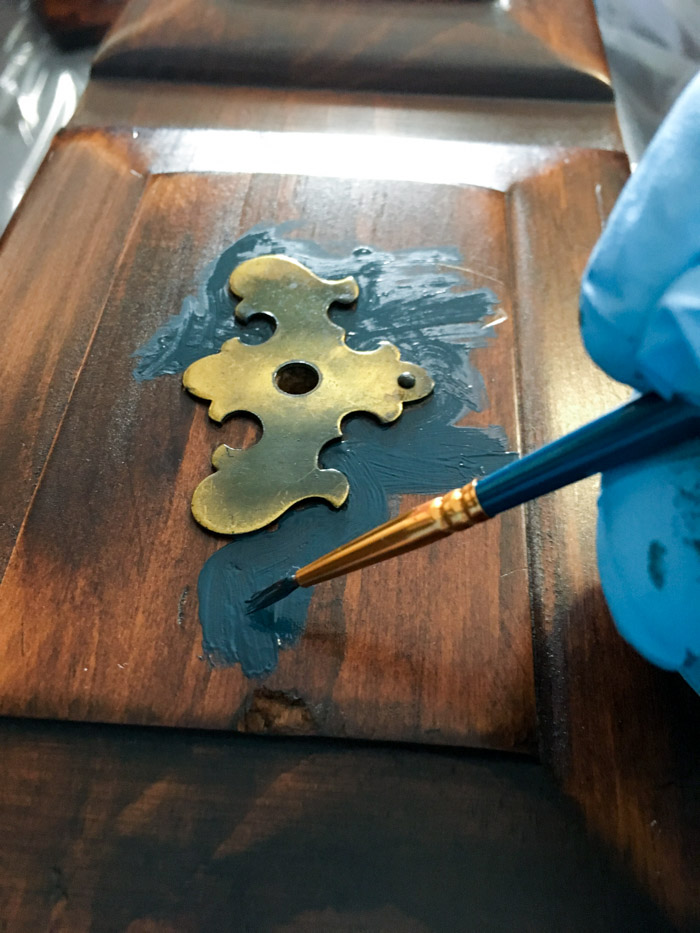
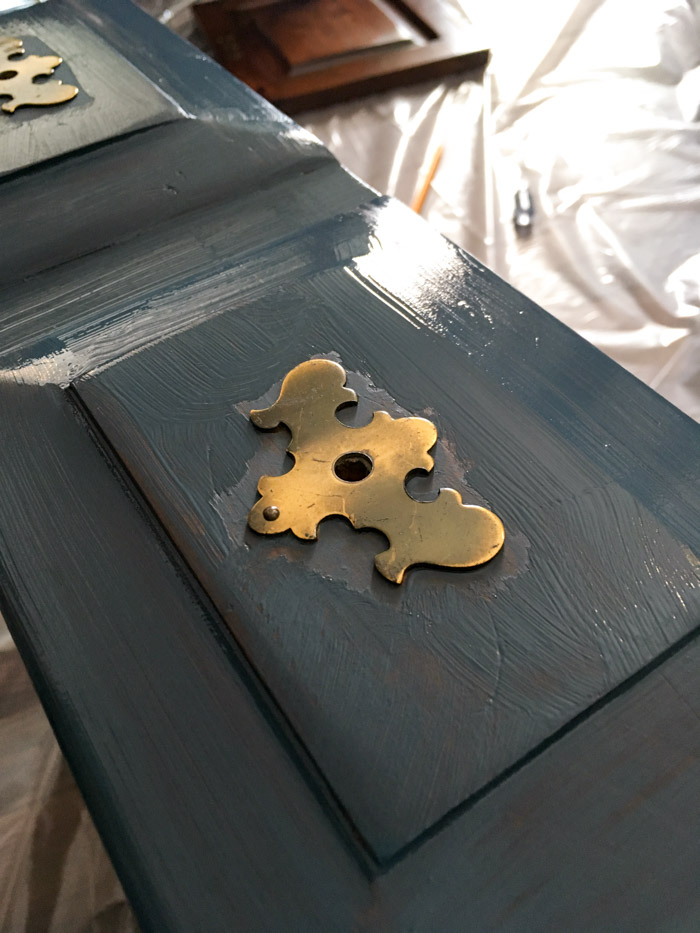
I’ll spare you all the details on how to chalk paint since we’ve shared that before. But I do want to share about these little brass knobs on our dining room hutch. The morning I started I thought I would get a few coats done quickly since the hutch was a pretty simple piece. Well, it wasn’t. At all. It turned out that while the knobs came off, their brass backing did not. Yes, I could have pried them off – but then I was afraid I would bend them and I didn’t want to have to nail them back on. I had a goal of saving them.
Out came the little artist brush and I went around each one – very carefully.
This is after one coat. The chalk paint dries sooooo fast. Not too bad. Working with antique furniture is like working on an old farmhouse like ours. There’s always a surprise around the corner but the end result is always worth it.
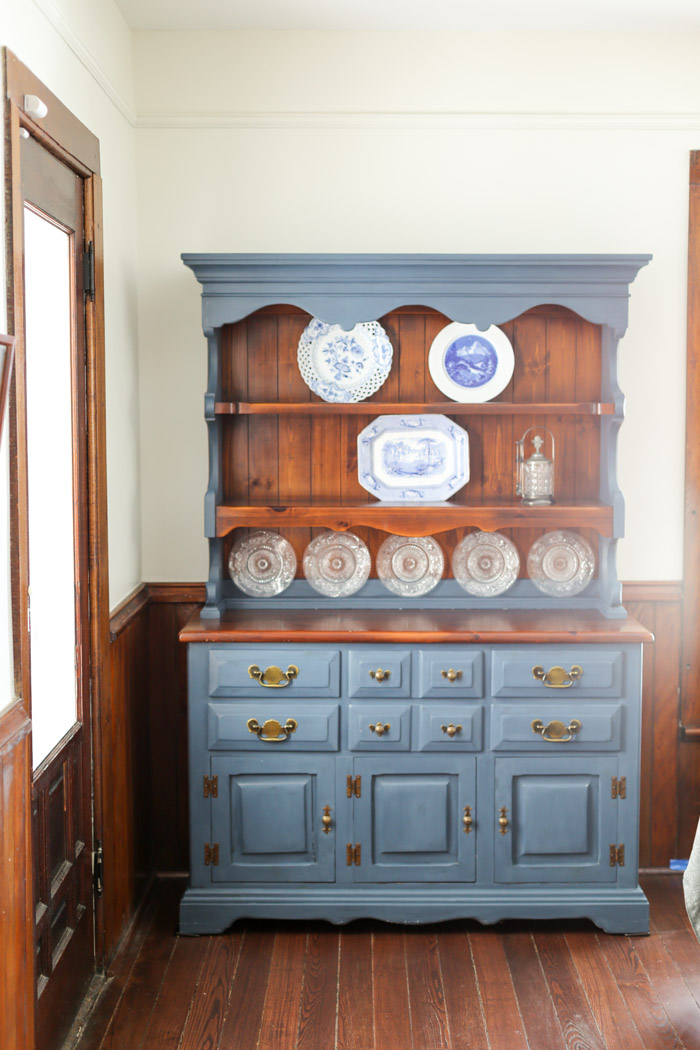
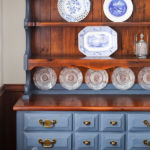
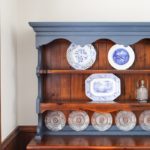
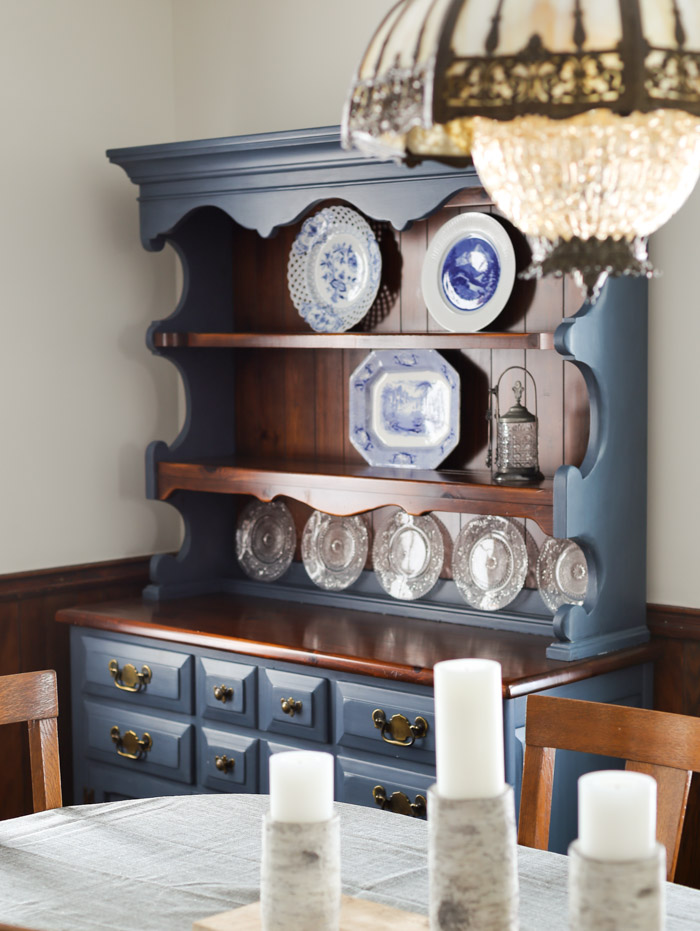
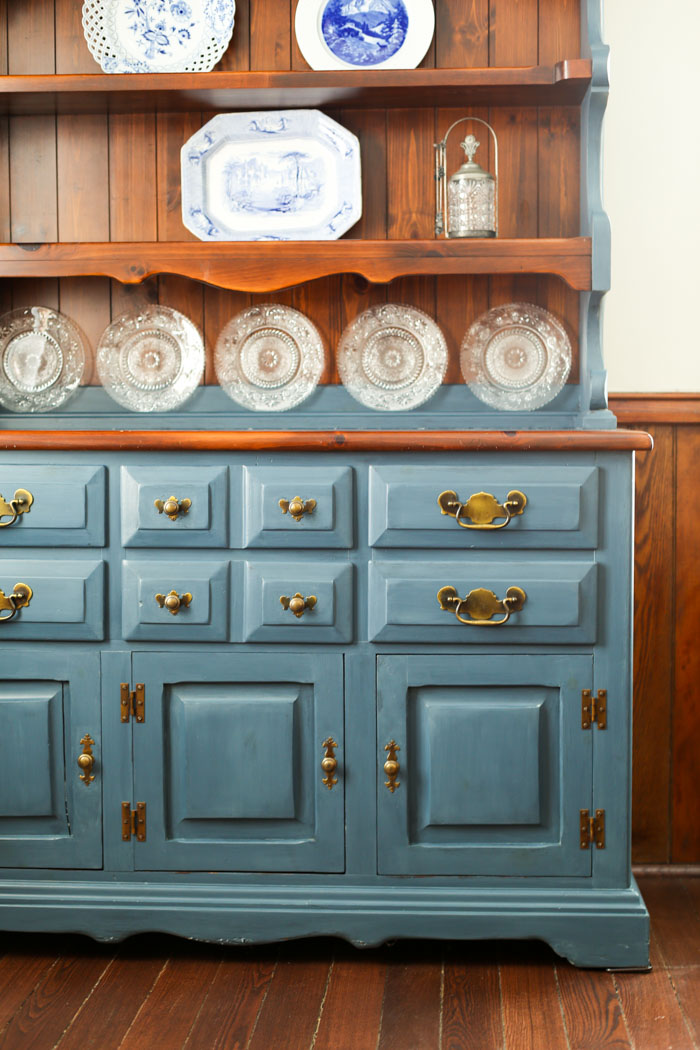
After two coats of chalk paint and one coat of the top coat, she was done! And I just love how she turned out! I couldn’t decide whether to paint the shelves so I decided not to and live with it for awhile knowing I could always go back and paint them later. But I think I like it the way it is. What do you think?
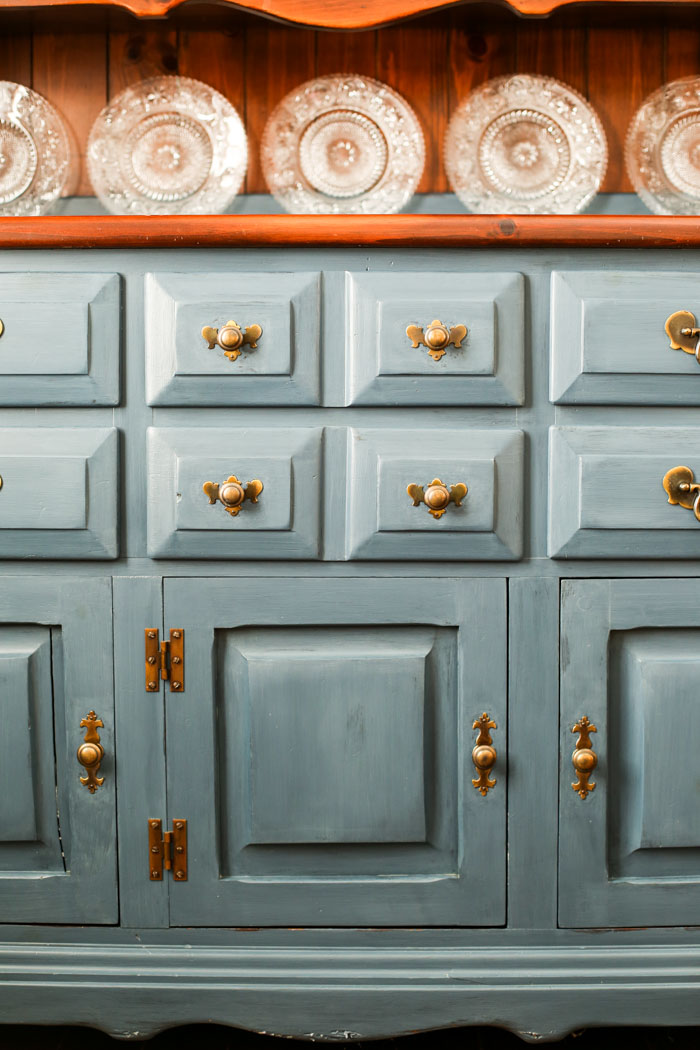
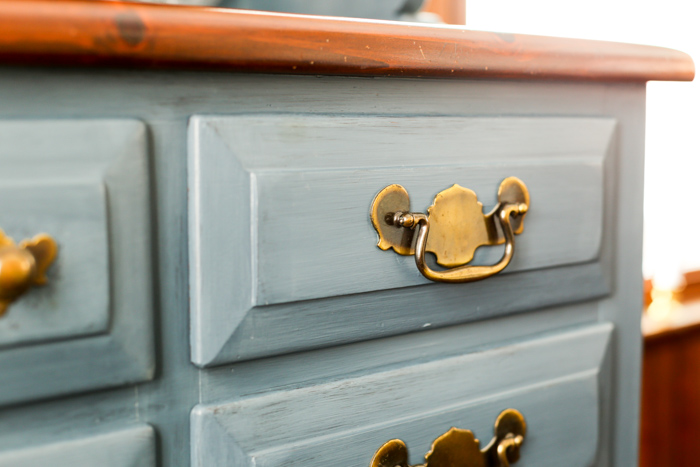
My favorite part by far is the way the brass knobs turned out. I’m so glad I kept them. They were worth the extra time and work.
After adding the top coat, I realized I maybe should have done a third coat of the chalk paint. It’s a little more streaky and rustic than I was originally planning. However, from far away you can’t tell – and, well, it does help it blend in with our old home.
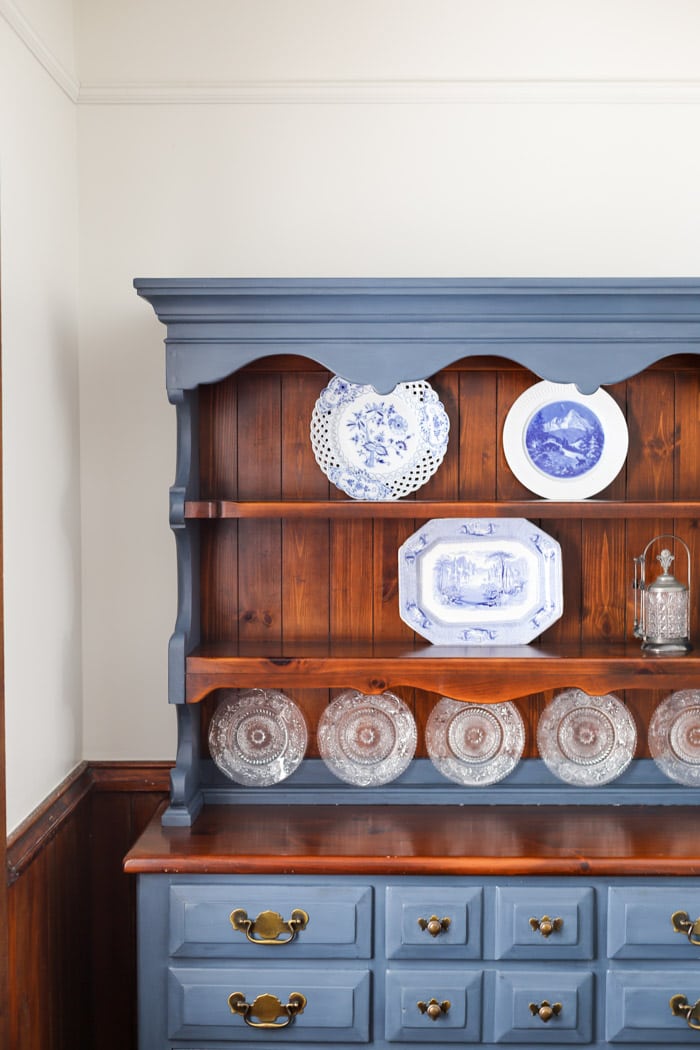
And I still have a place for my plates. I don’t have very many right now but I am hoping to collect blue plates in the future. The three above were my grandma’s and I’m looking forward to having something to hunt for at antique stores and auctions. I’m not a big knick knack girl since dusting little objects gives me hives and I have two young boys who like to break things – accidentally. This hutch is the perfect place for a few fragile items and a place to collect a few new pieces in the future.
While you won’t find me painting many antiques or the woodwork in my home because I love the deep colors. I do think it’s fun to add a few pops of color with projects like this one with some “new” furniture in the home.
Where To Buy Chalk Paint
I bought the deep blue navy Chalk Paint at Menards. It was the Rustoleum brand chalk paint. I liked that instead of a wax topcoat it has an actual top coat that doesn’t have to be re-sealed in the future.
You can find chalk paint at most hardware stores these days. I would recommend the Rustoleum chalk paint as I found it easy to brush on. It wasn’t super thick. I also preferred their colors over other brands, which is why I went with their brand. While it says you can cover in one coat, I think three would have been better in my situation. I found that the top coat pulled a bit of the chalk paint off the piece. In the end, I like the look even though it’s not what I originally was going for. The perfectionist in me had to let go a bit. But living in an old home and having furniture look imperfect – it fits right in.
What do you think? Have you tried chalk painting furniture before?


Comments & Reviews
Oh I’m so inspired! I just purchased a hutch from an auction and a few months ago we moved into a Colonial Revival home. I’m so excited to restore this old piece of furniture with a modern pop of color. LOVE love love the blue and natural look you did on your hutch! My wheels are spinning but I’m leaning on doing something very similar. Thank you for sharing. Enjoy your beautiful hutch in your gorgeous home!
I love your hutch. What type of topcoat did you use?
You did a great job! How do you paint so as not to get strieks through the painted areas?
lynette, does this project require sanding first? i have a very similar hutch i would like to paint. how is the paint job holding up now? thanks.
Hi! I did not sand. That’s the beauty of chalk paint! It is holding up great!
I painted mine with the same exact paint and color too!
Yay! Send me a picture at cleverlysimple @ gmail.com. I would love to see it!
It looks gorgeous. Not painting the shelves matches the brass a good choice. On the internet this does not look like a navy, but an antique powder blue. It looks liter in weight than all wood before perfect
Thanks! It has held up really well!
Beautiful job!
Hi Lynette! I absolutely love how your hutch turned out! It’s gorgeous! You did an excellent job and please leave it as it is. It’s a beautiful piece and i love that it was your grandmother’s.
I love antiques too and just a few here and there. You have great talent and eye so keep on doing what you are doing.
Thanks for sending me the update! Love your blog, farmhouse and your recipes!
Happy Friday! Hope the weekend is good to you and your family.
Joan
Thanks Joan! I really appreciate you saying such nice things. Our farmhouse can be a lot of work but I enjoy sharing all our “new” things in the house.
Looks BEAUTIFUL!!
Thanks Bonnie!
Hi Lynette — Your hutch is lovely! I think its actually the perfect amount of imperfect and adds just that little bit more character. Since this has a special connection with your Gram, this makes it even more precious. The parts of the hutch you left ‘natural’ are just right. I love your pickle jar on the second shelf. I found the silver holder part of a similar one at Salvation Army for $1.50 but I had no idea what it was until I did a bit of research. I’m still waiting for the other parts to magically appear somewhere, someday. You have given me the courage to try using chalk paint now that I’ve seen how nice it looks after the top coat … Thanks! — Jan
Yes! Try the chalk paint. I loved using it and I wanted to immediately chalk paint a few more things after I was finished. Waiting a bit to decide for sure, but I love the look of it in an old home like ours.