
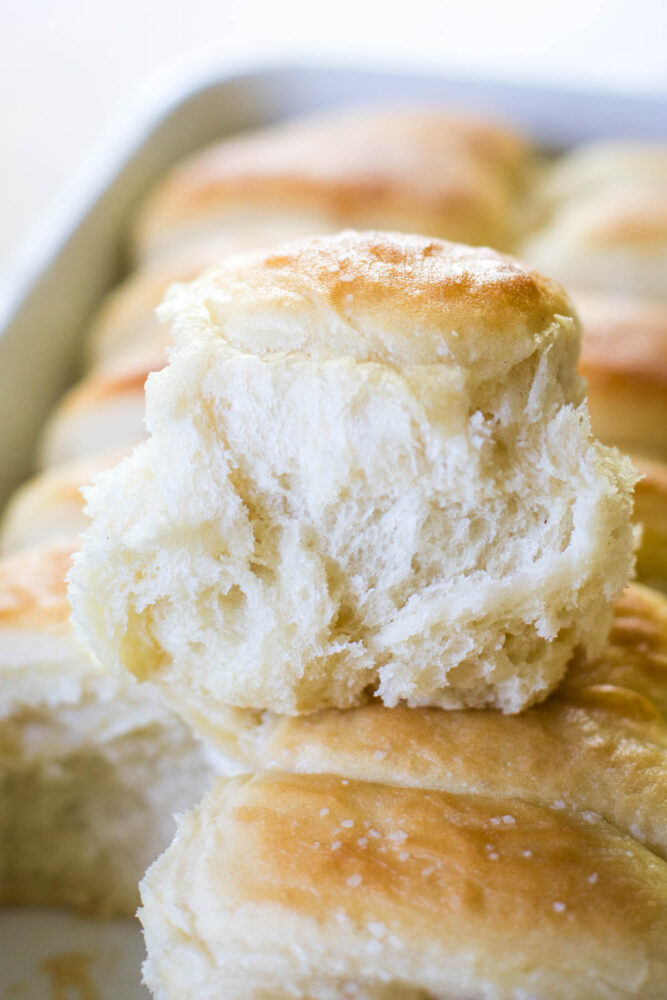
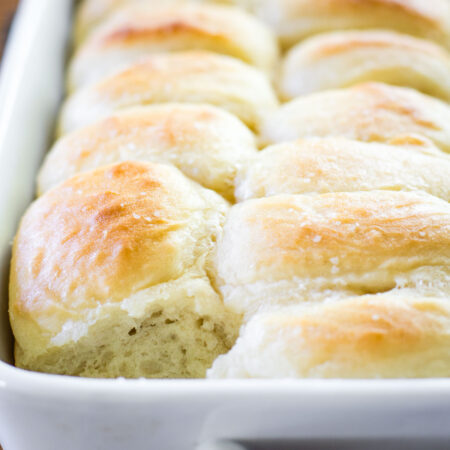
These No Knead Dinner Rolls are incredibly simple and easy to make! With this recipe, you’ll get beautifully golden rolls that are slightly crispy on the outside and perfectly soft, fluffy, and buttery on the inside. They have the ideal meaty, dense texture that will keep you coming back for more!
No knead rolls are a type of bread roll that, as you might have guessed, doesn’t require kneading. This makes them the perfect bread to make at home, even if you’re not an experienced baker. All you need are some simple ingredients like all-purpose flour, active yeast, warm water, and a few others, and you’re good to go.
My recipe is the easiest one you’ll find online, with foolproof results every time. Even if this is your first time baking bread, you’re going to end up with soft, buttery rolls that go with just about everything. Try this recipe today, and you’ll never want to try another one again!
Table of Contents
Why I Love This Recipe
Easy: This no knead dinner rolls recipe is incredibly easy to make. All you need to do is stir all the ingredients together, let the dough rise, and bake. There’s no need for kneading, making this recipe a breeze even for beginners.
Quick: Excluding the rise time, these rolls are incredibly quick to prepare. You just need to mix the ingredients, let it rise, cut, and bake. You’ll have soft, buttery rolls ready in no time.
Family-favorite: These rolls are a hit with the whole family. They’re meaty, dense, soft, and buttery, making them a delicious addition to any meal.
Ideal for holidays: If you’re looking for an easy soft dinner roll recipe for Christmas or Thanksgiving, this is it! It’s hassle-free and perfect for even first-time bakers!
Want to save this recipe?
Enter your email & I'll send it to your inbox. Plus, get great new recipes from me every week!
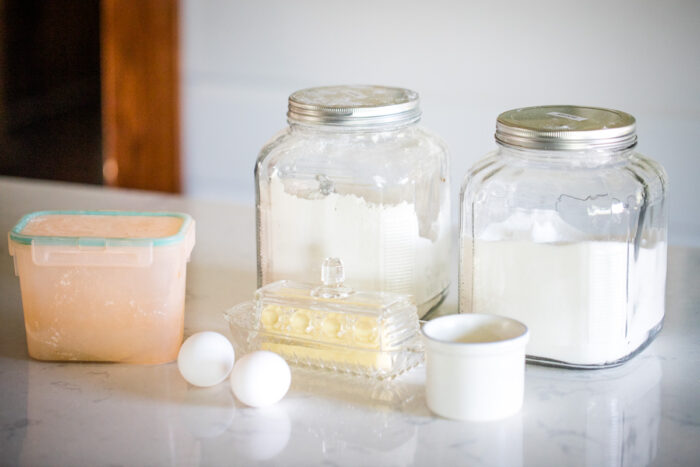
Key Ingredients
Eggs: The eggs in this recipe are beaten, which helps to incorporate air into the dough and give the rolls a light, fluffy texture. Make sure they’re at room temperature for easy mixing.
Warm Water: Warm water is used to activate the yeast. The warmth wakes up the yeast and gets it ready to help the dough rise. I ideal temperature is between 105° and 115°F.
Active Yeast: This is the rising agent in this recipe. It works with the warm water and sugar to make your dough rise and become fluffy and soft.
Melted Butter: It gives the rolls a rich, buttery flavor and helps to create a tender crumb.
Granulated Sugar: Sugar is used to feed the yeast, which helps the dough rise. It also adds a hint of sweetness to the rolls.
All-Purpose Flour: This is the main structural component of the rolls. Use a generous amount when working the dough to keep it from sticking. Remember, no kneading required!
Salt: A small amount of salt is added to balance the sweetness and bring out the flavors in the rolls.
For the Topping:
Butter: Melted butter is brushed on top of the rolls before baking to give them a beautiful golden color and additional buttery flavor.
Kosher Salt: A sprinkle of kosher salt on top of the rolls adds a delightful crunch and enhances the overall flavor.

Equipment
Dutch Whisk – This is an excellent tool for stirring all the roll ingredients together well. Its unique design allows for easy and efficient mixing of the dough. If you don’t have one, you could use a standard whisk or a wooden spoon, but the results might not be as smooth.
Large Mixing Bowl – You’ll need this for mixing your ingredients. The large size allows plenty of room for stirring without spilling. Make sure it’s big enough for the dough to rise as well.
Dough Cutter – This tool is essential for adding flour to the dough and making it workable. It also helps you cut your dough rectangle into strips. If you don’t have one, a sharp knife or a pizza cutter can also do the job, but a dough cutter is more convenient for this task.
9×13 Baking Dish – This dish is the perfect size for your rolls. It needs to be greased before adding the dough. You can use a different size if you prefer, but make sure it’s deep enough to accommodate the rising and baking of the rolls.
How to Make No Knead Dinner Rolls
Preparation
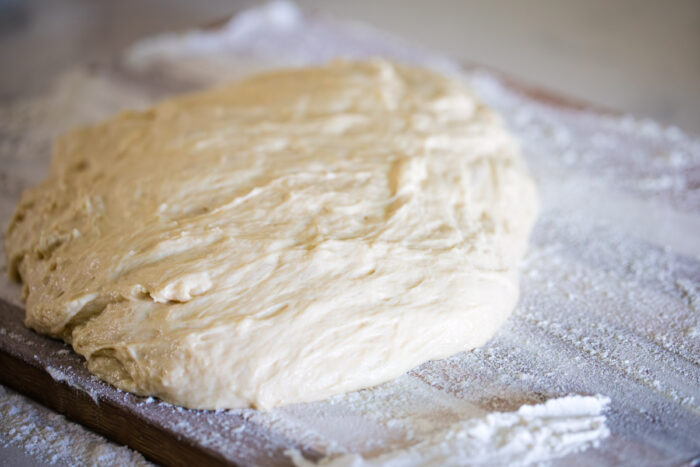
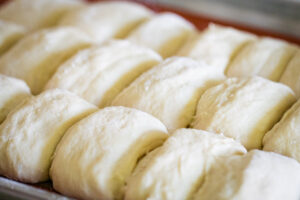
Start by stirring all the roll ingredients together until well combined. The dough will be very sticky at this point. Cover it with plastic wrap and let it rise for one hour in a warm place, or you can also place it in an oven set at a temperature of about 100˚ F.
Step 1 – Prepare the Dough
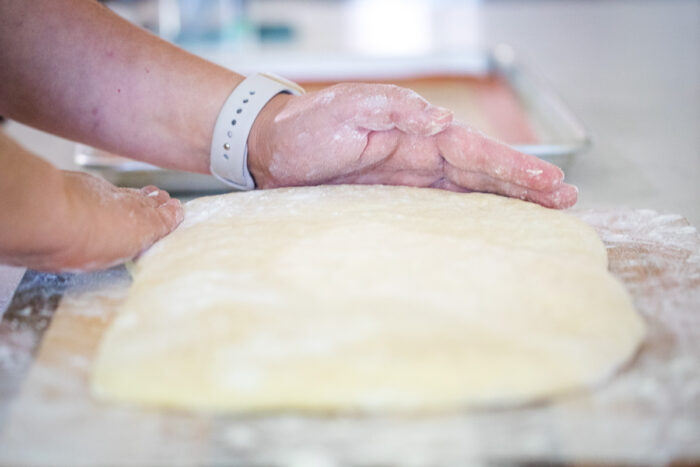
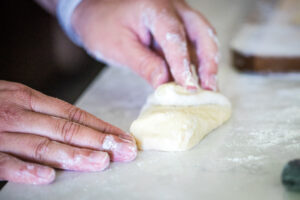
Next, sprinkle a generous amount of flour onto your countertop or large wooden cutting board to prevent the dough from sticking. Remove the batter from the large bowl and place it on top of the flour. Sprinkle some more flour on top of the dough. Flour your hands and using a dough cutter, incorporate the flour into the dough until it becomes workable. Then, roll the dough into a rectangle measuring approximately 12×20 inches.
Step 2 – Shape the Rolls
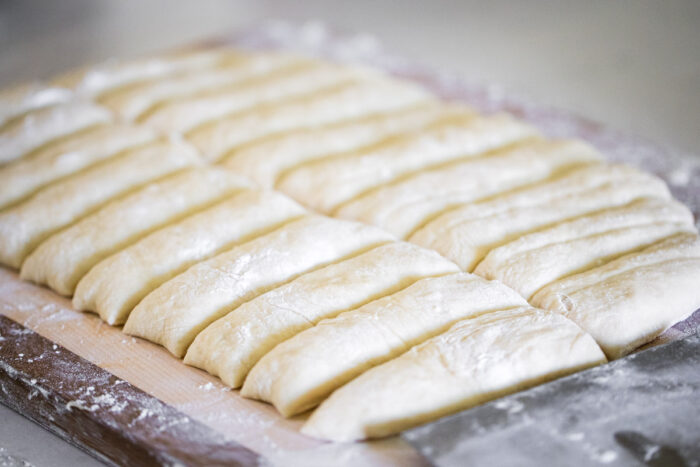
Cut the dough rectangle into strips of about 1½ inches wide, then cut these strips in half.
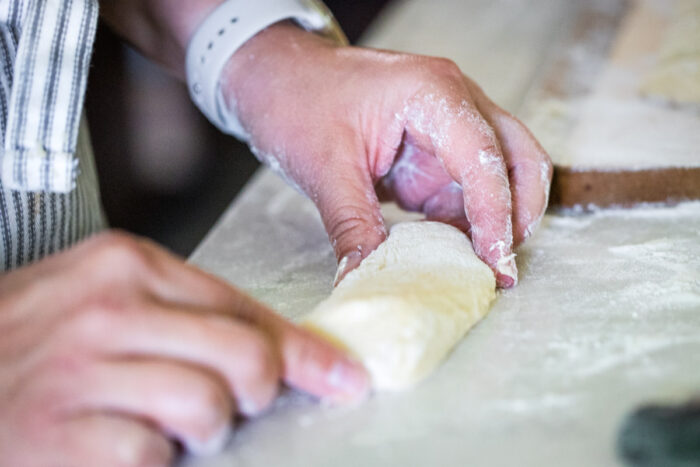

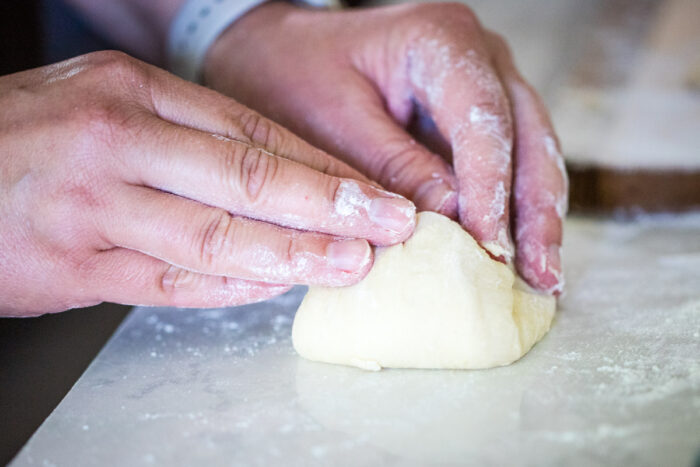
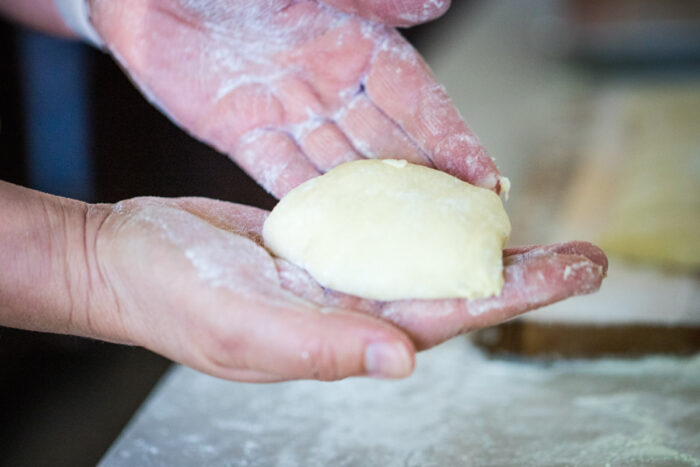
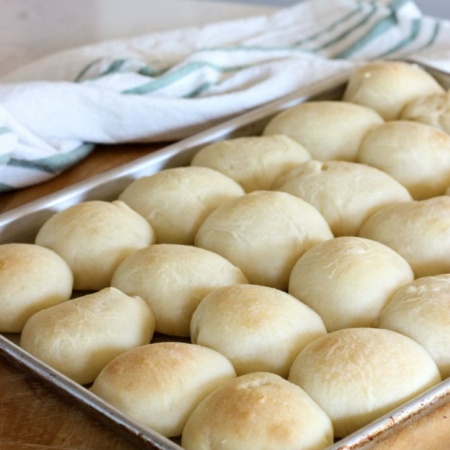
Take each strip and fold it into itself to form a roll. Place these rolls into a greased baking dish of about 9×13 inches.
Step 3 – Bake the Rolls
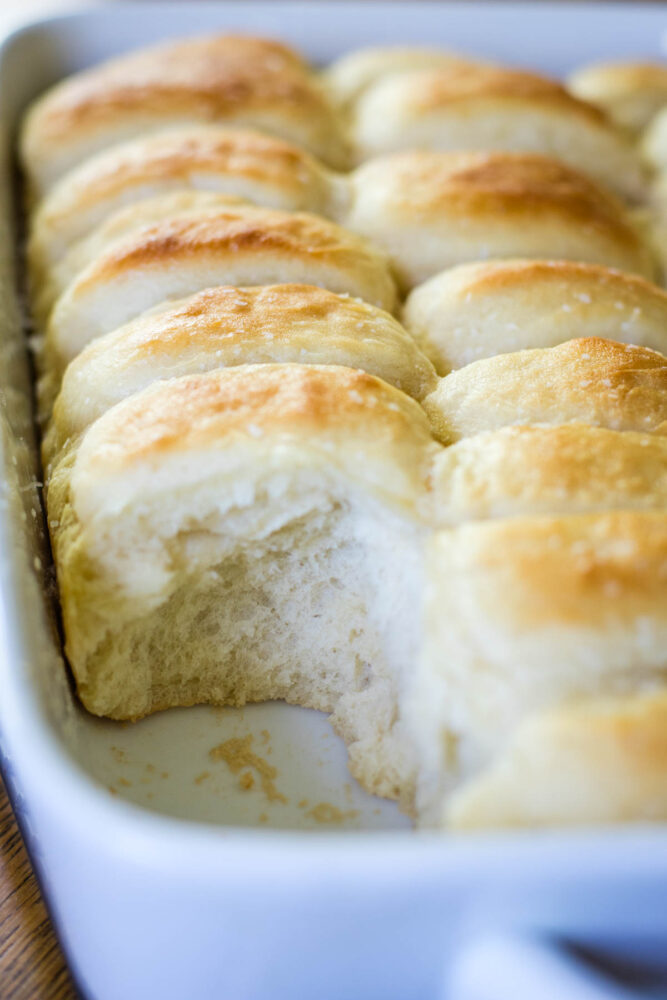
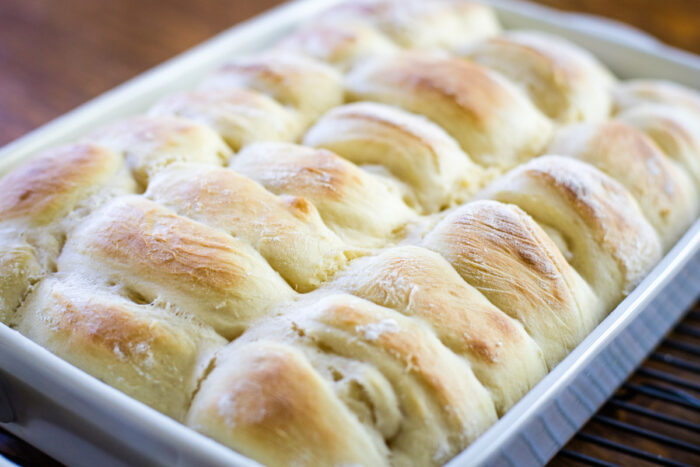
Bake the rolls in a preheated oven set at 375˚ F for about 12 minutes. Then, rotate the pan and continue to bake for an additional 8 minutes or until the top of the rolls turn a golden brown and the internal temperature reaches 190˚ F.
Step 4 – Finish and Serve
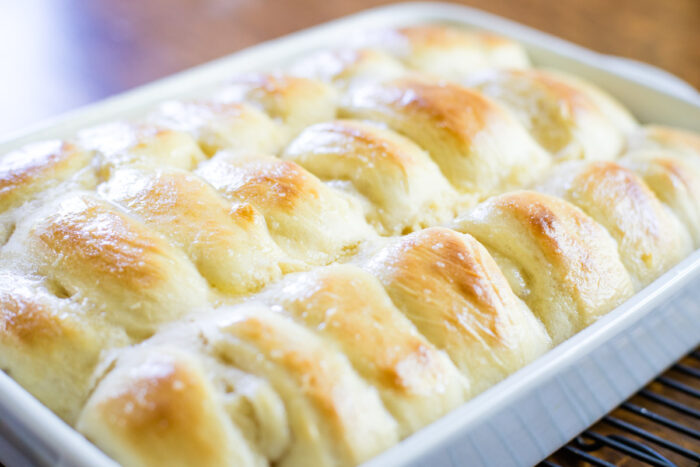
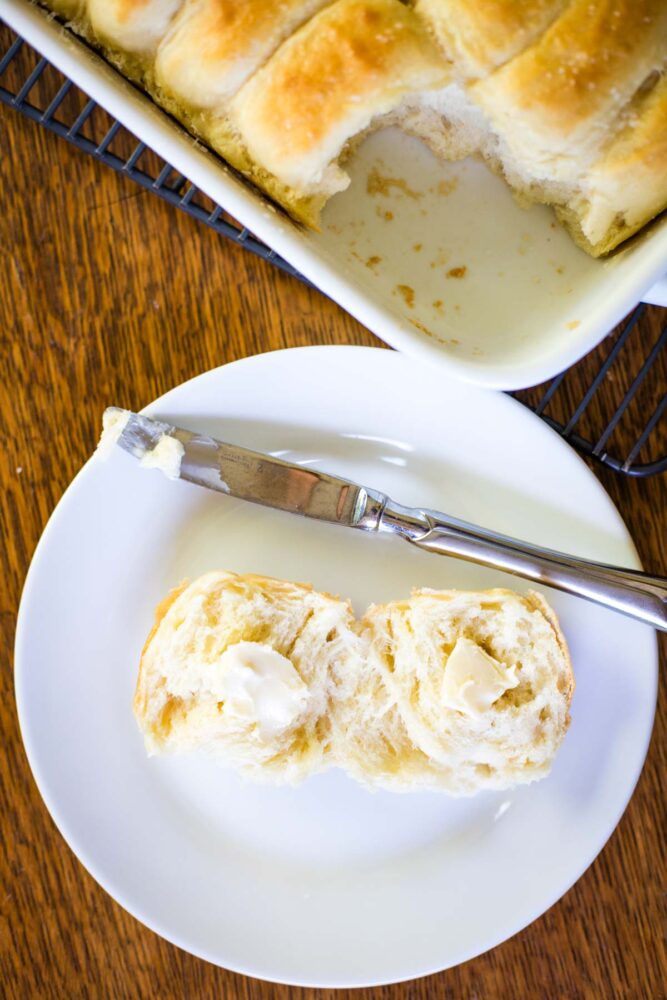
As soon as the rolls are out of the oven, brush them immediately with melted butter and sprinkle with kosher salt. Allow them to cool a bit on a cooling rack.
Your delicious No Knead Dinner Rolls are ready to serve!
Expert Tips
Proper Rising: Let the dough rise in a warm place or in an oven at a low temperature of around 100˚ F for one hour. This will ensure the dough rises correctly, resulting in soft and airy rolls.
Work with the Flour: Don’t be shy to use a generous amount of flour while working the dough. This prevents the dough from sticking and makes it workable. Dip your hands repeatedly in flour to keep your hands from sticking to the dough.
Use a Dough Cutter: A dough cutter can be your best friend to incorporate the flour into the dough and cut it into desired shapes and sizes.
Rotate During Baking: Rotate the pan halfway through baking. This ensures even baking and a golden brown crust on all your rolls.
Brush Immediately: For a glossy, buttery finish, brush your rolls with melted butter right after they come out of the oven, then sprinkle with kosher salt for a savory touch.
Recipe Variations
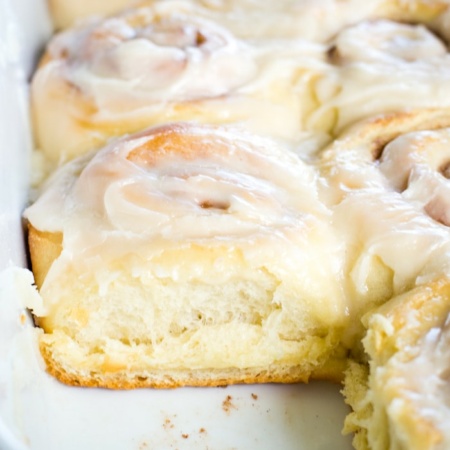
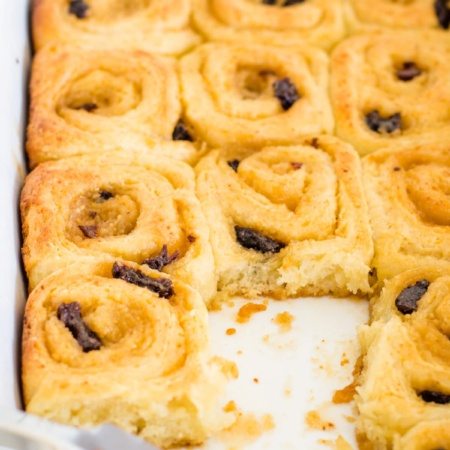
Try Some Cinnamon Sugar: If you have a sweet tooth, this variation is perfect for you. Brush your rolls with a mixture of cinnamon sugar and melted butter before baking. The sweet and spicy cinnamon sugar adds a delightful twist to the traditional rolls, and it pairs perfectly with a cup of tea or coffee.
Make It Garlicky: If you’re a fan of garlic, brush your rolls with garlic-infused melted butter before baking. You can also sprinkle some garlic powder on top for an extra kick. This will give your rolls a rich, aromatic garlic flavor that’s simply irresistible.
Use a Baking Sheet: Want a different shape for your rolls? Try baking them on a baking sheet instead of a baking dish. They will spread wider instead of supporting each other to give you a flatter shape.
What to Serve With
- For a savory snack, try serving these easy dinner rolls with a bowl of tomato soup. The warm, comforting soup and the soft, buttery rolls make for a fulfilling meal.
- Hosting a dinner party? These no knead dinner rolls can be an excellent side to a roast chicken or beef stew. The dense, meaty texture of the rolls pairs well with the savory dishes.
- These rolls are perfect for making sliders. Just slice them in half, add in your favorite fillings, and you have a quick and tasty meal.
Recipe FAQs
Yes, you can replace the butter with oil, but it may slightly change the flavor and texture of the rolls. Butter gives a rich, buttery taste that oil might not provide.
After mixing all the roll ingredients, let the dough rise for one hour. You can place it in a warm spot or in an oven set at a temperature of around 100˚ F.
Absolutely! You can brush the rolls with a mixture of cinnamon sugar and melted butter before baking them to add a sweet taste.
Yes, you can bake the rolls on a baking sheet. However, keep in mind that they will spread wider instead of supporting each other, which may slightly alter their shape.
Storing and Reheating
Storing: Once your no knead dinner rolls have completely cooled, store them in an airtight container at room temperature for up to two days.
Reheat Instructions: When you’re ready to enjoy your rolls again, reheat individual rolls for about fifteen seconds in the microwave. This will bring back the soft, buttery texture we all love.
More Roll Recipes You’ll Enjoy
Serving Size
What to Expect: This recipe makes around 21 no knead rolls that are good for a family of 5 to 6.
How to Scale: If you want to make a larger batch, you can easily double the recipe and follow the instructions as directed. Make sure you use a large enough bowl to properly mix the ingredients and allow the dough to rise.
No Knead Dinner Rolls
Equipment
- 1 Dutch Dough Whisk
- 1 Dough Scraper
Ingredients
Roll Ingredients
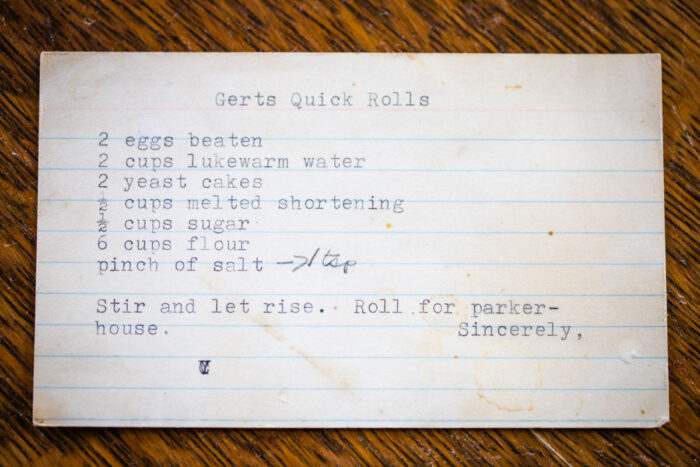
- 2 eggs beaten
- 2 cups warm water
- 4 ¼ teaspoons active yeast
- ½ cup butter melted
- ½ cup granulated sugar
- 6 cups all-purpose flour
- 1 teaspoon salt
Butter Topping
- 2 Tablespoons Butter melted
- 1 Tablespoon kosher salt
Instructions
Make The Dough
- Stir all roll ingredients together well using dough whisk. The dough will be very sticky. Cover with plastic wrap and let rise for one hour in a warm place or in an oven at 100˚ F.


Shape the Dough
- Preheat oven to 375˚ F.
- Add a generous amount of flour to the countertop. Remove the batter from the large bowl on top of the flour. Sprinkle flour on top and use a dough cutter to add flour to the dough to make it workable. Roll into a 12×20 rectangle.
- Cut the dough rectangle into 1 ½ inch strips, and then cut in half.
- With each strip, fold one third into center.
- Fold the other half of the strip into the center.
- Put each roll seam down into a 9×13 baking dish.


Bake the Dough
- Bake in a preheated 375˚ F oven for 12 minutes. Rotate the pan and bake for an additional 8 minutes or until the top is golden brown and the internal temperature of the rolls is 190˚ F.
- Brush immediately with melted butter and sprinkle with kosher salt. Let cool and serve.


Comments & Reviews
I found a no knead bread recipe last year that my friends and I loved. Then I was looking for a no knead soft roll recipe, and found this!
I am having a hard time going back to the first recipe! The good news is that my friends don’t care what I bring as long as it’s rolls or bread!
Thank you for sharing this easy and tasty recipe!
So glad you enjoyed it! It’s my family’s favorite!