
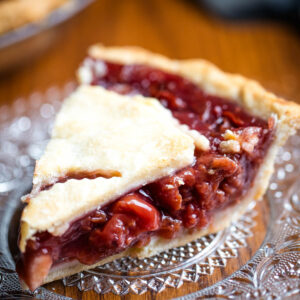
This is the best cherry pie recipe you’ll ever try. It’s a family favorite recipe that gives delicious results every time using only four ingredients for the pie filling and a pie crust. If you’re intimidated by making your pies and don’t know where to start, this recipe is perfect for you! It’ll give you a homemade cherry pie like none other.
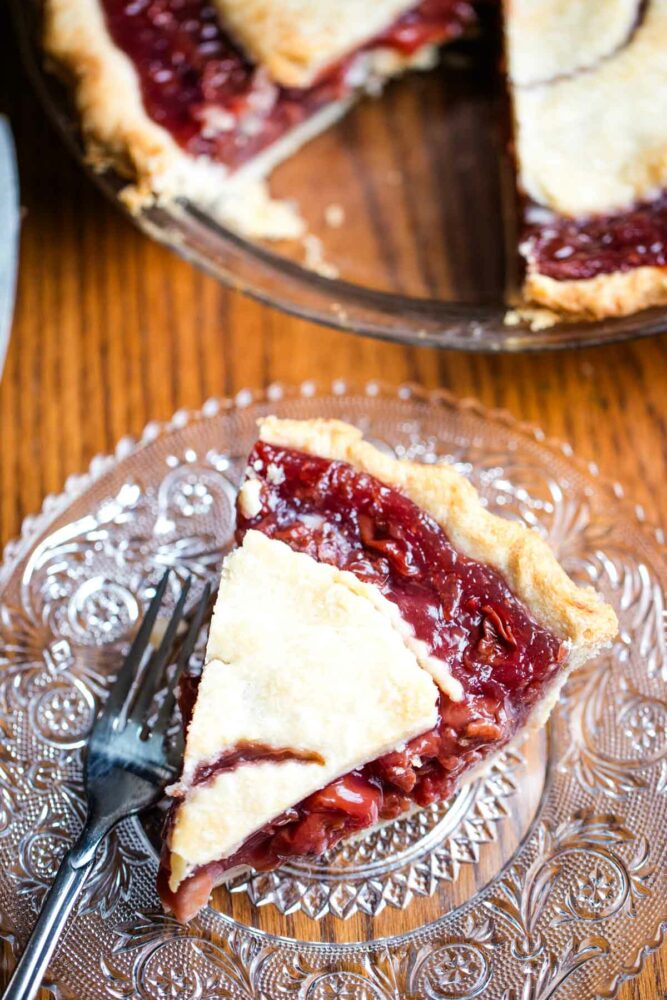
Cherry pie is a quintessential dessert, and the homemade version of it is even better. Trust me, there’s nothing, absolutely nothing, like a homemade cherry pie made from scratch. My mom created this recipe, and I’ve made it hundreds of times; it seriously turns out great every single time. So, if you’re looking for a tried and tested cherry pie recipe, this is it.
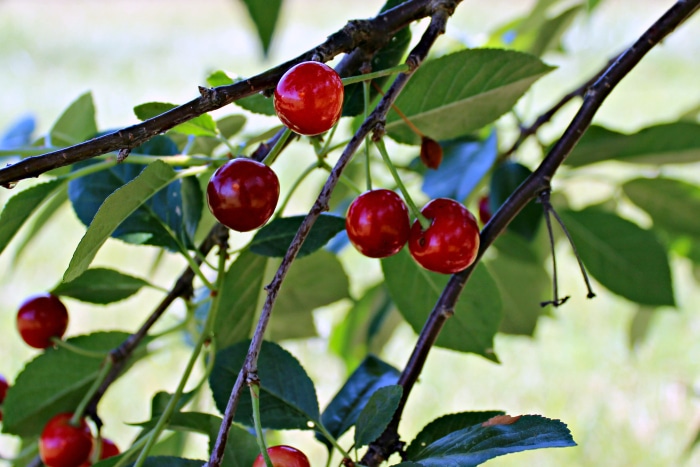
My family has had cherry trees for as long as I can remember. I have vivid memories of spending entire days pitting cherries. Cherries freeze well, so my mom would freeze the pitted cherries to use in pies throughout the year for special occasions like Christmas, my dad’s birthday, Thanksgiving, and others.
The original cherry trees are now gone, so my dad planted new dwarf cherry trees that have tart cherries. They are best for pies. One dwarf tree can make about 2 to 3 pies or 8 – 12 cups of cherries. It probably doesn’t seem like that much for all the work my dad does to keep the birds from eating them. But when cherry pies are your favorite, it’s so worth it!
Table of Contents
Why I Love This Recipe
- Easy to make: This homemade cherry pie recipe is straightforward like my favorite oatmeal pie. With a pre-made pie crust and canned cherries, you’re just a few steps away from a classic dessert.
- Family-favorite: The taste of this pie is a hit with all ages, and you only need four ingredients to get that classic flavor. It’s a dessert that’s been a family favorite for generations.
- Adaptable: This recipe is versatile and allows for the use of different types of cherries. Whether you’ve got fresh, frozen cherries, or canned ones, this pie will turn out delicious. You can even adapt it to make a blueberry pie.
- Crowd Pleaser: This cherry pie is a definite crowd-pleaser. It’s perfect for serving at family gatherings, birthday parties, or even during the holidays. Add a scoop of vanilla ice cream on top for an extra special treat.
Want to save this recipe?
Enter your email & I'll send it to your inbox. Plus, get great new recipes from me every week!
Key Ingredients
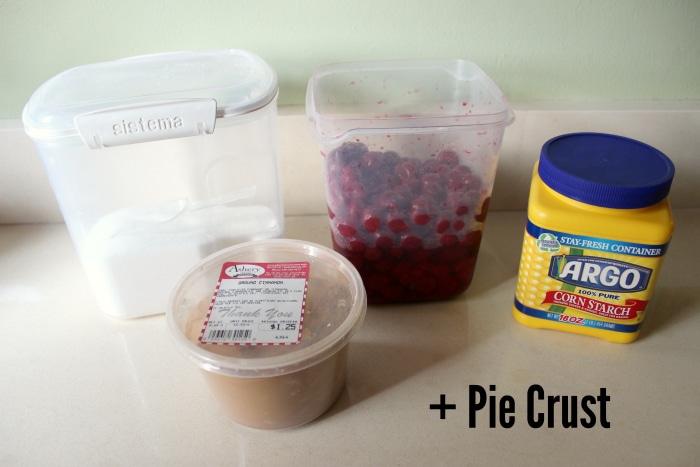
Granulated Sugar: This is what sweetens the pie. It balances the tartness of the cherries and brings out their natural sweetness.
Cornstarch: This is a thickening agent. It helps to thicken the cherry pie filling, making it just the right consistency.
Ground Cinnamon: This spice adds a warm, aromatic flavor that compliments the cherries beautifully.
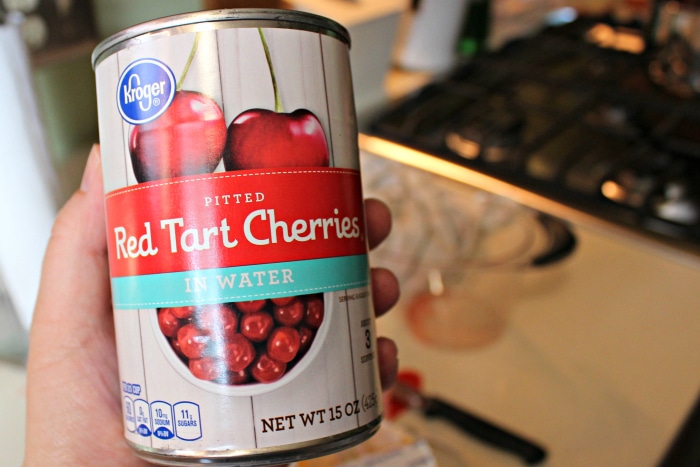
Canned Pitted Tart Cherries: This is the star of the show! Tart cherries give the pie its classic, tangy flavor. Remember, you’ll need about two cans to get the right amount. It’s important to purchase tart cherries in water and not cherry pie filling. You’re going to be making your own.
Fresh Cherries: You can also use fresh cherries with this recipe. Make sure they are pitted. I also freeze them over night to let them fully thaw to produce the juice you’ll need for the filling.
Cherry Juice: This comes from the canned cherries. It is used in the filling and enhances the cherry flavor.
Make-Ahead Pie Crust: This is the shell for your pie. It holds everything together and provides a delicious, flaky contrast to the juicy filling. I recommend making a homemade pie crust for the best results; trust me, it’s easier than you think!
Equipment
Pan – A good-sized pan is essential for this recipe. It is where you’ll combine the sugar, cornstarch, cinnamon, and cherry juice to create the filling for your homemade cherry pie.
Cherry Pitter – If you are using fresh cherries, a cherry pitter can make your job a lot easier. This handy tool removes the pits from your cherries quickly and efficiently, saving you a lot of time.
Pie Dish – You’ll need a pie pan to form your pie crust. I recommend using a nine-inch pie pan or pie plate for this recipe.
Cooling Rack – After baking, the pie needs to cool for a couple of hours before serving. A cooling rack allows air to circulate the pie, helping it cool faster and preventing the bottom crust from getting soggy.
How to Make Cherry Pie
Preparations
To prepare for your homemade cherry pie, gather all your ingredients. Preheat your oven to 450° F.
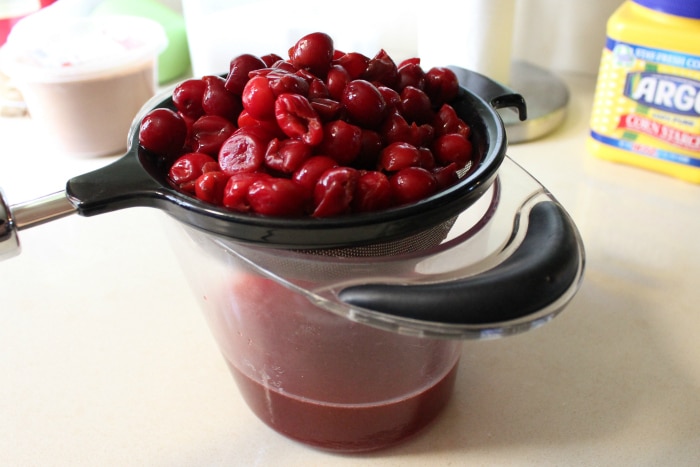
- Frozen cherries: Make sure they’re completely thawed. If you’re using fresh cherries, you’ll need a cherry pitter to remove the pits. If using fresh cherries, I recommend freezing them overnight and thawing for the juiciest cherries. Drain the thawed cherries over a glass measuring cup to use the juice in the next step.
- Canned Cherries: Drain the canned cherries over a large glass measuring cup.

Step 1 – Cook the Cherry Pie Filling
In a large pan, combine your sugar, cornstarch, cinnamon, and one cup of cherry juice. Cook this mixture until it thickens into a rich, sweet cherry pie filling – stirring constantly. Add in your tart cherries, and let the mixture completely cool to room temperature. (Optionally, you can make this filling the night before and store it in the refrigerator. Let it come to room temperature before adding the pie crust.)

Step 2 – Fill the Pie Crust
Pour your cooled cherry pie filling into a homemade pie crust that has been dusted with a tablespoon of flour on the bottom. This flour helps to absorb any excess juices and prevents a soggy pie crust. Dot the filling with pieces of butter for added richness.
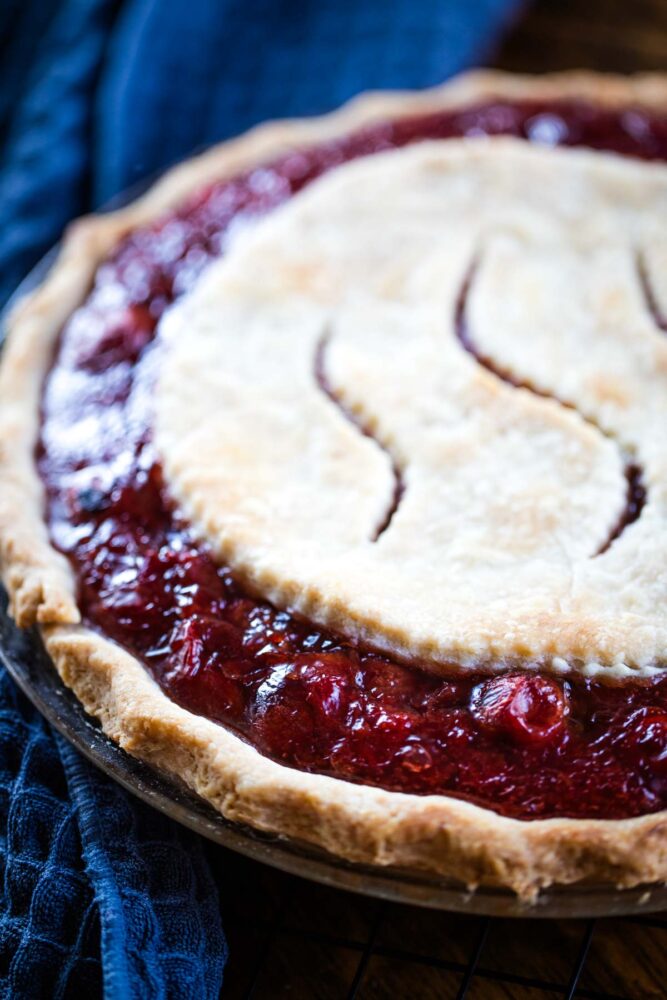
Step 3 – Add the Top Crust
Cover your cherry pie filling with the top crust of your pie dough. You can choose to simply place the top crust over the filling or get creative with a lattice design or cut-outs.
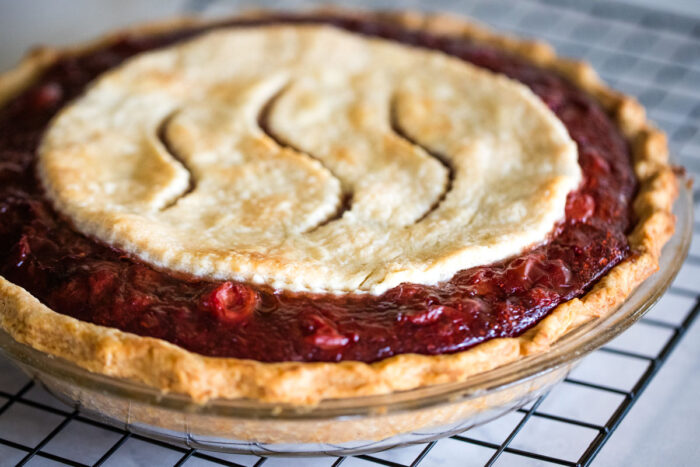
Step 4 – Bake the Pie
Bake your pie at a high temperature of around 450° F for the first 15 minutes. This helps to set the pie crust and prevent it from becoming soggy. After this, turn down the oven to a lower temperature of around 350° F and bake for an additional 30 minutes. This allows the pie to cook thoroughly without the crust burning.
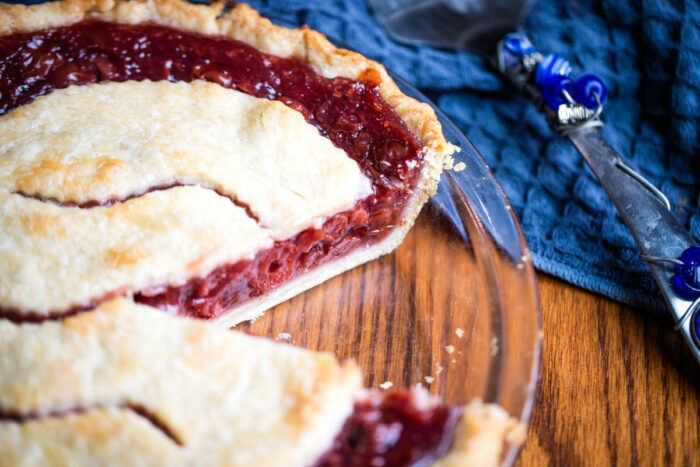
Step 5 – Cool and Serve
Let your homemade cherry pie cool for at least two hours before serving. This allows the filling to set and makes it easier to slice. Enjoy your delicious homemade cherry pie!
Expert Tips
Choose the right cherries: Always opt for tart cherries for your cherry pie filling. They give the perfect balance of sweet and tart flavors. Remember, you can use canned, frozen, or fresh cherries, but the tart ones make the best pies.
Prep your cherries: If you’re using fresh cherries, freeze them overnight and then let them thaw. This step makes them extra juicy. Use a cherry pitter to remove the pits easily.
Manage your juices: Don’t forget to drain the juice from the cherries before using them. While the juices add flavor, too much can make your pie too juicy and it won’t hold together well.
Don’t skip the butter: Dotting your cherry mixture with butter before adding the top crust adds richness and depth to the flavor of your pie. Butter also helps to create a golden, flaky pie crust.
Master the bake: Bake your pie at two different temperatures to achieve the perfect crust and filling. Start at a higher temperature (450°F) for the first fifteen minutes and then lower it (350°F) for the rest of the baking time. This method guarantees a well-cooked filling and a beautifully browned pie crust.
Use a pie shield: After the first fifteen minutes, add a pie shield to keep the edges of the pie from overbaking.
Patience is key: After baking, let your pie cool for at least two hours before serving. This allows the filling to be set properly and makes slicing much easier. Enjoy your delicious homemade cherry pie with a scoop of vanilla ice cream for an added treat!
Recipe Variations
Add Nut Extract: If you love the taste of almonds, try adding a teaspoon of almond extract to your cherry mixture. This will give your homemade cherry pie a delicious nutty flavor that perfectly compliments the tartness of the sour cherries.
Use Sweet Cherries: Tart cherries give the best results, but for a sweeter twist, you can swap the sour cherries for sweet cherries. This variation will give your cherry pie a naturally sweeter taste, reducing the need for added sugar. Remember to adjust the amount of granulated sugar to avoid an overly sweet pie.
Add a Zesty Twist: For a refreshing tang, add a tablespoon of lemon juice to your cherry mixture. The citrus notes will brighten the flavor of the cherries, giving your pie a unique and invigorating taste.
What to Serve With
- For a delicious dessert option, serve your homemade cherry pie warm with a generous scoop of vanilla ice cream on top. The creaminess of the ice cream perfectly compliments the tartness of the cherries.
- For a festive twist, try serving your cherry pie with a sprinkle of powdered sugar and a side of whipped cream. It is a delightful combination that will impress your guests.
- This cherry pie can also be a great addition to your afternoon tea. Serve it with a cup of strong black tea or a light, floral chamomile tea.
- You can even serve this delicious pie with some warm custard sauce. The velvety consistency of the custard will go beautifully with the cherry pie.

Recipe FAQs
You should ideally use tart cherries for this pie recipe. You can buy them canned or you can find them in the freezer section of your grocery store. If you’re using fresh cherries, it is best to freeze them overnight and then let them thaw before using to get them nice and juicy.
To prevent your pie from becoming too juicy, it is important to drain some of the juices from the cherries before adding them to your pie. This will guarantee that your pie holds together well. Also, make sure to let the filling become thick before adding the cherries while making the filling. This precooking of the filling results in a thick pie filling.
Yes, you can make the cherry filling the night before and refrigerate it. This can help to save time and make your baking process more efficient the next day. Bring the filling to room temperature before filling the pie crust and baking.
Storing and Reheating
Unsliced Storage: If your pie is unsliced, you can store it at room temperature for up to 24 hours. One you slice into your pie you will need to refrigerate it.
Refrigerate: After you’ve enjoyed your delicious cherry pie, you can store the leftovers in your refrigerator. Simply cover the pie with plastic wrap or foil and place it in the fridge. It is best to consume the leftovers within four to five days for the freshest taste.
Reheat Instructions: When you’re ready to enjoy your pie again, preheat your oven to a low temperature. Place the pie on a baking sheet and warm it for about fifteen minutes. This will help revive the flaky texture of the pie crust and warm the cherry pie filling.
Freeze: If you have a lot of leftover pie, you might consider freezing it. Wrap the pie tightly in plastic wrap and then a layer of aluminum foil to protect it from freezer burn. It is best to consume the frozen pie within two to three months.
Thawing Instructions: When you’re ready to eat your frozen pie, transfer it to the refrigerator and let it thaw overnight. Once it is thawed, you can reheat it in the oven as described above.
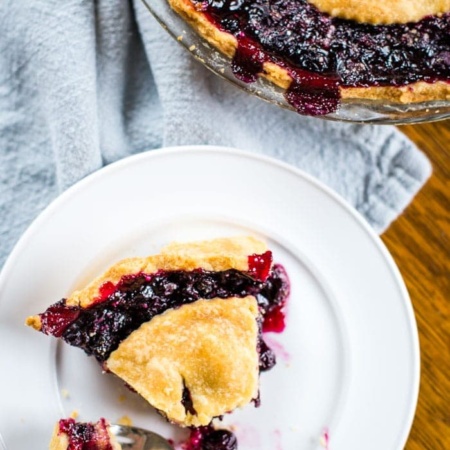
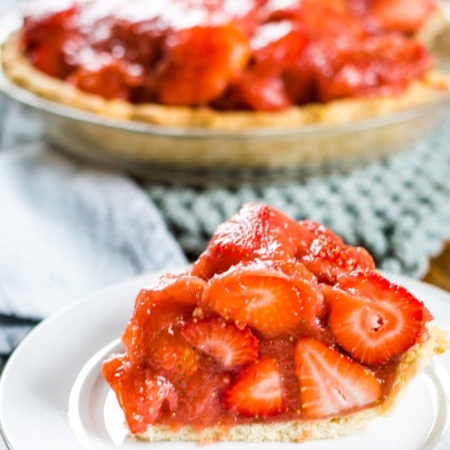
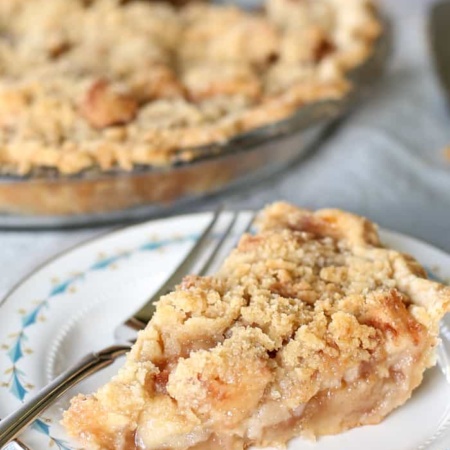
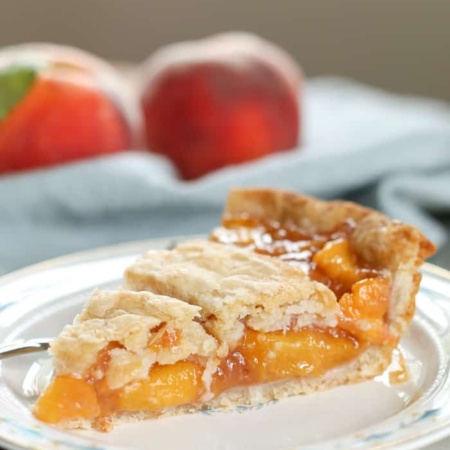
More Pie Recipes You’ll Enjoy
Serving Size
What to Expect: This recipe makes enough filling for one nine-inch pie. I recommend using my double pie crust recipe and freezing one pie crust to enjoy later.
How to Scale: If you want to make more than one 9” pie, you can double the recipe and follow the instructions as directed. Use a large pan to mix all the ingredients and two pie crusts for the filling you’ll make.
The Best Cherry Pie Recipe
Equipment
- 9" Traditional Pie Plate
Ingredients
- 1 9" Pie Crust
- 1 Cup Granulated Sugar
- 4 Tablespoons Cornstarch
- ¼ teaspoon Ground Cinnamon
- 32 oz Canned and Pitted Tart Cherries
- 1 cup Cherry Juice from canned cherries
- 1 Tablespoon All-Purpose Flour
- 1 Tablespoon Butter
Instructions
- Preheat your oven to 450˚ F. Make your pie dough and press into a traditional 9" pie plate. Drain the cherries into a glass measuring cup. Reserve one cup of cherry juice for filling.
- In a stockpot, combine sugar, cornstarch, cinnamon, and 1 cup of cherry juice. Stir and bring to boil under medium heat until thickened. Immediately remove from heat and stir in cherries. Let cool to room temperature.
- Pour cooled filling into the formed pie crust with 1 Tablespoon of flour on the bottom. Dot with butter and add top crust.
- Bake at 450° F for 15 minutes, then turn down oven and then at 350° F for 30 more minutes. Let cool for at least 2 hours before serving.


Comments & Reviews
Can I use frozen pie crust to cook? And then add the extra of course trimmed off for the top?
Definitely a keeper!! I made this pie for my family and they loved it! Everyone said it was the best cherry pie they ever had!!! It also worked well with blueberries. Thank you for making delicious simple and with real ingredients!!
Yay! So glad you enjoyed it! It is one of our favorites in our home as well.
Do you ever use almond extract in your cherry pies or would it work ok in your receipt I usually use l teaspoon in 3 cans of cherries
I don’t use almond extract in my pie, but I do think it would make a nice compliment. I would start with 1/4 teaspoon of almond extract as it can be strong in recipes. Let me know how it turns out!
Recipe not receipt auto correct sucks
What does the tablespoon of flour on the bottom of filling do?
My great-grandma always did it, so I do as well. I believe it keeps the bottom pie crust from getting soggy. I add a tablespoon of flour to the bottom whether I’m making this cherry pie or my apple pie.
Thanks so much!
Is this degrees fahreheit or celsius?
Can you add F or C to recipes please
Hi Paul, I apologize for the confusion and will update the recipe. All recipes on Cleverly Simple are Fahrenheit.
What size pie plate are you using for this recipe? Does is need to be adjusted if I’m using a 9 inch pie plate? ANd if so by how much? THANKs!!!
Hi Kyla, I use a 9 inch pie plate that is not deep dish. The deep dish pie plate will not have enough filling. This is the one I use.
Hi Lynette, Just browsing and came across your site for this lovely looking pie. I have some “fresh” cherries in the fridge to use, but you don’t say how to prepare “fresh” cherries. What ratio of “fresh cherries” to “water” to do initial cooking of cherries before freezing then draining to make the sauce. You’ve explained if one is using canned or jarred cherries, but I’m a little lost in using “fresh cherries”.
Hi Josephine, what kind of cherries are they? They need to be a tart cherry not the bing cherries you would find in the produce section of the grocery store. If they are a tart cherry, you can let them drain a bit of the cherry juice after pitting them and that will give you the cherry juice you need. I’ve made this pie fresh from the cherry tree – using fresh cherries but they are of the tart cherry variety that are grown for pies.
Do you think you could substitute sugar substitute for the sugar?
I have never tried this recipe with sugar substitute so I can’t say how it would work. If you do try it, please let me know the results!
This looks very good. The only thing I would add is a teaspoon of almond extract. Really compliments the cherry flavor!