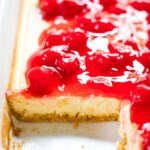
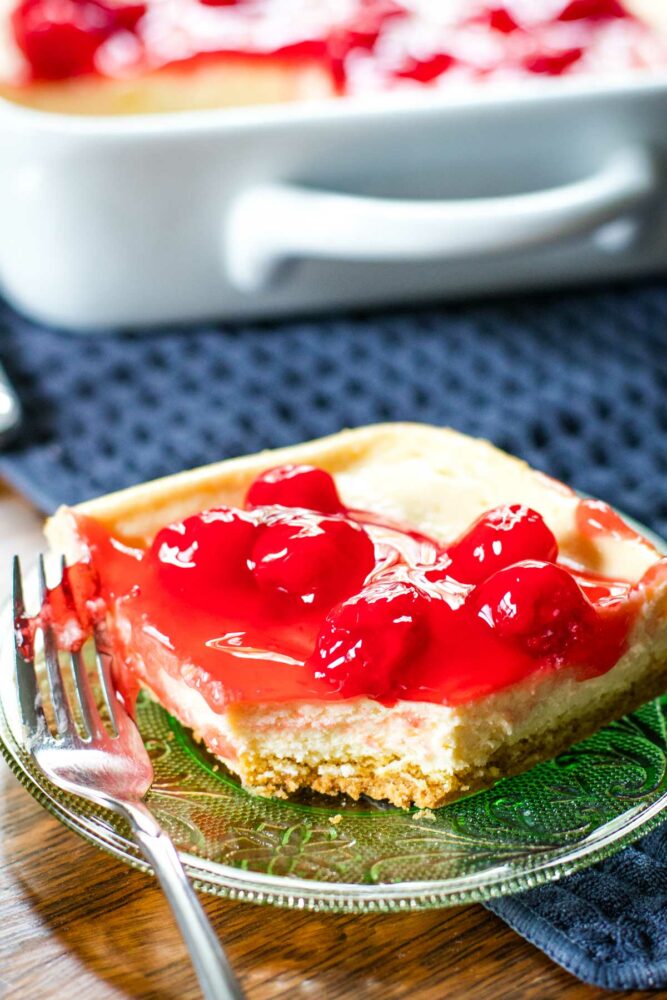
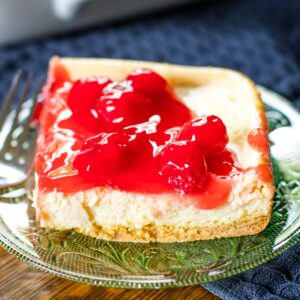
If you’re looking to make a classic Cherry Cheesecake without all the fuss, this recipe is going to become your new favorite! It’ll give you a cheesecake that’s incredibly creamy, perfectly sweet, and super easy to make with a boxed cake mix! Classic flavors made easy!
The flavor profile of this cherry cheesecake is simply irresistible. The sweetness of the cake mix compliments the creaminess of the cream cheese, and the tartness of the cherry pie filling adds a perfect contrast. It’s a wonderful cake to prepare at home, offering a gourmet dessert experience right in your own kitchen.
Whether it’s a family get-together, a potluck, or a casual dinner party, this cherry cheesecake is sure to win everyone over. It looks impressive, tastes amazing, and can be made ahead of time, making it the perfect dessert for any occasion.
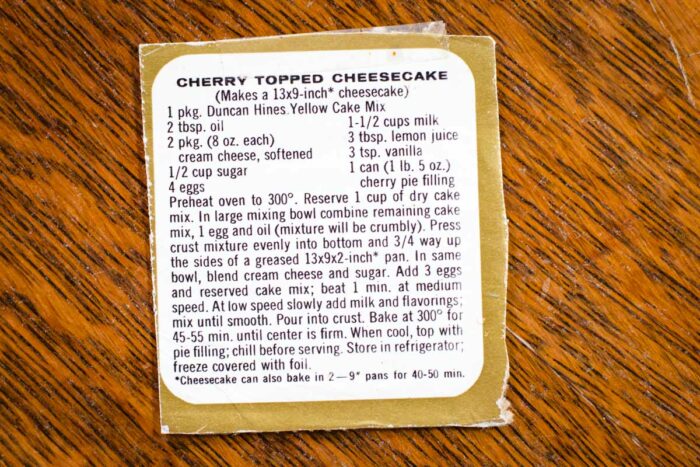
Table of Contents
Why I Love This Recipe
I found this one tucked in an old recipe binder. It looks like it was cut out of a box, and kept. You know what they say about those kept recipes! Here are a few reasons why this recipe was a success.
Easy to make: This cherry cheesecake recipe is super easy to whip up, especially because it uses a boxed cake mix. Just mix the ingredients, pour into the pan, and let the oven do the rest.
Quick: With a total baking time of just around an hour, this recipe is perfect for those sudden dessert cravings. The prep work is minimal – just mix, pour, and bake. And the best part? You can make it ahead of time and refrigerate.
Family favorite: The combination of flavors from the creamy cheesecake filling, the tangy cherry pie filling, and the sweet cake mix is a hit with kids and adults alike. It’s the kind of dessert that gets requested over and over again at family gatherings.
Versatile: This cherry cheesecake is not just delicious but also versatile. You can top it with homemade cherry pie filling or use store-bought for convenience. You can also try other toppings like blueberry or strawberry for a change.
Want to save this recipe?
Enter your email & I'll send it to your inbox. Plus, get great new recipes from me every week!
Key Ingredients
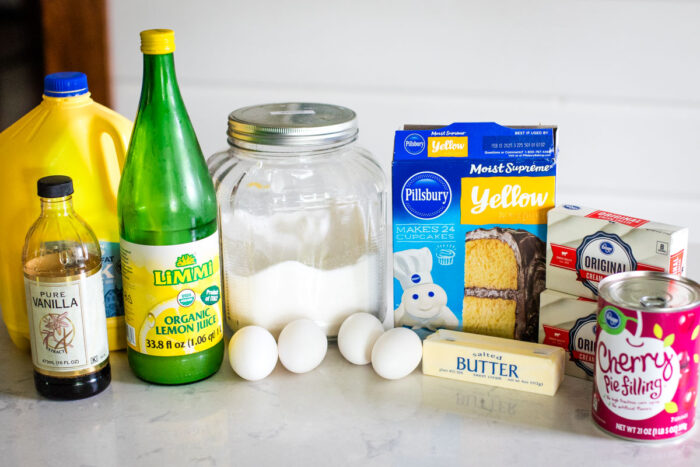
Yellow Cake Mix: This serves as the basis of your cheesecake, providing a sweet, fluffy layer that contrasts perfectly with the creamy filling.
Melted Butter: The melted butter binds the cake mix together, creating a firm yet crumbly crust for your cheesecake. It also adds a rich, buttery flavor to the crust.
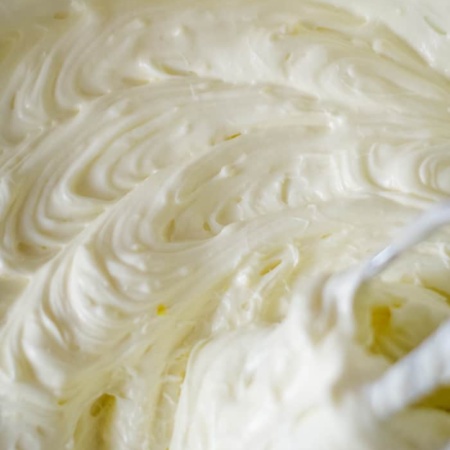
Cream Cheese: Cream cheese is the star of the show in any cheesecake recipe. It is what gives the cheesecake filling its creamy, tangy flavor and smooth texture. Make sure that it is softened to room temperature for easy mixing.
Granulated Sugar: This sweetens the cream cheese, balancing out its tanginess. The sugar also helps to give the cheesecake a nice, smooth texture.
Eggs: Eggs are crucial in a cheesecake recipe. They help to bind the ingredients together and give the cheesecake its firm yet creamy texture.
Milk: Milk adds moisture to the cheesecake, helping to create a smooth and creamy texture.
Lemon Juice: A bit of lemon juice adds a subtle citrusy tang to the cheesecake, balancing the sweetness of the other ingredients and enhancing their flavors.
Vanilla: Vanilla extract adds a hint of warm, aromatic flavor that compliments the cream cheese beautifully.
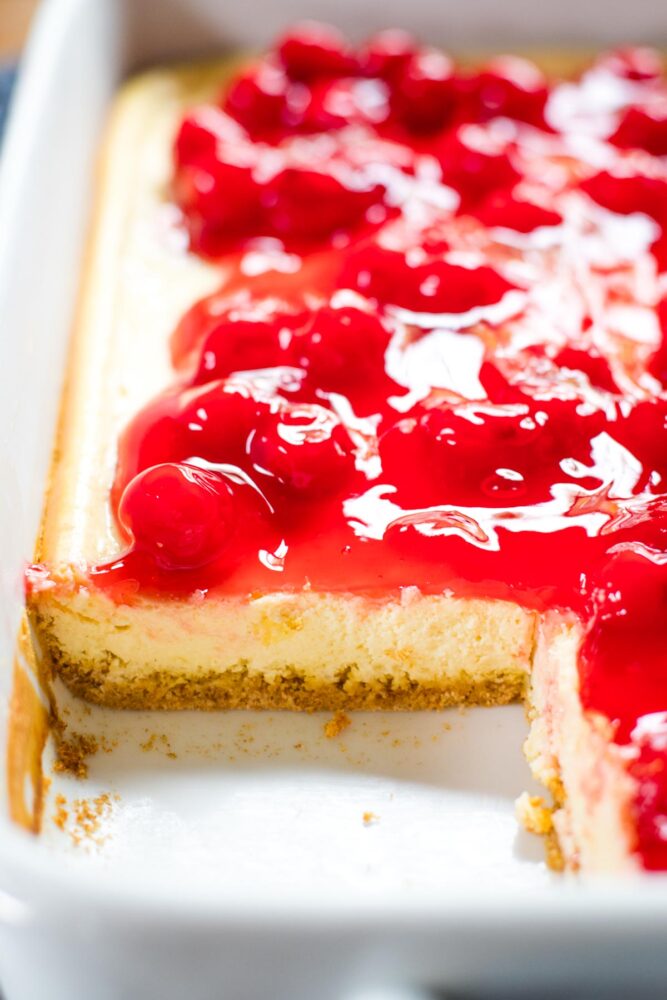
Cherry Pie Filling: The cherry pie filling serves as a sweet, fruity topping that compliments the creamy cheesecake perfectly.
Equipment
Electric Mixer – This is a key piece of equipment in our cherry cheesecake recipe. It’ll allow you to easily blend the cream cheese and sugar until they’re light and fluffy and also beat the eggs and cake mix and mix in the wet ingredients properly. If you don’t own one, a hand whisk can also get the job done, but it will require a bit more effort.
Large Bowl – A large bowl is necessary in this recipe. It gives you plenty of space to mix your ingredients without making a mess.
13×9” Pan – This is the pan size recommended for this cherry cheesecake recipe. It provides ample space for the cake and cheesecake layers and the cherry pie filling topping. Remember to grease it before adding the ingredients to prevent sticking.
How to Make Cherry Cheesecake
Preparation
Before starting, make sure to preheat your oven to a temperature of 300˚ F. Grease your baking pan, preferably a size of about 13×9”. Set aside a cup of yellow cake mix for later use.

Step 1 – Make the Crust
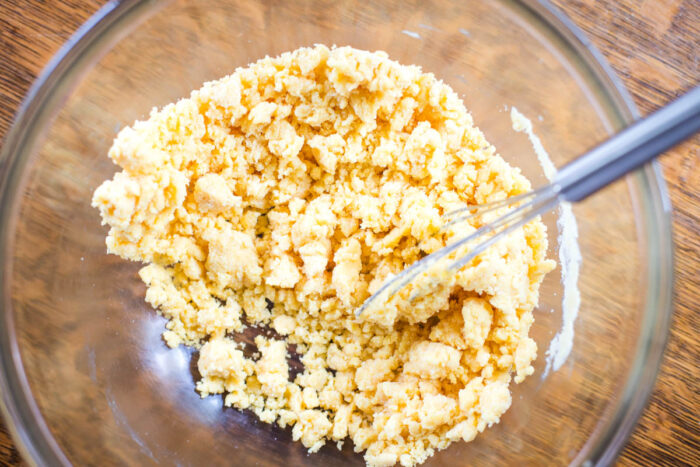
In a large bowl, mix together the remaining cake mix with an egg and some melted butter to create a crumbly texture. Press this mixture into your greased pan to form the crust of your cheesecake.
Step 2 – Prepare the Cheesecake Filling
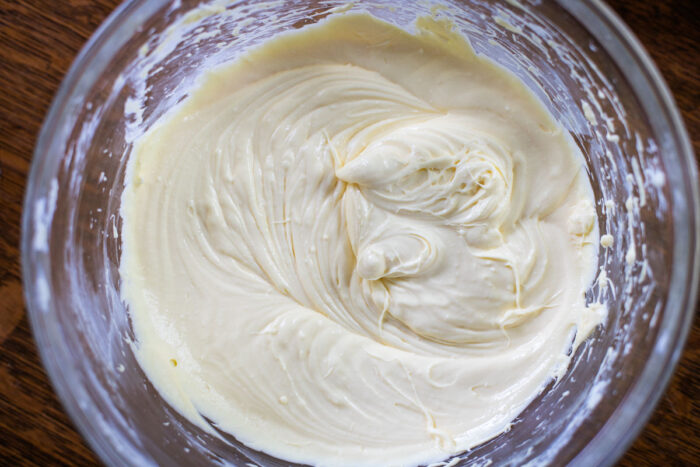
Using the same large bowl, blend together some cream cheese and sugar until the mixture is light and fluffy. Add in three eggs and the cup of yellow cake mix you set aside earlier. Using an electric mixer, beat the mixture for about a minute at medium speed.
Step 3 – Add Flavorings to the Filling
Decrease the speed of your mixer to low, then add in some milk, lemon juice, and vanilla extract. Pour this cheesecake batter over the crust in your pan.
Step 4 – Bake the Cheesecake
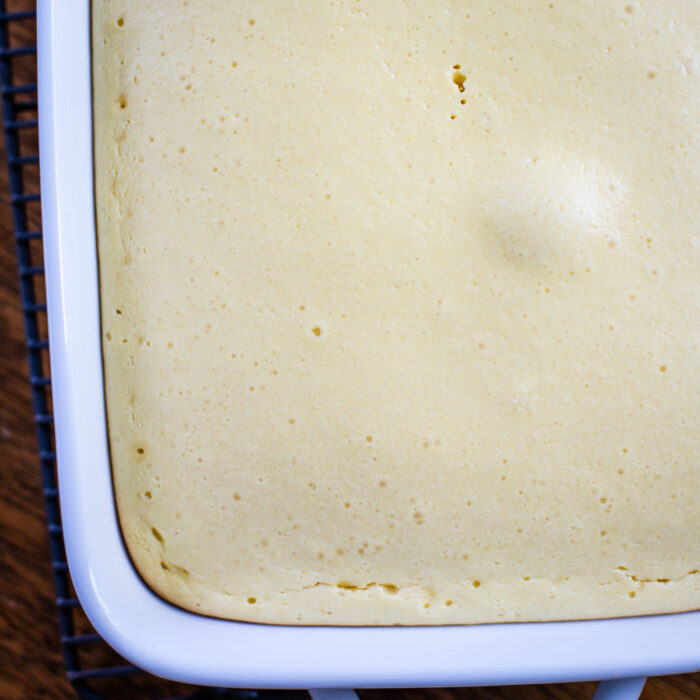
Bake your cheesecake in the preheated oven at 300 ̊ F for about 50-60 minutes. The cheesecake is done when the center is firm and reaches a temperature of 180 ̊ F.
Step 5 – Cool and Store
Allow your cheesecake to cool completely before storing it in the refrigerator.
Step 6 – Add the Cherry Topping
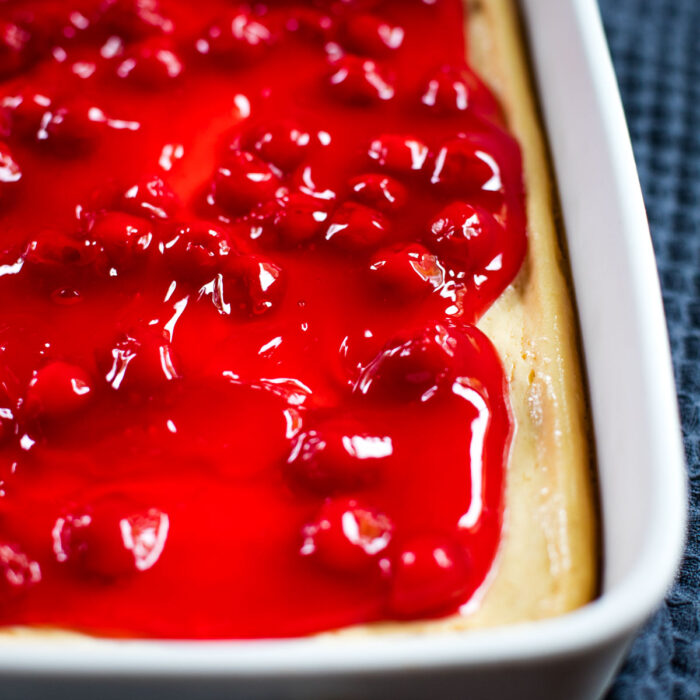
Before serving, top your cheesecake with some cherry pie filling to add an extra burst of flavor. Enjoy your homemade cherry cheesecake!
Expert Tips
Use a Boxed Cake Mix: This cherry cheesecake recipe cleverly uses a boxed cake mix for the crust. It’s a time-saver, and guarantees a perfect crumble every time.
Press the Base Firmly: Make sure to press the crumbly cake mixture firmly and evenly into the cake pan. This will create a sturdy and delicious foundation for your cheesecake.
Grease the Pan Well: Be sure to grease your pan thoroughly before adding the cake mix. This prevents the cake from sticking to the pan and makes it easier to serve.
Double Up on the Cherry Topping: Use two cans of cherry pie filling to fully cover the top of your cheesecake. This gives an extra burst of cherry flavor with each slice.
Freeze and Thaw for Optimal Freshness: You can make your cheesecake in advance and freeze it without the cherry pie filling. Let it thaw in the refrigerator, and top it with cherry pie filling when you’re ready to serve.
Recipe Variations
Bake it in a smaller pan: If you’re looking to serve fewer people or simply want a thicker cheesecake, try baking the recipe in two separate, smaller 9” pans. This will give you two thicker cheesecake cakes. Just remember to adjust the cooking time to about forty to fifty minutes.
Top it with a different berry: If cherries aren’t your thing or if you’re just looking to experiment with different flavors, try topping the cheesecake with a different kind of berry pie filling. Raspberries, blackberries, blueberries, or strawberries would all make fantastic alternatives to the traditional cherry topping.
Add a nutty flavor: If you’re a fan of almonds, this variation is for you. Simply add a teaspoon of almond extract to the cheesecake filling for a subtle nutty flavor. You can also sprinkle some sliced almonds on top before serving for a delightful crunch.
Make it homemade: For an extra special touch, make your own homemade cherry pie filling. Not only will you be able to control the amount of sugar, but you’ll also get to enjoy the fresh and vibrant flavors of homemade cherry sauce.
What to Serve With
- Looking for a midday treat? Enjoy a slice of this cherry cheesecake with a cup of coffee. The rich, creamy flavors of the cheesecake complement the bold, robust taste of the coffee.
- Make your weekend brunch special by serving this cherry cheesecake. Its sweet and tangy flavors are a perfect match for a savory quiche or a protein-packed omelet.
- For a refreshing summer treat, try pairing a slice of this cherry cheesecake with a scoop of lemon sorbet. The tanginess of the sorbet will cut through the creaminess of the cheesecake, creating a balanced palate.
- This cherry cheesecake also makes a great late-night snack. Just grab a slice from the fridge and enjoy it while catching up on your favorite TV show. Remember, the cheesecake tastes best when consumed within three days of making it.
Recipe FAQs
Absolutely! While the recipe calls for canned cherry pie filling, you can certainly make your own homemade cherry pie filling. It adds a personal touch and allows you to adjust the sweetness and flavors according to your preference.
No problem! You can use a combination of flour, sugar, and baking powder as a substitute to make your own cake mix. However, the convenience of the boxed mix is that it already contains the perfect blend of these ingredients.
Definitely! While cherry topping is traditional, you can top your cheesecake with any berry pie filling you like. Blueberry, raspberry, or even a mixed berry filling would all be delicious choices.
Storing and Reheating
Refrigerate: Once you’ve enjoyed a slice or two of this cherry cheesecake recipe, you’ll need to store the leftovers promptly. Wrap your cheesecake tightly in plastic wrap or place it in an airtight container and refrigerate. The cheesecake will keep well in the fridge for up to three days.
Freeze: If you’d like to extend the life of your cheesecake, you can freeze it. However, remember to freeze the cheesecake without the cherry pie filling as the topping may not freeze well. Simply wrap the cheesecake securely in plastic wrap, and then in aluminum foil. It can be frozen for up to a month. When you’re ready to enjoy, let it thaw in the refrigerator and then top it with the cherry pie filling.
Thawing Instructions: To thaw your frozen cheesecake, move it from the freezer to the refrigerator and let it thaw slowly, ideally overnight. Once it is thawed, add your cherry pie filling on top for that fresh, juicy cherry flavor.
Reheating Instructions: The beauty of this cherry cheesecake recipe is that it doesn’t require reheating. Cheesecake is best served chilled, straight from the fridge.
More Cream Cheese Recipes You’ll Enjoy

Serving Size
What to Expect: This recipe makes one 13×9” cherry cheesecake, which is enough for 16 servings.
How to Scale: If you want to make more than one cheesecake, you can double the recipe and follow the instructions as directed. Make sure to use a larger bowl and two 13×9” pans to bake your cheesecakes.
Cherry Cheesecake Recipe
Ingredients
- 15.25 oz Yellow Cake Mix divided
- 2 Tablespoons butter melted
- 4 Eggs divided
- 16 oz Cream Cheese softened
- ½ Cup Granulated Sugar
- 1 ½ Cups Milk
- 3 Tablespoons Lemon Juice
- 1 Tablespoon Vanilla
- 20 Oz Can Cherry Pie Filling
Instructions
- Preheat oven to 300˚ F. Grease a 13×9 pan. Reserve 1 Cup of yellow cake mix.
- In a large bowl, combine the remaining cake mix, 1 egg, and butter. The mixture will be crumbly. Press the mixture into the 13×9 pan.
- In the same bowl, blend the cream cheese and sugar until light and fluffy. Add 3 eggs and the reserved 1 Cup of yellow cake mix, and beat for 1 minute on medium speed on electric mixer.
- At low speed, add the milk, lemon juice, and vanilla. Pour onto the crust.
- Bake at 300˚ F for 50-60 minutes or until the center is firm and 180˚ F.
- Let fully cool. Store in refrigerator. Top with cherry pie filling before serving.


Leave A Reply!