

This easy pie crust recipe is a tried and tested family favorite – it’s my great-grandma’s homemade pie crust that’s flaky, delicious, and incredibly forgiving. This recipe is perfect for beginners and works for any pie, sweet or savory!

The pie crust MAKES the pie – store-bought crusts just don’t cut it. I grew up with a mother who always made homemade pies for every occasion. With this easy pie crust recipe, anyone can make a delicious pie crust that will have everyone singing their praises!
Love recipes from scratch? You’ll also love this homemade graham cracker crust that’s perfectly sweet, flaky, and crunchy. You can also try this pizza crust that can be made in one bowl with cornmeal.
This recipe is my great-grandma’s original pie crust recipe. She taught my mom how to make pies and in turn, my mom taught me. This recipe is incredibly easy to use to form a flaky pie crust with great flavor. Once you try this pie crust you will never go back to store-bought.
Why I Love This Recipe
- Tried and Tested: This pie crust recipe has been passed down through my family for generations since it’s my great-grandma’s recipe. It never disappoints!
- Flavor: The combination of shortening, water, and vinegar in this recipe results in a flaky, buttery crust that’s perfect for both sweet and savory pies.
- Easy to Make: Despite being a homemade pie crust, this recipe is incredibly easy to make. If you can make cookies, you can make a pie.
- Foolproof: This recipe is virtually foolproof. It’s forgiving and can be easily patched up if you make a mistake while rolling out the dough.

Key Ingredients
- All-Purpose Flour: This is the base of the pie crust, providing structure and a sturdy foundation for your pie.
- Granulated Sugar: A touch of sweetness that helps to balance the flavors in the crust.
- Salt: A pinch of salt enhances the overall flavor of the crust, making all the other flavors pop.
- Shortening: In this recipe, I prefer using shortening. Pies don’t need the added flavor of butter simply because your pie fillings are the star of the show. However, it’s very important to chill your shortening before adding to the dry ingredients to make it easier to incorporate.
- Cold Water: This is used to bring the pie dough together. Make sure it’s really cold, as we want to keep the shortening solid and not let it melt into the dough.
- Egg: This helps to bind the ingredients together and adds a bit of richness to the crust.
- White Vinegar: A little bit of vinegar helps to tenderize the gluten in the flour, making the crust more flaky and tender.
Equipment
- Pie Plate – We’ll use this to bake our homemade pie crust. I always prefer looking at the bottom of my pie crust when baking to make sure it’s light golden brown before removing it from the oven and use a glass pie dish for this reason but you can use a regular one as well.
- Pastry Cutter – You’ll need this to cut the chilled shortening into the flour mixture. It ensures that the shortening is well distributed, which is essential for a flaky pie crust.
- Large Bowl – This is where you’ll combine the flour, sugar, and salt, and later make a dip to pour in the egg/water mixture. It provides the space you need to mix the ingredients.
How to Make Easy Pie Crust Recipe
Preparation
You’ll need cold shortening for the best results, as it’ll make it easier to incorporate it. Placing it in the refrigerator the night before does the trick. If you’re like me and always forget, I throw it in the freezer for about an hour.

Step 1 – Combine Dry Ingredients
To start, combine the dry ingredients. This means the flour, sugar, and salt. Make sure they are well mixed.
Step 2 – Add the Shortening
Next, cut in the chilled shortening using a pastry cutter. You want the shortening to be well distributed in the flour mixture. Look for the shortening to be no bigger than a pea mixed throughout.
Step 3 – Mix the Wet Ingredients
In a separate bowl, mix together the cold water, cold egg, and vinegar. Stir well to combine the ingredients.

Step 4 – Combine the Wet and Dry Ingredients
Make a well in the center of the flour mixture and pour in the egg and water mixture. Stir gently with a fork until the ingredients are just moistened and the dough leaves the side of the bowl.
Step 5 – Chill the Dough
Once your pie dough is mixed, chill it in the refrigerator for at least 15 minutes. This will make it easier to roll out.

Step 6 – Roll Out the Dough
After chilling, roll the dough onto a lightly floured surface. This will be the base for your pie crust.
Side note: I prefer using a rolling mat like this one to make this entire process easier.

Step 7 – Place Crust Dough on the Pie Plate
When you place your pie crust dough on your pie plate, you want to do so gently. No tugging needed. Lift it with one hand on the outside edge of the pie plate and then let the pie crust fall into the pie plate into place without pushing it down.

Step 8 – Trim Away Excess Pie Dough
Use a simple kitchen knife to trim away the excess pie dough. You can add it back into the main dough to make your next pie crust and topper.

Step 9 – Design the Pie Edges (Optional)
There are many styles you can go with. The fork method is probably the easiest and I enjoy the simple look of it. You can also pinch it as you make the edges to give it a bit of a swirl. Pinch around one finger all the way around the pie.

Step 10 – Make the Pie Topper (Optional)
Roll out your dough as usual. Then use a bowl that is the size of the pie plate minus about 1 1/2 inches around. You can use a knife to cut it or a pastry wheel as I did.

Step 11 – Bake the Crust
Finally, bake your pie crust according to your pie recipe directions. You can now use this easy pie crust recipe for all your favorite pie fillings.

Expert Tip
When making your easy pie crust, it’s crucial to work with well-chilled shortening. This will help to keep the dough from becoming too soft and sticky, making it easier to handle and resulting in a flakier crust.
Every time I make a pie with a filling that needs to be baked, I add one tablespoon of flour to the bottom. This keeps the bottom from ever getting soggy.
Recipe Variations
- Gluten-Free Option: If you have a gluten-free family member, you can try this recipe with gluten-free flour. While the crust may not be as good as the regular one, it’s still a pretty decent alternative.
- Flakier Crust: For a flakier crust, use a combination of all-purpose flour and pastry flour. This will give your pie crust a more delicate, flakier texture.

What to Use With
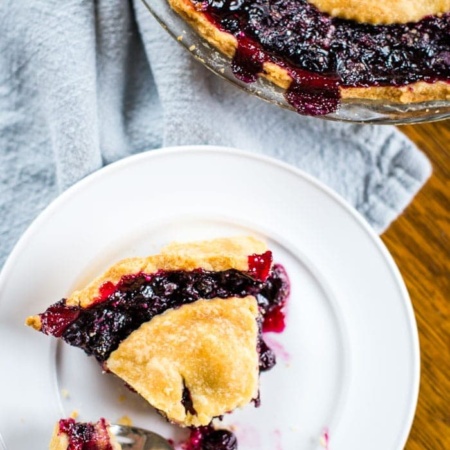
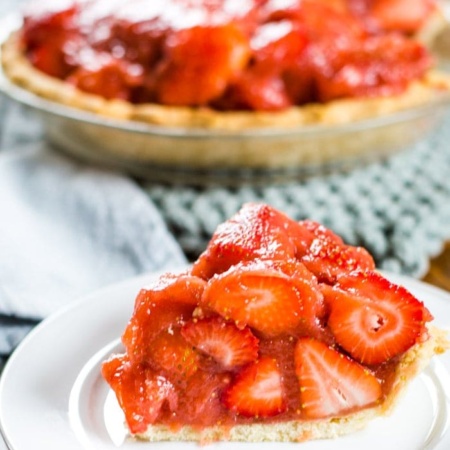
You can use this homemade pie crust for just about any homemade pie you like! I have 27 homemade pie recipes for any occasion that work beautifully with this crust. Here are some of our readers’ top picks:
Recipe FAQs
My grandma always poked holes in the bottom and added a tablespoon or so of flour. So, that’s what my mom and I do. I think that helps. I also always look at the bottom of my pie crust when baking to make sure it’s a light golden brown before removing it from the oven. Obviously, this can only be done when using a glass pie dish.
How long you bake the pie crust depends on the pie directions. Some pies will call for you to pre-bake the pie crust but most recipes will have you baking the pie crust along with the filling.
Yes. In fact, I have this frozen pie crust recipe in my freezer right now. I actually recommend you make the pie crust on a different day than you make the pie. It just makes life easier. This pie crust makes two pie crusts and two pie toppers so into the freezer one goes.
Storing and Reheating
- Storing: If you have a leftover pie crust, you can store it in the refrigerator for up to 3 days. Make sure it’s well-wrapped in plastic wrap or stored in an airtight container.
- Freezing: To freeze the pie crust, roll it out and place the pie plate as directed. Cover completely in plastic wrap and if possible in a plastic bag. Freezer. When ready to use, place at room temperature as you prepare your pie filling. Bake as directed.
More Pie Recipes You’ll Enjoy


Serving Size
- What to Expect: This easy pie crust recipe yields enough dough for two 9-inch pie crusts.
- How to Scale: If you want to make more than two pie crusts, you can double the recipe. Just make sure your food processor or mixing bowl is large enough to accommodate the increased quantity of ingredients. Follow the rest of the instructions as directed.
Watch How to Make Easy Pie Crust Pie
Want to save this recipe?
Enter your email & I’ll send it to your inbox. Plus, get great new recipes from me every week!

Pie Crust Recipe (Makes Enough for Two Pies)
Video
Ingredients
- 4 cups all-purpose flour
- 1 Tablespoon granulated sugar
- 1 teaspoon salt
- 1 1/2 cups shortening chilled
- 1/2 Cup cold water
- 1 egg
- 1 Tablespoon white vinegar
Instructions
- In a large bowl, combine flour, sugar and salt. Blend together with a whisk.
- Using a pastry cutter, cut in 1 and ½ cups of chilled shortening. Shortening should be pea size and flour should be well distributed.
- Crack an egg (cold from refrigerator) into ½ cup of cold water. Add 1 Tablespoon of vinegar and mix well with a fork.
- Make a well in the center of the flour mixture and pour in the egg/water mixture.
- Stir with a fork gently to blend wet and dry ingredients until just moistened and dough leaves side of bowl. Chill in the refrigerator for at least 15 minutes or overnight.
- Roll onto a lightly floured pastry mat and create your pie crust according to your pie recipe.
- Bake crust according to pie recipe directions.








I use this recipe exclusively but forgot it was for 2 pies – wife said I was making crust too thick – she was right. It’s delicious. Next time I’ll divide it in half. Thank you so much.
Too funny! It would be thick – but with the time you invest in making it, it’s nice to get two pie crusts out of it! 🙂
I followed your instructions but I found the pastry was too wet even after I refrigerated it for an hour. Do you use the whole egg? My shortening wasn’t really cold maybe that was the problem. I would like to try it again.
\
Hi! I hope you try again. I’ve made it many times with success. Let me know if you try again or if you have any other questions.
This was the first time I ever attempted to make a pie. The crust was amazing and the Dutch Apple Pie recipe was so good and easy to make. My 12yr old helped and it was so fun to make this with her. We usually buy our Apple pies from a Apple orchard but this recipe was just as delicious if not better. No more buying pies for this family. Question, how long can the crust be frozen for?
I love baking but for some reason pies were not my strength. I never liked how the crust came out until I tried this recipe. Thank you so much. I have been making perfect apple pies since! It is the best!!!!
Awesome!! So glad you enjoyed it.
Hi Lynette, just wondering if I can use butter instead of shortening in your receipt. Can you explain why some many pie receipts call for shortening over butter?
Thank you! Turned out beautifully!
Hi! Im so excited to try this recipe! I’ve never made a pie crust before. Do I put my apple mix in the unbaked pie shell or do I bake the shell first????
Thanks for any help!
It depends on the recipe but most baked pies, you’ll place the filling in before you bake the shell. Here’s the links to the two apple pies I make, I hope it helps. And let me know if you have any questions!
Dutch Apple Pie (my favorite)
Apple Pie
Thank you!! My pie turned out amazingly! The receipe and instructions worked out so well. My husband says its the best pie he’s ever had. I’ll be using this receipe forever 🙂
I have tried to make pie crust so many times and it never works well for me. I have given up and leave the pie making to my sister. If your recipe works, you will be my absolute favorite person!!
Yay! Let me know how it goes. 🙂
You will find that if you Lard instead of crisco , that your
Crust will be lighter, flakier, and have a much more desirable over all flavor.
Hi, I’ve not tried lard but I have used pastry flour before to get a flakier crust. I’ll have to give lard a try. Thanks!
What kind of shortening do you use?
I use these Crisco sticks. I find them the easiest to use to bake with, especially since the sticks make it easy to measure.
I always make pie crusts from scratch and I can’t wait to try your recipe next time. It looks so easy!